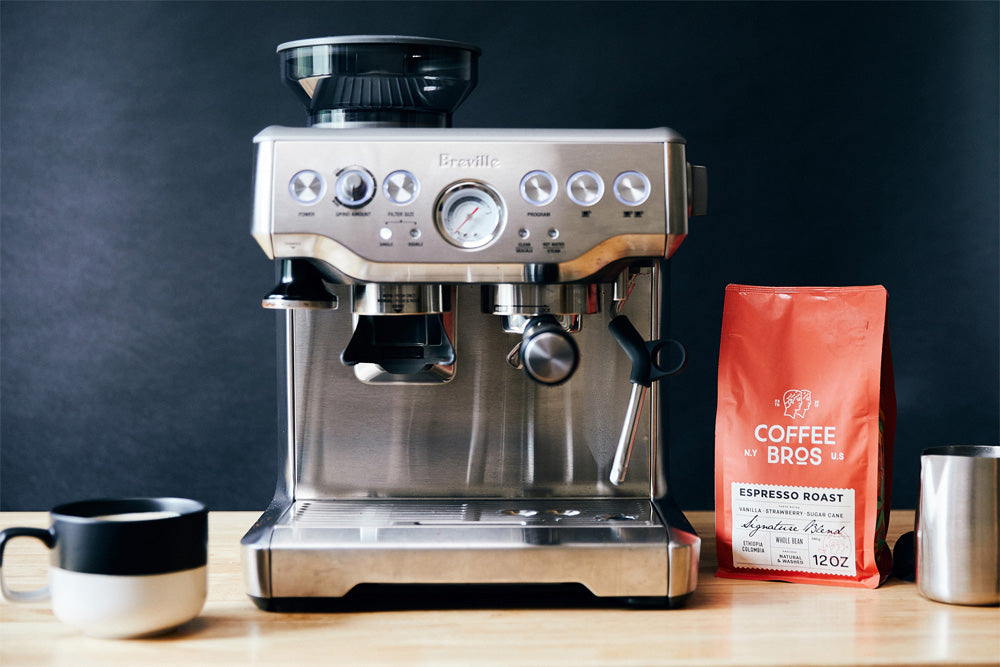
Ah, the dream of home espresso! There’s just something truly special about that moment – your very own gleaming machine on the counter, promising rich, syrupy shots and the kind of aroma that makes the whole kitchen feel like your favorite café.
You’re excited, maybe a little intimidated, but ready to dive in. You grab your trusty bag of coffee beans, the ones you love for your morning pot, and then… that little question mark pops into your head. Wait a minute, you think, can I use these coffee beans in my espresso machine? Or is there some secret I’m missing?
If that sounds familiar, please know you are not alone! It’s one of the first hurdles many of us face on this wonderful, caffeinated journey. Trust me, I’ve been there – I can still picture my early attempts, full of hope, followed by a rather sad, watery shot that tasted mostly of… well, learning! It was a messy, slightly frustrating, but ultimately invaluable part of figuring out what makes an espresso sing.
And that’s exactly why I’m so excited to share this guide with you. I want to take all those lessons, those “aha!” moments, and distill them into a friendly chat that cuts through the confusion.
Think of me as your coffee-loving friend who’s made a few of the mistakes already, so hopefully, you don’t have to! Together, we’ll explore everything you need to know – from why some beans make your espresso machine weep with joy (and others, not so much!), to picking the perfect partners for your palate, the unsung hero that is your grinder, and keeping your setup in tip-top shape. Let’s get you from bean to truly blissful brew, right in your own home.

Espresso Basics: Why Your Bean Choice is So Darn Important
So, what’s the big deal about espresso anyway? It’s not just a tiny cup of strong coffee; it’s a whole different beast, a beautiful one at that! Imagine hot water, zipping through a tightly packed bed of finely ground coffee at some serious pressure – we’re talking about nine times the atmosphere around us! And it all happens in a flash, usually under 30 seconds. It’s this intense, rapid rendezvous that makes espresso so unique.
Think of it like this: your espresso machine is a powerful magnifying glass for your coffee beans.
Flavor Explosion (or Implosion!)
Because it’s so concentrated, every little nuance in a great bean gets amplified into something truly spectacular. But, and it’s a big but, if any not-so-great things are hiding in those beans? Well, they get magnified too, often leading to a taste that’s just… not what you were dreaming of.
The Bean is Boss
Everything you love (or don’t love) in that little cup – the rich chocolatey notes, the zesty brightness, that lovely syrupy feeling in your mouth, and yes, that gorgeous reddish-brown crema on top – it all comes directly from the beans you chose.
What About “Espresso Beans”?
You’ve seen them, right? Bags proudly labeled “Espresso Roast.” Often, these are fantastic starting points! Roasters craft them (usually medium to dark roasts, often blends), aiming for that classic, balanced espresso taste and a lovely, thick crema. But here’s a little secret: they’re not the only golden ticket. Many other beans can create espresso magic once you know what you’re doing.
Getting to grips with just how different espresso brewing is, that’s the first step to understanding why choosing your beans thoughtfully is less of a chore and more of an exciting part of the adventure!
The Million-Dollar Question: Can You Use Your “Regular” Coffee Beans?
Alright, let’s get right to it. You’ve got your favorite bag of beans, the ones that make your French press sing or your drip brewer dance. Can you invite them to the espresso party?
The exciting, short answer is: Yes, technically, most whole coffee beans can be used to make espresso. Phew!
But here’s the friendly “but” – the part that matters for taste: Success is all in the details, my friend.
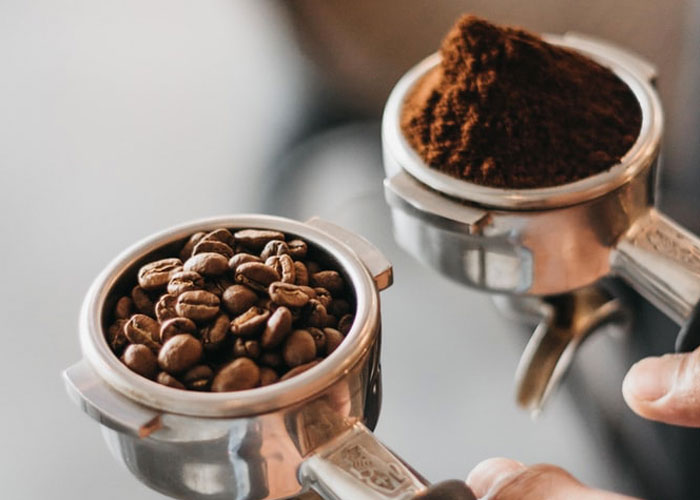
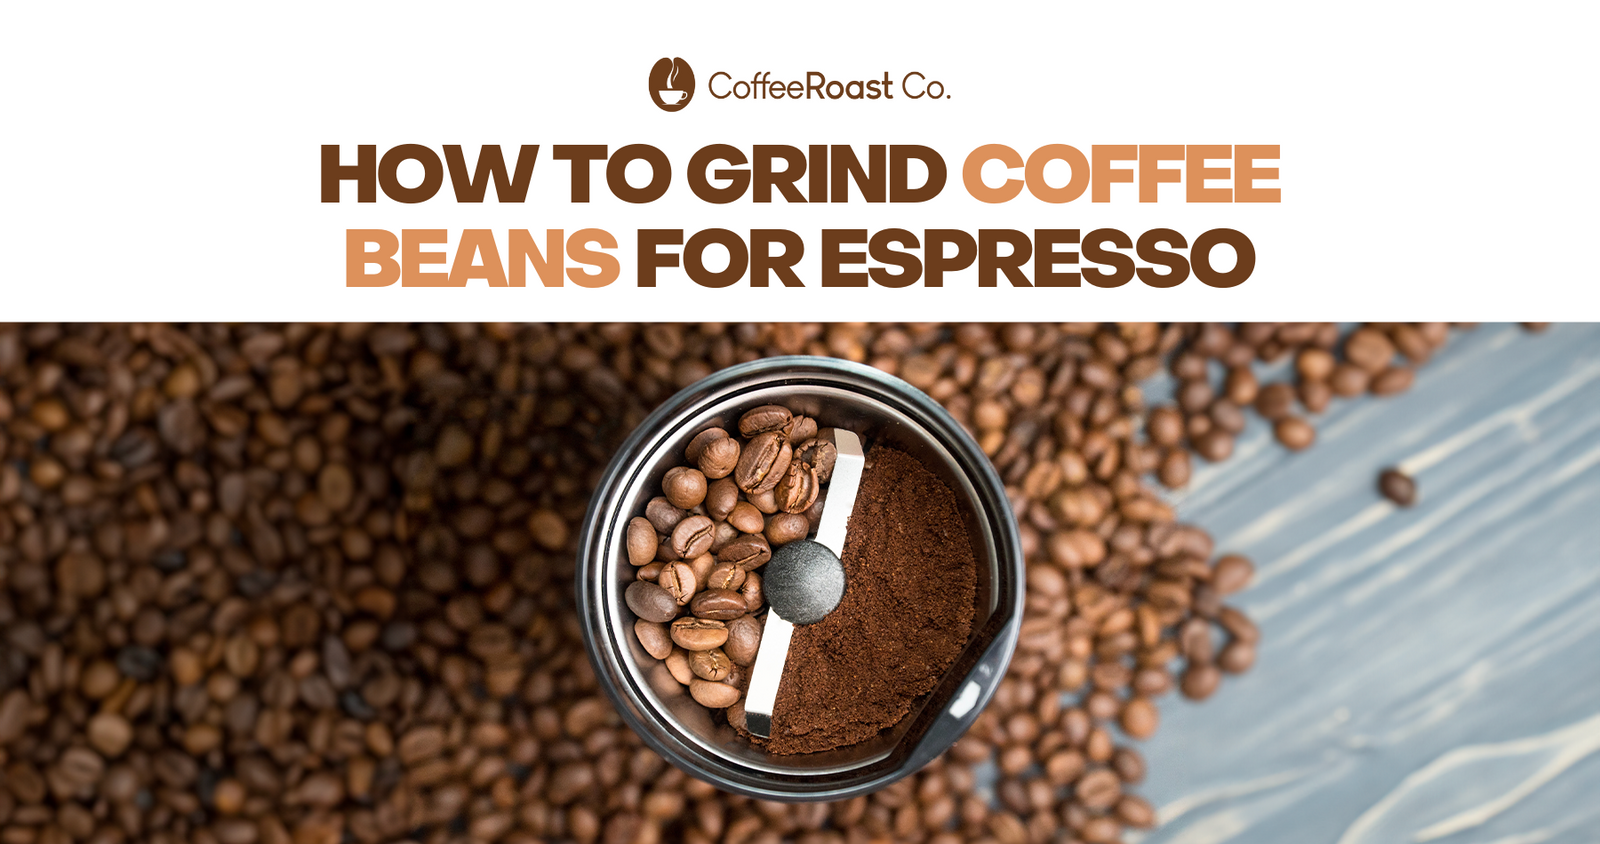
Grind Size: The Undisputed Champion!
If there’s one thing your espresso machine is a real stickler about, it’s grind size. It needs those beans ground super fine and incredibly consistently – think finer than table salt, almost like powdered sugar but with a tiny bit of grit.
Why the fuss? This super-fine grind creates a tightly packed bed for the water to push through, allowing all those lovely flavors to be coaxed out under pressure.
A word of warning on pre-ground: That bag of coffee already ground for your drip machine? As much as I wish I could say otherwise, it’s just not going to cut it for espresso. It’s far too coarse. The water will zoom right through, and you’ll likely get a thin, sour, and pretty disappointing cup. I’ve made this mistake with a hopeful heart, and believe me, the cleanup of a watery mess is no fun!
Your Grinder is Your Superpower
To get this just right, you’ll need a good quality burr grinder. Those whirly blade grinders? They’re great for spices, but they chop beans into all sorts of uneven bits and pieces, which is a recipe for an unhappy espresso.
The Roast Level & What It Means for Your Cup
Light & Bright Roasts
These can be a bit like a thrilling rollercoaster! They’re harder beans, so some grinders might grumble a bit. Their zippy acidity can sometimes taste sour if you don’t nail the extraction. But oh, when you get it right, they can offer incredibly vibrant and complex flavors. One for the adventurous spirit!
Dark & Oily Roasts
These guys are eager to give up their flavor, which is great, but they can also turn bitter or taste a bit smoky or burnt if you’re not careful. Those shiny oils on the surface? They can also mean more cleaning for your grinder and machine down the line.
The Cozy Middle Ground (Medium to Medium-Dark Roasts)
For many, especially when you’re just getting into the groove, these are like a warm hug. They’re generally more forgiving, give you those lovely balanced flavors, and are pretty generous with the crema.
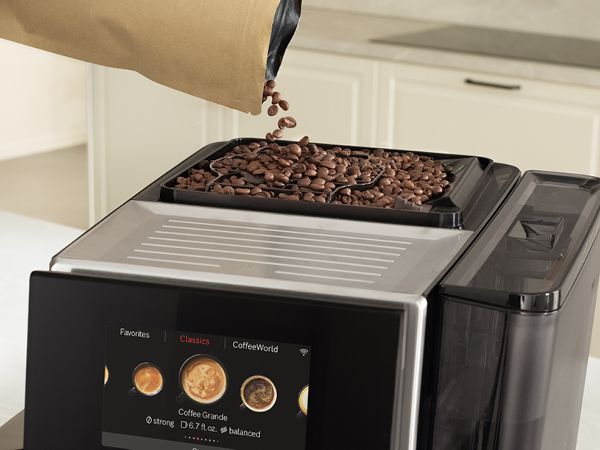
Freshness: The Secret Ingredient to Amazing Crema (and Flavor!)
Stale Beans = Sad Coffee
I can’t say this enough – old beans make for a dull, lifeless espresso. The wonderful aromas fade, and that beautiful crema? It pretty much vanishes.
Be a Date Detective
Always look for a “Roasted On” date on the bag. You’re aiming for beans that were roasted ideally within the last 4 days to 3 weeks. That’s the sweet spot!
Whole Bean Wins
The magic happens when you grind those beans just before you brew. It keeps all those precious, delicate flavors locked in until the very last second.
So, while the specific kind of bean (whether it’s from Ethiopia or Brazil, an Arabica or a touch of Robusta) opens up a whole universe of taste, it’s how you treat it – the grind, its roast, and its freshness – that truly decides if it’s going to be a star in your espresso machine.
Choosing Your Bean Team: A Flavor Quest!
This is where the real fun begins! Picking coffee beans is like curating your flavor playlist. Before you even look at a bag, take a moment and think: what kinds of tastes make you happy? Are you dreaming of a rich, dark chocolatey hug in a mug? Or maybe something bright and zesty that makes your tastebuds tingle? Perhaps something bold and intense that stands up proudly, especially if you love a milky latte? Knowing your own heart (or palate!) is the best compass here.
What to Look For When You’re Bean Shopping
Roast Level – Let’s Get Cozy With It
- Light: These are the adventurers! They keep a lot of the bean’s original personality, often tasting fruity or floral with a brighter zing. They can be a little trickier for espresso, but oh, the reward when you nail it!
- Medium: My happy place for exploring! These are wonderfully balanced, letting both the bean’s origin and the gentle roast flavors shine. Think caramel, milk chocolate, and a pleasing roundness.
- Medium-Dark: This is your classic espresso territory. Expect deeper, toastier flavors, a fuller body, and often less acidity. Perfect if you love that traditional, robust espresso punch, and they’re fantastic in milk drinks.
- Dark: Big, bold, and smoky! These can be intense, but watch out – it’s a fine line between bold and bitter. Also, if they look super oily and shiny, they might mean a bit more cleaning for your gear.
Where in the World? (Origin & Varietal)
Just like wine, where coffee grows gives it unique superpowers! Ethiopian beans might give you lovely floral or citrus notes, while beans from Brazil often bring comforting nutty and chocolatey vibes. “Single-origin” means all the beans are from one place, offering a distinct taste. “Blends” are like a skilled chef mixing ingredients for a perfectly balanced and consistent dish – often a super reliable choice for espresso.
How Were They Pampered? (Processing Method)
After picking, the coffee cherries are processed to get to the bean inside. “Washed” beans often taste cleaner and brighter. “Natural” processed beans (dried with the fruit on) can be sweeter, fruitier, and have a fuller body. “Honey” processed is somewhere in between. All can be delicious in espresso – it’s about finding what tickles your fancy!
Freshness, Freshness, Freshness!
Did I mention this already? It’s that important! That “roasted on” date is your best friend. Try to use those beans within a few weeks. My heart always sinks a little when I see a bag with no roast date in a supermarket – it’s often a sign it’s been sitting a while. Your local roaster or good online shops that roast to order are goldmines for fresh beans.
“Espresso Roast” vs “Filter Roast” – The Real Scoop
Don’t feel boxed in by these labels! Yes, “espresso roasts” are crafted for the job, but many “filter roasts” (especially lovely medium ones) can make incredible espresso if you grind them right. Some of my own most delightful espresso surprises came from beans that weren’t officially “for espresso.”
Your Bean Besties (Where to Find Them)
Your local coffee roaster is often your best bet – super fresh beans and usually some great advice! Good online coffee shops also ship fresh. And if your favorite café roasts their own or sells beans they use, that’s another great spot.
The Unsung Hero: Your Coffee Grinder (It’s a BIG Deal!)
Okay, let’s talk about what I genuinely believe is the secret weapon in your home espresso arsenal: your grinder. You could have the fanciest, shiniest espresso machine in the world, but if your grinder isn’t up to snuff, you’re going to have a tough time getting that truly amazing shot. Seriously, a great burr grinder is often a better investment for improving your espresso than a machine upgrade.
Why Your Grinder is the Star Player
Remember how espresso needs that super-fine, super-consistent grind? Well, that’s your grinder’s job. It needs to crush those beans into tiny particles that are all pretty much the same size.
The Magic of Burr Grinders
Unlike those blade grinders that just kind of smash beans into random bits (great for a quick spice grind, not so much for precise espresso), burr grinders use two abrasive surfaces – the burrs – to mill the coffee to a uniform size. This uniformity is what lets the water flow through evenly and extract all that deliciousness just right.
Consistency is Your Best Friend
If your grind is all over the place – some bits fine, some bits coarse – the water will just find the easiest path, leading to a shot that’s a bit of a confused mess (some parts sour, some parts bitter).
Getting to Know Your Burrs
- Conical vs. Flat: You’ll hear these terms. Both types can do a fantastic job! What matters more for most of us at home is the quality of the burrs themselves and how well the grinder is built.
- Stepped vs. Stepless: “Stepped” grinders click into set grind sizes. “Stepless” (or “micro-stepped”) ones let you make tiny, tiny adjustments in between those clicks. For espresso, that extra bit of fine-tuning from a stepless grinder can feel like a superpower – it lets you dial things in perfectly!
What Makes a Great Espresso Grinder?
- It must be able to grind really fine.
- The particles it produces should look nice and even.
- It should be easy to make those small, precise adjustments.
- Ideally, it doesn’t hold onto a lot of old grounds (low retention).
My Own “Aha!” Grinder Moment
I vividly remember when I upgraded my grinder. I had a decent little espresso machine, but my shots were so hit-or-miss. I finally invested in a dedicated espresso grinder, and WOW! Suddenly, I had control. My espresso became consistent, flavorful, and so much more enjoyable. It was a total game-changer.
Little Grinding Rituals
- Fresh is Best, Always: Grind those beans right before you pull your shot. They start to lose their magic so quickly once ground.
- The “Dialing In” Dance: This is the fun part! It’s about tweaking your grind size – a little finer if your shot is too fast and sour, a little coarser if it’s too slow and bitter – until it’s just right.
- A Quick Purge: Especially if your grinder has been sitting for a bit, grind a few beans and toss them. This clears out any old grounds that might be hanging around.
Trust me on this one: investing in a good grinder is investing in the happiness of every single espresso shot you make!

Setting the Scene: Prepping Your Beans & Machine Like a Pro
Those little things you do just before you brew? They might seem small, but they can make a surprisingly big difference to your final cup. It’s all about setting the stage for espresso perfection!
Keeping Your Beans Cozy (Storage)
Think of your precious coffee beans like little flavor bombs – you want to protect them! Store them whole in an airtight container that light can’t get through, and tuck them away in a cool, dark spot (like your pantry, not next to the sunny window or the warm oven). For everyday use, try to avoid the freezer – that back-and-forth temperature change can create condensation, which beans don’t like. Buying smaller amounts more often is a great way to keep things fresh.
Measuring Up (Dosing)
For espresso, guessing just doesn’t cut it. A small coffee scale is your friend here! Weighing your beans (your “dose”) helps you get consistent results every single time. For a double shot, many people use somewhere between 14 to 20 grams of coffee, but it can vary depending on your machine’s basket.
The Daily Grind (Just Before Brewing!)
As we’ve chatted about, grind those beans right before you’re ready to brew. You’re aiming for that fine, sandy texture.
Warming Up the Star (Your Machine)
Give your machine a good 15 to 30 minutes to heat up properly. This is super important for a stable brewing temperature. While it’s warming, lock your empty portafilter (the handle thingy) into the group head (where the coffee comes out) so it gets nice and toasty too. A cold portafilter can cool down your brew water, and nobody wants that!
Just before you put your coffee-filled portafilter in, let a little hot water run through the group head for a few seconds. This flushes out any cooler water hanging out in there and clears away any old grounds.
Making these little steps part of your routine doesn’t take long, and it helps make sure everything is just right for that magical extraction moment!

The Moment of Truth: Brewing That Beautiful Espresso Shot
Okay, deep breath! This is where all your careful prep comes together. It’s time to turn those perfectly ground beans into a little cup of liquid gold.
The Gentle Art of Tamping
Once your portafilter has its dose of lovely, fluffy grounds, it’s time to tamp. The idea is to create a nice, level, and evenly packed little bed of coffee for the water to flow through.
First, try to get the grounds sitting evenly in the basket – a gentle tap or a quick stir with a toothpick can help.
Then, with your tamper, press down firmly and consistently, making sure you keep it perfectly level. You don’t need to use all your strength! Just a good, even press until the coffee feels compacted. I used to think harder was better, but a level tamp is way more important to stop water from finding sneaky fast lanes.
Showtime! (Extraction)
Lock that portafilter into the group head, pop your pre-warmed cup underneath (yes, warming your cup is a nice touch!), and hit that brew button!
Be a Detective (Observe!)
This is my favorite part! After a few seconds (maybe 5 to 8), you should see the first dark, syrupy drops appearing. If it gushes out right away, your grind might be too coarse. If it takes ages, it might be too fine.
Those first drops should then turn into lovely, steady streams – baristas call them “mouse tails” because they’re thin and flow gracefully. Watch the color change too; it’ll start dark and rich, then gradually get lighter, more like caramel, and then finally quite blonde.
Time & Treasure (Timing & Yield)
Most people aim for a double espresso to brew in about 25 to 30 seconds. And for the “yield” (how much liquid espresso you get), a common starting point is a 1:2 ratio – so if you used 18 grams of coffee grounds, you’d be looking for about 36 grams of espresso in your cup. Using a little scale under your cup and a timer on your phone can be incredibly helpful for this! It felt like a real breakthrough for me when I started weighing my shots.
Little Hiccups & How to Fix Them
- Too Fast & Sour? Usually means your grind is too coarse. Try grinding a bit finer.
- Too Slow & Bitter (or it chokes the machine)? Your grind is likely too fine. Go a bit coarser.
- Where’s My Crema? This is often a sign of stale beans. Fresh beans are the crema champions! Sometimes, a too-coarse grind can also be the culprit.
The “Dialing In” Dance with New Beans
Every new bag of beans is a little different. You’ll likely need to make small tweaks to your grind size to get them tasting their best. It’s a fun little ritual – your first shot might be a learning experience, but by the second or third, you’ll be getting close to perfection!
Don’t worry if your first few shots aren’t magazine-cover perfect. It’s a wonderfully satisfying learning curve, and each attempt teaches you something new!
Uh Oh! Can the “Wrong” Beans Hurt My Machine?
It’s a fair question! While most standard coffee beans won’t send your beloved machine to an early grave, there are a couple of things to be a little wary of to keep it humming happily.
Those Super Oily, Dark Roast Beans
You know the ones – they look almost black and incredibly shiny. While some folks love that intense flavor, those surface oils can be a bit clingy.
- In your grinder: They can leave a sticky residue on the burrs and in the chute, which can eventually lead to clogs or make your grounds a bit clumpy.
- In your espresso machine: Those oils can also build up in the group head and shower screen.
It’s not a disaster, but if you love these very dark, oily beans, just be prepared to clean your grinder and machine a little more often to keep things fresh and flowing smoothly.
Flavored Coffee Beans: The Big Red Flag!
Okay, friend to friend, please, please, please do not put flavored coffee beans (like hazelnut, vanilla, etc.) through your espresso grinder and machine. I say this with all the care in the world!
Those lovely added flavors are usually carried in an oily, syrupy substance that is an absolute nightmare for espresso equipment. It gets everywhere, it’s incredibly hard to clean off, and it can leave “ghost flavors” that will haunt every future (unflavored) shot you try to make. Imagine your beautiful, pure espresso tasting faintly of last month’s French Vanilla – no, thank you!
I’ve seen this happen, and it’s heartbreaking (and can be expensive if parts need replacing). If you adore flavored coffee, enjoy it with a separate brewing method (like a drip pot you don’t mind dedicating to it) and a different grinder. Your espresso machine will thank you!
Super Light, Super Hard Beans
This is less about damaging the machine itself and more about your grinder. Some very lightly roasted beans can be quite hard. If your grinder isn’t particularly robust, it might struggle a bit to grind them super-fine for espresso.
The golden rule? Regular, loving cleaning is your best friend against almost any bean-related buildup.

TLC for Your Machine: A Little Maintenance Goes a Long Way
You’ve invested in a wonderful piece of equipment that brings you daily joy (or at least a much-needed caffeine kick!). Giving it a bit of regular, tender loving care will keep it performing beautifully for years to come and ensure every cup tastes as pure and delicious as possible.
Your Daily Quick Clean-Up (Just a Few Minutes!)
- After your last shot of the day, give the group head a quick flush by running some water through it (without the portafilter). A little brush around the shower screen helps, too.
- Rinse out your portafilter and basket thoroughly. Don’t leave old, wet grounds sitting in there.
- If you’ve steamed milk, wipe down that steam wand immediately with a damp cloth and give it a quick purge (let out a little steam) to clear any milk from the inside. Dried milk is no fun to clean!
A Weekly Spa Day (Still Pretty Easy!)
If your machine has a three-way solenoid valve (many do – check your manual!), you can “backflush” it. This involves using a blind basket (one with no holes) in your portafilter and running the pump for a few seconds on and off. It helps clean out coffee oils from inside the group head. Start with just water.
Once a week or so, you might want to soak your metal portafilter parts and baskets in a special espresso machine cleaning solution to really dissolve those coffee oils.
The Monthly Deep Clean (Or As Needed)
This is when you might do a backflush with that special espresso machine cleaning powder (like Cafiza). It does a more thorough job of breaking down stubborn oils.
Depending on how hard your water is, you’ll also need to descale your machine periodically to prevent limescale buildup. Always use a descaler designed for espresso machines and follow your machine’s instructions to the letter – the process can vary. Using filtered water can really help reduce how often you need to do this!
Don’t Forget Your Grinder! It needs a little love, too. Regularly brush out any loose grounds. Now and then, you can use grinder cleaning pellets (they look like little beans) to help absorb oils and dislodge old particles.
I know “cleaning” might not sound like the most exciting part of making coffee, but I promise, making it a quick, regular habit feels good. It’s like tucking your machine into a clean bed each night! And when your coffee tastes consistently amazing, you’ll know that little bit of effort is so worth it.
Wrapping It Up: Your Amazing Home Espresso Adventure Awaits!
So, after all our chatting, let’s circle back to that big question: can you use your favorite coffee beans in your espresso machine? And the wonderfully liberating answer is a big, resounding YES! But, as we’ve discovered together, it’s a “yes” that comes with a little sprinkle of know-how and a dash of care.
You’re not chained to only using bags that scream “ESPRESSO!” in big letters. That whole wide, wonderful world of coffee beans – with all their incredible origins, unique flavors, and fascinating roast profiles – is right there waiting for you and your machine to explore.
The real secrets to unlocking truly magical espresso from almost any good quality bean are things you’re now totally clued up on:
- Starting with beans that are full of life (aka FRESH!).
- Having a great burr grinder and knowing how to get that perfect, super-fine grind.
- Understanding how different roast levels like to behave when they meet hot water under pressure.
- Embracing those little prep steps and brewing techniques that make all the difference.
- And, of course, keeping your trusty machine and grinder sparkling clean.
The journey to pulling consistently amazing espresso shots in your kitchen is such a rewarding one. It’s a little bit of science, a little bit of art, and a whole lot of personal taste. Please don’t be shy about experimenting! Try that bean that sounds intriguing, play around with your grind, and trust your taste buds – they’re usually your best guide.
I’ve shared some of my stumbles and happy discoveries along the way, genuinely hoping it helps smooth your path and makes your coffee adventures even more joyful. There’s nothing quite like that feeling of satisfaction when you pull a truly beautiful shot, hand it to someone (or savor it yourself!), and see that little smile of delight.
With the right beans, a good grinder, a dash of practice, and a sprinkle of love, you are so well on your way to becoming the kind of home barista who makes coffee that doesn’t just wake you up, but genuinely makes your day.
Happy brewing, my friend!
I’d love to hear about your coffee adventures! What are your go-to beans for espresso? Any surprising discoveries you’ve made? Or perhaps you have a question that’s still brewing? Please share in the comments below – let’s keep the coffee conversation flowing!
Quick FAQs Of Can You Use Coffee Beans in Espresso Machine
Do I need a super expensive grinder for good espresso?
You need a capable burr grinder that’s designed to grind consistently fine for espresso – that part is super important! While “expensive” can mean different things to different people, think of it as the most important investment for delicious espresso. Often, a great grinder will make a bigger difference to your cup than even the fanciest machine. There are some really good entry-level burr grinders out there that can do a wonderful job without breaking the bank. It’s all about getting that beautiful, even grind!
Help! Can I just use my regular pre-ground coffee in my espresso machine?
Oh, I wish I could say yes to make life easier, but for truly lovely espresso, it’s a gentle no. Pre-ground coffee is usually too coarse and has lost a lot of its fresh sparkle by the time it gets to you. This usually means a watery, kind of sad shot with no yummy crema. Freshly grinding whole beans with a good burr grinder right before you brew is where the magic starts!
I’m just starting. What kind of beans are good for an espresso newbie like me?
Great question! I usually suggest starting with a nice medium to medium-dark roast blend, perhaps one that’s even labeled for espresso. These blends are often crafted to be a bit more forgiving when you’re learning, and they tend to give you those classic, rich espresso flavors and a lovely crema, which is super encouraging! Look for fresh beans (check that roast date!) and then, as you get more confident, you can explore all sorts of exciting single origins and lighter roasts!
My beans look oily – is that okay for my machine?
You’ve got a good eye! Very oily beans (usually very dark roasts) aren’t going to cause an instant disaster, but those oils can be a bit clingy. They can leave more residue in your grinder and the nooks and crannies of your espresso machine’s group head. It just means you’ll want to be a little extra diligent with your cleaning routine to keep everything tasting fresh and working smoothly.
Watch This Video on can you use coffee beans in an espresso machine