You can safely can venison meat with a pressure cooker by following tested pressure and time guidelines.
I have canned wild game for years and I know how to can venison meat with a pressure cooker safely and well. This guide explains step-by-step how to prepare venison, set up your pressure cooker, follow USDA-tested times and pressures, and store jars. I combine hands-on tips, common mistakes, and practical safety checks so you can can venison meat with a pressure cooker confidently and enjoy shelf-stable venison at home.
Why can venison meat with a pressure cooker?
Canning venison meat with a pressure cooker is the safest way to kill bacteria in low-acid foods. The high heat of pressurized steam reaches temperatures that boiling water cannot. This method preserves meat for months without refrigeration if jars seal and are processed correctly.

Equipment and supplies you need to can venison meat with a pressure cooker
Use the right tools to reduce risk and speed up the job. Below is a basic list to get started.
- Pressure cooker or pressure canner rated for canning meat
- Canning jars, lids, and bands
- Jar lifter, funnel, and bubble remover tool
- Sharp knives and cutting board
- Salt and jar filler (optional: broth, stock, or water)
- Kitchen scale and timer
- Clean towels and a heatproof work surface
I prefer a pressure canner for large batches, but a heavy-duty pressure cooker with a pressure gauge can work if it is rated for canning. Always follow the manufacturer’s label for safe canning.
Choosing and preparing venison before you can
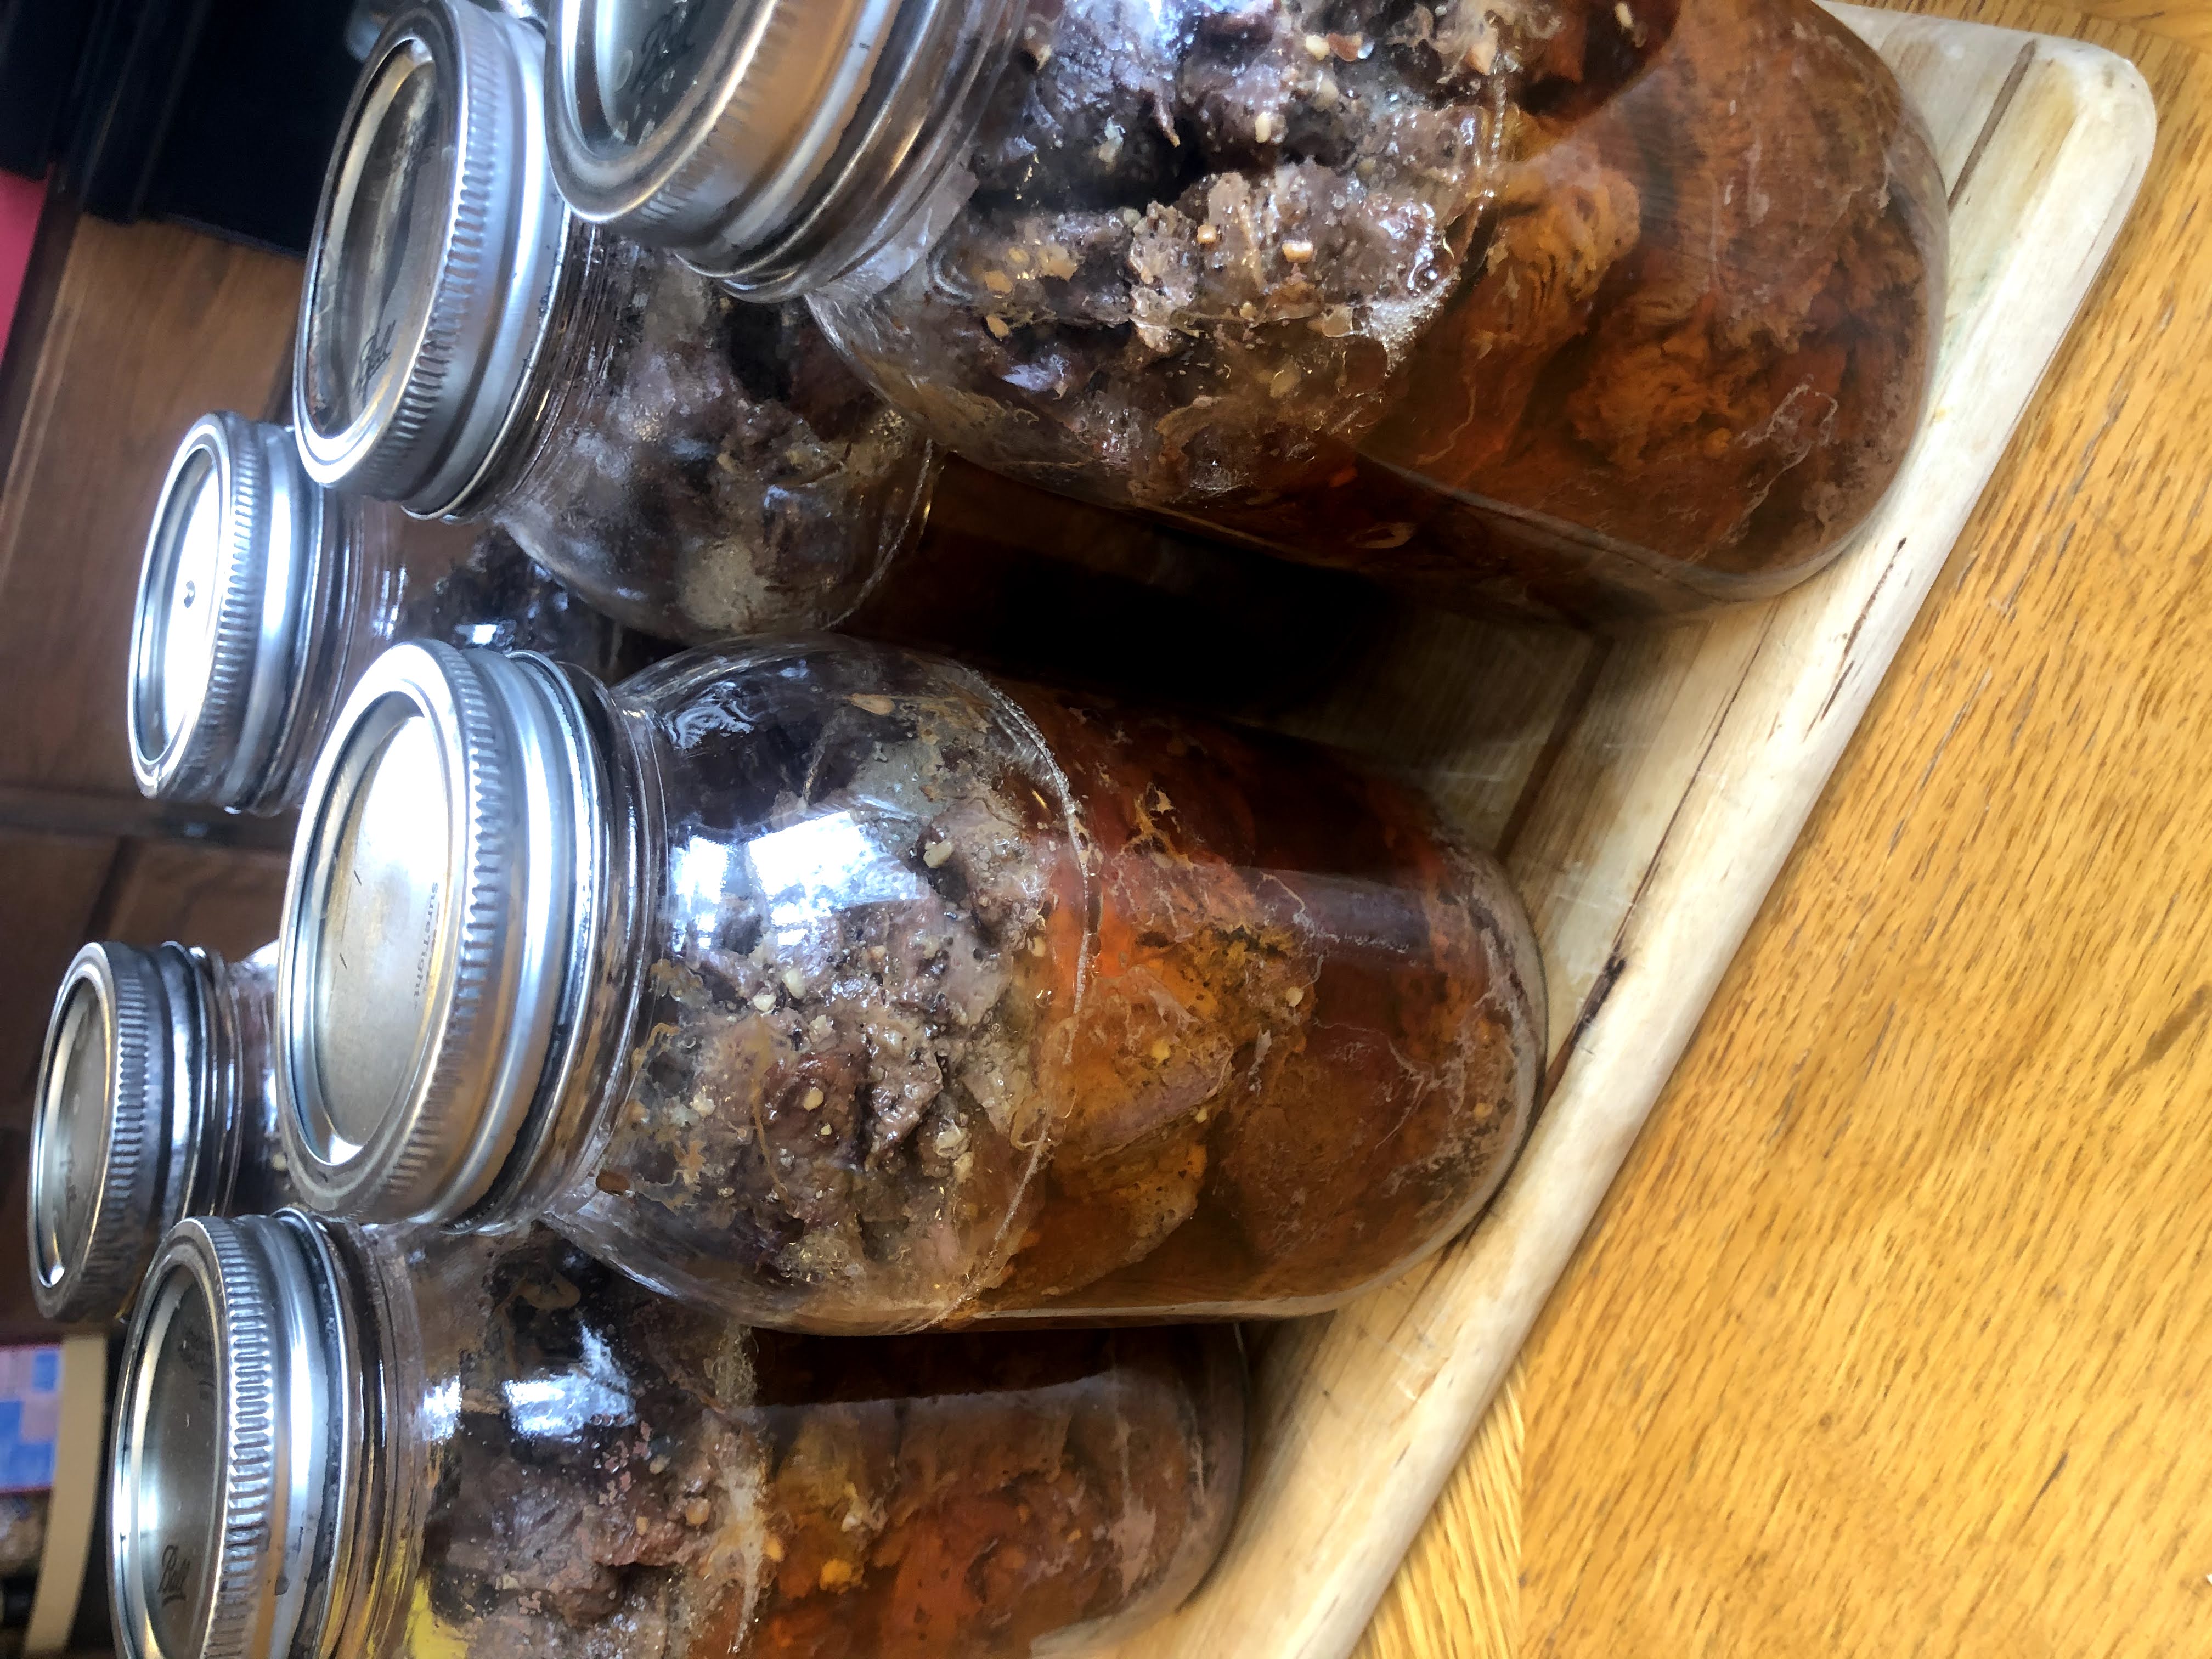
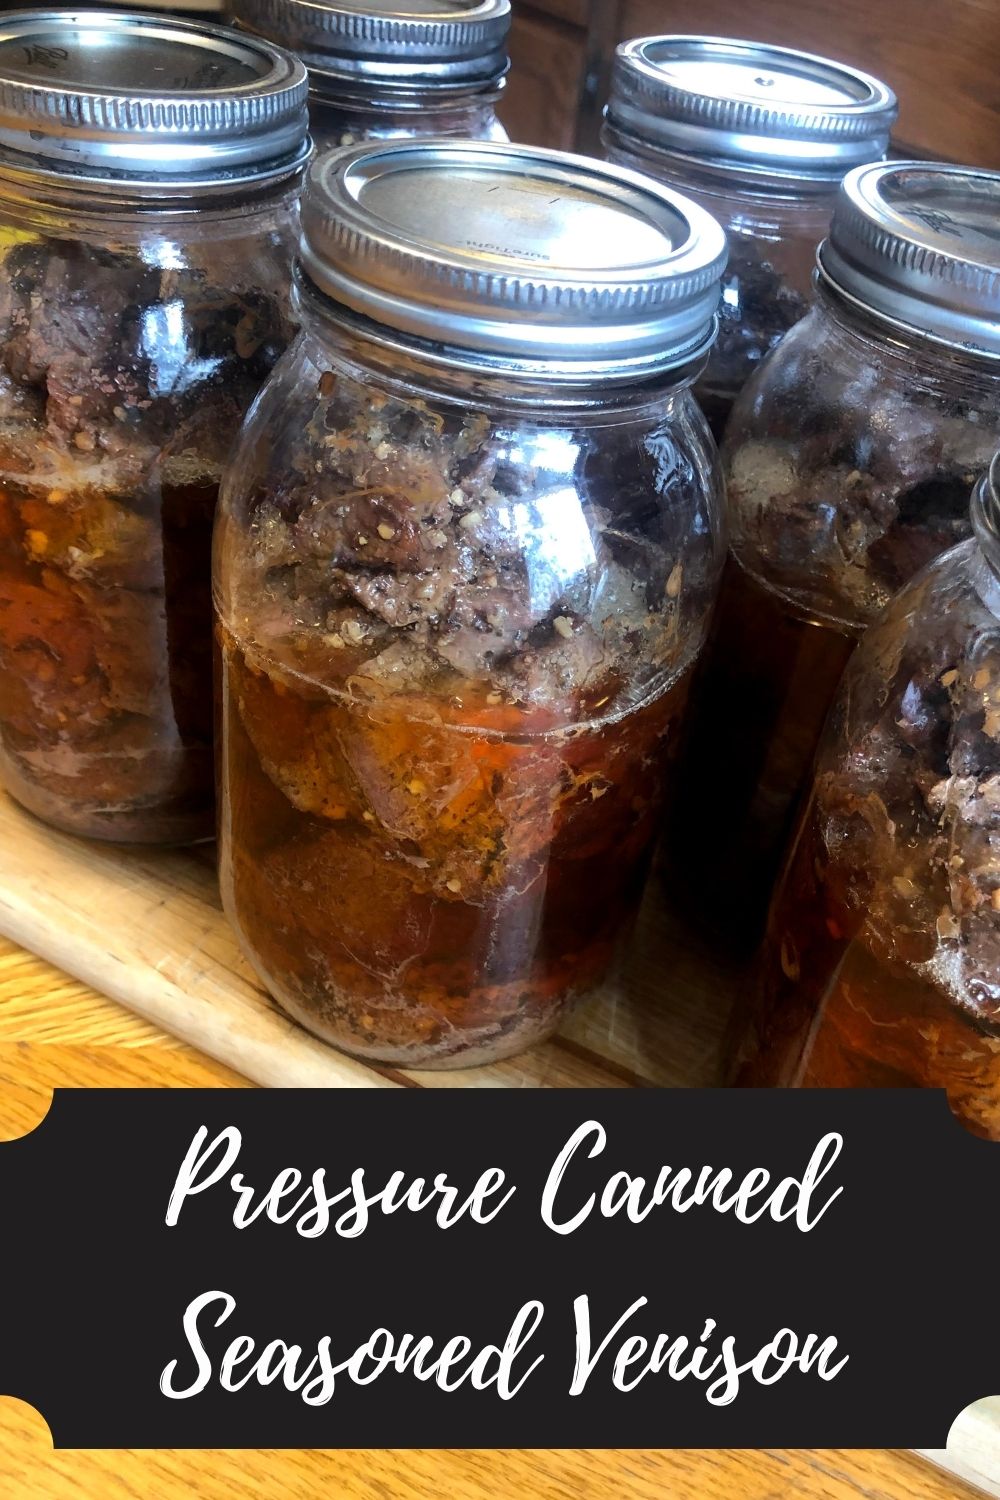
Start with fresh, well-handled meat to get the best flavor and safety. Trim fat and silver skin. Cut meat into 1-inch cubes or pack into large chunks for stews. Rinse only if needed and pat dry.
- Remove excess fat to prevent jar spoilage and off flavors.
- Keep meat cold from field to jar to limit bacteria growth.
- For broth, simmer bones or trimmings and strain; cool before using in jars.
I learned early that fatty venison shortens shelf life and tastes odd after months. Trim well and pack lean meat for the best results when you can venison meat with a pressure cooker.

Step-by-step: how to can venison meat with a pressure cooker
Follow these steps in order. Small mistakes can affect safety.
- Sterilize jars and prepare lids
- Wash jars and lids in hot, soapy water. Keep jars hot until filling.
- Pack jars
- Pack raw cubed venison into hot jars, leaving 1-inch headspace. Add 1/2 teaspoon salt per pint if desired.
- Add liquid
- Pour hot broth, stock, or boiling water over meat, maintaining 1-inch headspace. Remove air bubbles.
- Wipe rims and apply lids
- Wipe jar rims clean, center lids, and screw on bands fingertip-tight.
- Load the pressure cooker
- Add 2–3 inches of hot water to the cooker. Place a rack or trivet and set jars on it.
- Vent and pressurize
- Close the cooker. Vent steam for 10 minutes if required by your cooker. Then bring to required pressure.
- Process using correct time and pressure
* Process pints at 10–11 pounds pressure (adjust for altitude) for the time recommended for meat. Follow tested times for venison or beef in a pressure canner. - Cool and check seals
- Turn off heat and let pressure drop naturally. Remove jars and cool 12–24 hours. Check seals and label.
A tip from practice: keep a printed time and pressure chart by the cooker. I once under-processed because I guessed pressure. Never guess. Always follow tested processing guidelines when you can venison meat with a pressure cooker.

Processing times, pressure, and altitude adjustments
Time and pressure are not optional. They prevent botulism and spoilage. Use tested times for meat. Processing differs by jar size and altitude.
- Pints and quarts both need pressure processing. Follow the table for meat times.
- Increase pressure by 1 pound for every 2,000 feet above sea level when directed.
- Use the exact time for the jar size. Do not reduce time.
I double-check local altitude adjustments before each canning day. Misreading pressure settings can ruin a whole batch. Always check your pressure gauge and weight to can venison meat with a pressure cooker safely.

Safety: pressure cooker vs. pressure canner
A pressure canner is designed for home canning and is the gold standard. Some pressure cookers can work but must be explicitly rated for canning.
- Pressure canner offers consistent pressure and capacity for multiple jars.
- Some modern pressure cookers have canning modes, but read the manual.
- Never use a stovetop pressure cooker intended only for cooking to replace a canner unless the manufacturer allows it.
If you use a pressure cooker, confirm it reaches and holds the required pressure over the processing time. Safety matters most when you can venison meat with a pressure cooker.
Storage, shelf life, and labeling
Proper storage keeps jars safe and tasty. Store jars in a cool, dark place.
- Shelf life is typically 1 to 5 years for properly canned meat; best within 12 months for flavor.
- Label jars with content and date. Rotate older jars forward.
- Check lids before use. Discard any jar with an unsealed lid, broken seal, or off smell.
I store my canned venison in a basement pantry. I eat jars within a year for the best flavor and texture. Proper labels help me avoid guessing when I can venison meat with a pressure cooker.

Troubleshooting and common mistakes
Knowing common problems helps you fix them fast. Here are frequent issues and fixes.
- Jar didn’t seal
- Possible causes: dirty rim, too much headspace, or failed processing. Reprocess or refrigerate and use within a few days.
- Cloudy liquid or fat separation
- Not harmful if processing was correct. May indicate excess fat or long storage.
- Bulging lids or off smell
- Discard immediately; this indicates spoilage.
I once had jars leak because bands were too tight. Loosen bands to allow air escape during processing. These small fixes matter when you can venison meat with a pressure cooker.
Personal tips, lessons learned, and quick recipes
Real experience speeds learning. Here are practical tips from my years canning venison.
- Use lean cuts for stew meat and ground venison for chili.
- If you like broth, add a splash of vinegar to jars for flavor balance.
- Label jar recipes to reproduce favorite mixes later.
- Cooked vs. raw pack: I prefer raw pack; it keeps texture better when you can venison meat with a pressure cooker.
A favorite quick recipe: add garlic, diced onions, salt, and broth in pint jars. Process and use the meat for fast stews or tacos. Small thoughtful tweaks make canned venison taste like home.
Frequently Asked Questions of how to can venison meat with a pressure cooker
Is it safe to can venison meat with a pressure cooker at home?
Yes. It is safe if you follow tested processing times and pressures and use equipment rated for canning. Always adjust for altitude and follow manufacturer directions.
Can I can ground venison in a pressure cooker?
Yes. Use a raw pack for ground venison and follow the tested processing time for ground meat. Pack it tightly and cover with boiling broth or water.
Do I need to pre-cook venison before canning?
No. You can raw-pack venison into jars. Raw packing is common and preserves texture well. If you prefer, you can brown meat first, but adjust recipes and processing highs accordingly.
How long will canned venison last?
Properly canned venison is best within 12 months for flavor, but it can remain safe for 1 to 5 years when stored cool and dark. Always check for off smells or broken seals before use.
Can I use a pressure cooker that is not labeled as a canner?
Only if the manufacturer states it is suitable for home canning. Many pressure cookers are not designed to hold pressure for long processing times. Use a pressure canner when in doubt.
Conclusion
Canning venison meat with a pressure cooker gives you safe, shelf-stable meat when you follow tested times and pressures. Use the right equipment, trim fat, pack jars correctly, and strictly follow processing guidelines. Start small, label jars, and learn from each batch to improve flavor and safety. Try a single batch this season and taste the reward of shelf-stable venison—then share your results or questions below.


