Use a chemical stripper, gentle sanding, or heat to strip paint from kitchen cabinets.
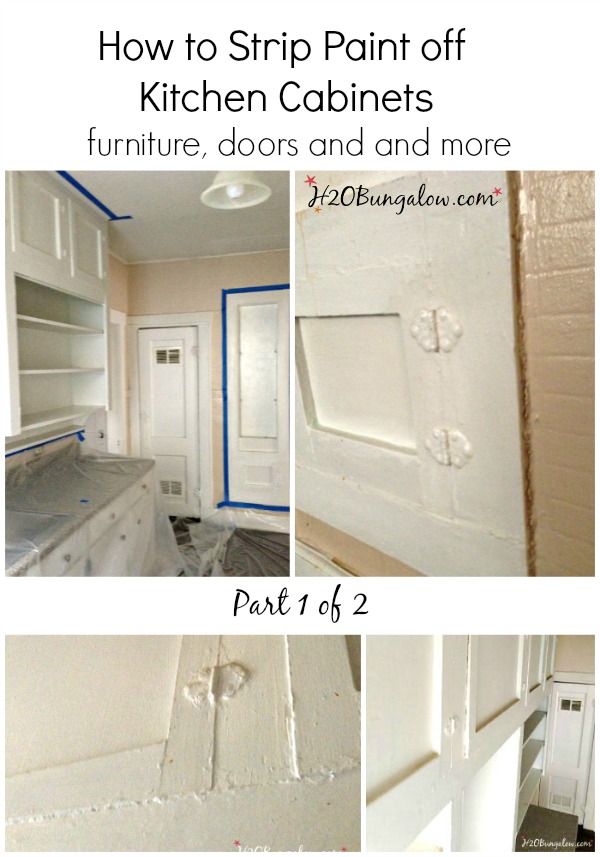
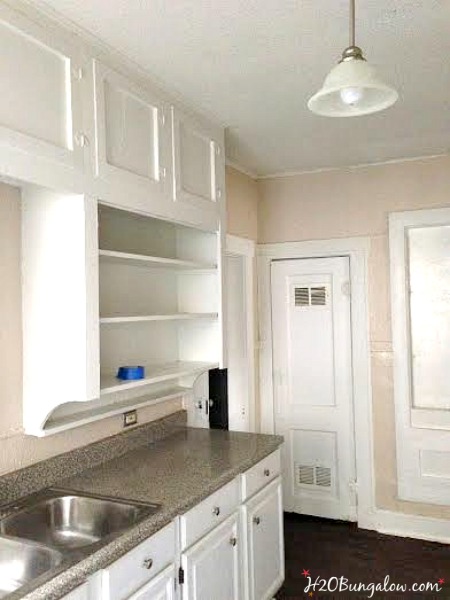
I have stripped many sets of kitchen cabinets over the years for homeowners and for my own projects. This guide shows how to strip paint from kitchen cabinets step by step, with clear safety tips, tools, method choices, and real-world tips I learned on the job. Read on to learn which method fits your cabinets, how to avoid common mistakes, and how to prepare surfaces for a pro finish.

Tools and materials for how to strip paint from kitchen cabinets
Before you start, gather the right tools. The right gear makes the job faster and safer.
- Chemical stripper Select a low-VOC, gel or paste stripper for vertical surfaces.
- Protective gear Nitrile gloves, safety goggles, and a respirator mask rated for organic vapors.
- Scrapers and putty knives Use flexible plastic and stiff metal scrapers.
- Heat gun A low-temperature heat gun controls blistering paint without scorching wood.
- Sandpaper and sanding blocks Use 120 to 220 grit for finish sanding.
- Steel wool and abrasive pads Good for detail work in corners and profiles.
- Drop cloths and plastic sheeting Protect floors, counters, and appliances.
- Mineral spirits or denatured alcohol For cleanup and removing residue.
- Painter’s tape and labels Keep hardware and parts organized.
- Small brushes and toothbrushes For crevices and ornate moldings.
Safety first when you strip paint from kitchen cabinets
Safety is the most important part of this job. Old paint can contain lead. Strippers and dust can harm you.
- Test for lead Use a lead test kit if the home was built before 1978.
- Ventilation Work in a well-ventilated space or mask up with an appropriate respirator.
- Protect surfaces Cover counters and floors with thick drop cloths.
- Proper disposal Put chemical residue in sealed bags and follow local rules for hazardous waste.
I always work with a respirator and gloves. I test older homes for lead before I touch paint. If lead is present, hire a certified contractor. This keeps you legal and safe.

Methods overview: options to strip paint from kitchen cabinets
There are three main ways to strip paint from kitchen cabinets. Each fits different cabinet types and goals.
- Chemical strippers Best for detailed doors and deep profiles. Works well on old, multiple paint layers.
- Heat guns Fast and clean for flat panels. Use low heat to avoid scorching wood.
- Sanding Good for modern flat doors or small touch-ups. Avoid over-sanding veneer.
You can combine methods. For example, use a stripper for corners and a sander for flat faces. Choose based on time, cabinet age, and how much detail you must preserve.

Chemical strippers: deep clean with care
Chemical strippers dissolve paint for easy removal. Gel formulas stick to vertical surfaces. Follow label directions.
- Apply stripper in a thin, even coat. Wait the time listed on the label.
- Scrape away softened paint with a plastic scraper to avoid gouging wood.
- Clean residue with mineral spirits or water if the product allows.
- Repeat if multiple layers remain.
Chemical strippers work well on carved moldings and recessed panels. They are slower than heat but gentler on ornate wood.
Heat guns: speed for flat surfaces
Heat guns soften paint so you can scrape it off. Keep the gun moving.
- Hold the heat gun 6 to 8 inches away from the paint.
- Heat a small area until paint bubbles. Scrape immediately.
- Use a low-temperature setting to avoid charring.
Heat is fast. It creates less chemical waste. But avoid using high heat on veneered doors, as it can delaminate the veneer.
Sanding: control and finish prep
Sanding removes paint and smooths edges for refinishing.
- Start with 120 grit to remove paint. Move to 180–220 grit for finish.
- Use a sanding block for panels and an orbital sander for flat faces.
- Hand-sand carvings with steel wool or small sanding sponges.
Sanding is dusty. Wear a dust mask and vacuum often. It works best when previous layers are already loosened.

Step-by-step process: how to strip paint from kitchen cabinets
Follow these steps for a smooth, repeatable process. Work methodically and label parts.
- Remove doors, drawers, and hardware
- Take off hinges and knobs. Label each piece and its location.
- Clean surfaces
- Wipe cabinets with a mild degreaser to remove grease and dirt.
- Protect your workspace
- Lay down plastic, and set up fans for ventilation.
- Test a small area
- Try your chosen method on a hidden spot to check results.
- Apply method of choice
- Chemical: apply, wait, scrape, and clean.
- Heat: warm, scrape, cool, and repeat.
- Sand: remove in stages, then clean dust.
- Detail work
- Use steel wool and toothbrushes for grooves and corners.
- Neutralize and clean
- Use mineral spirits or water per stripper instructions to remove residue.
- Final sanding and prep
- Sand to 180–220 grit for a smooth finish ready for primer or stain.
- Reassemble
- Reattach hardware or replace it with new pieces.
I always work on a door at a time. That keeps details consistent. Label every hinge so doors go back exactly where they belong.

Troubleshooting and common problems when you strip paint from kitchen cabinets
Problems come up. Here are fixes I use on the job.
- Paint won’t lift Try a longer dwell time with a stripper or score topcoat first with a razor to let the product penetrate.
- Soft or gummy wood Use a mild solvent and test sanding lightly to avoid removing wood fibers.
- Lead paint found Stop work and call a certified lead abatement professional. Do not dry scrape or sand.
- Veneer damage Avoid chemical soak and high heat; use light sanding and hand tools instead.
- Uneven finish after stripping Sand lightly and use a primer tailored for wood to hide small imperfections.
Learning to read the paint is key. Old paint that chips easily behaves differently than modern polyurethanes. Adjust your method accordingly.

Personal experience, lessons learned, and pro tips
I stripped cabinets in a 1920s kitchen once. The doors had three paint layers and delicate moldings. I used a gel stripper and soft plastic scrapers. It took patience. The result was worth it.
Lessons I learned
- Patience pays Rushing causes gouges and damage.
- Work small areas It keeps the stripper from drying out too fast.
- Preserve details Use hand tools for corners and carvings.
- Label everything Mixing up doors and hinges wastes time.
Pro tips
- Test multiple strippers on small samples to find the best one for your paint type.
- If you plan to stain, test wood color after stripping to choose the stain tone.
- Replace old hinges with new ones if they show wear; it lifts the whole look.

Costs, time, and when to hire a pro
Consider cost and time before you start. Small jobs you can do yourself. Large jobs with lead or fragile antiques need a pro.
- DIY cost factors Stripper, tools, PPE, and disposal fees can add up.
- Time A set of 10 doors can take 2–3 full days if you work methodically.
- Hire a pro if You find lead paint, delicate veneer, or you need a fast, guaranteed finish.
A professional can handle lead safety, complex repairs, and quality finish work. For many homeowners, DIY is rewarding and saves money if you plan well.
Frequently Asked Questions of how to strip paint from kitchen cabinets
What is the safest way to strip paint from kitchen cabinets?
The safest way is to test for lead and then use a low-VOC chemical stripper with good ventilation and proper PPE. For lead-painted surfaces, hire a certified abatement pro.
Can I use a heat gun on veneered cabinet doors?
Using a heat gun on veneer is risky because heat can cause delamination. Use gentle chemical strippers and light hand sanding instead.
How long does it take to strip paint from kitchen cabinets?
Time varies by method and condition. Expect 15 to 45 minutes per door for chemical stripping and scraping, plus extra for cleaning and sanding.
Do I need to remove cabinet doors to strip paint?
Removing doors and drawers makes the job cleaner and easier. You can strip in place, but removal gives better access and a more professional result.
How do I prep cabinets for repainting after stripping?
Clean residue, sand to 180–220 grit, apply a bonding primer, and then paint with a high-quality cabinet paint for long-lasting results.
Conclusion
Stripping paint from kitchen cabinets is a hands-on task you can do well with the right method, tools, and safety steps. Pick chemical stripping for detailed work, heat for flat panels, and sanding for simple repairs. Test, work slowly, and protect yourself and the space. Try one door as your practice piece, then move forward with confidence. If you hit lead paint or fragile veneers, call a pro to avoid damage and health risks. Share your cabinet project in the comments or subscribe for more step-by-step guides and tips.


