Use a food processor with a shredding disc, chill the cheese, then pulse until evenly shredded.
I’ve shredded hundreds of blocks of cheese in home and test kitchens, and I’ll show you clear, safe steps for how to shred cheese in a food processor. This guide explains gear, cheese choices, timing, common mistakes, and cleaning tips so you get perfect shreds every time. Read on to master the process quickly and confidently.
Why use a food processor to shred cheese?
A food processor saves time and gives consistent results. You can shred large amounts fast. That makes it great for parties, meal prep, or busy weeknights.
I use a food processor when I need uniform shreds for melting or topping. It beats a box grater for speed and less messy hands. Learning how to shred cheese in a food processor helps you control texture and portion size.

What equipment and cheese work best
Choose the right tool and cheese for the job. Not every blade or cheese behaves the same.
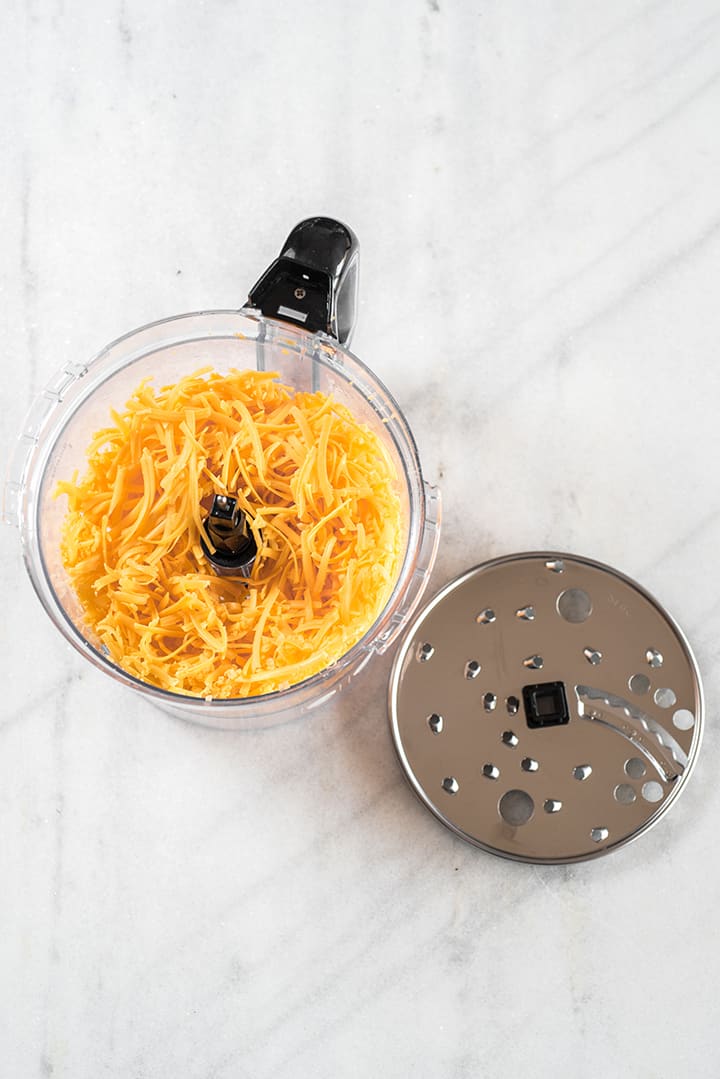
- Food processor with a shredding or grating disc
Use the dedicated shredding disc if your machine includes one. It gives even, ribbon-like shreds. - Sharp, clean blades and sturdy bowl
A dull blade smashes cheese. Make sure parts are dry and secure. - Cheese types that shred well
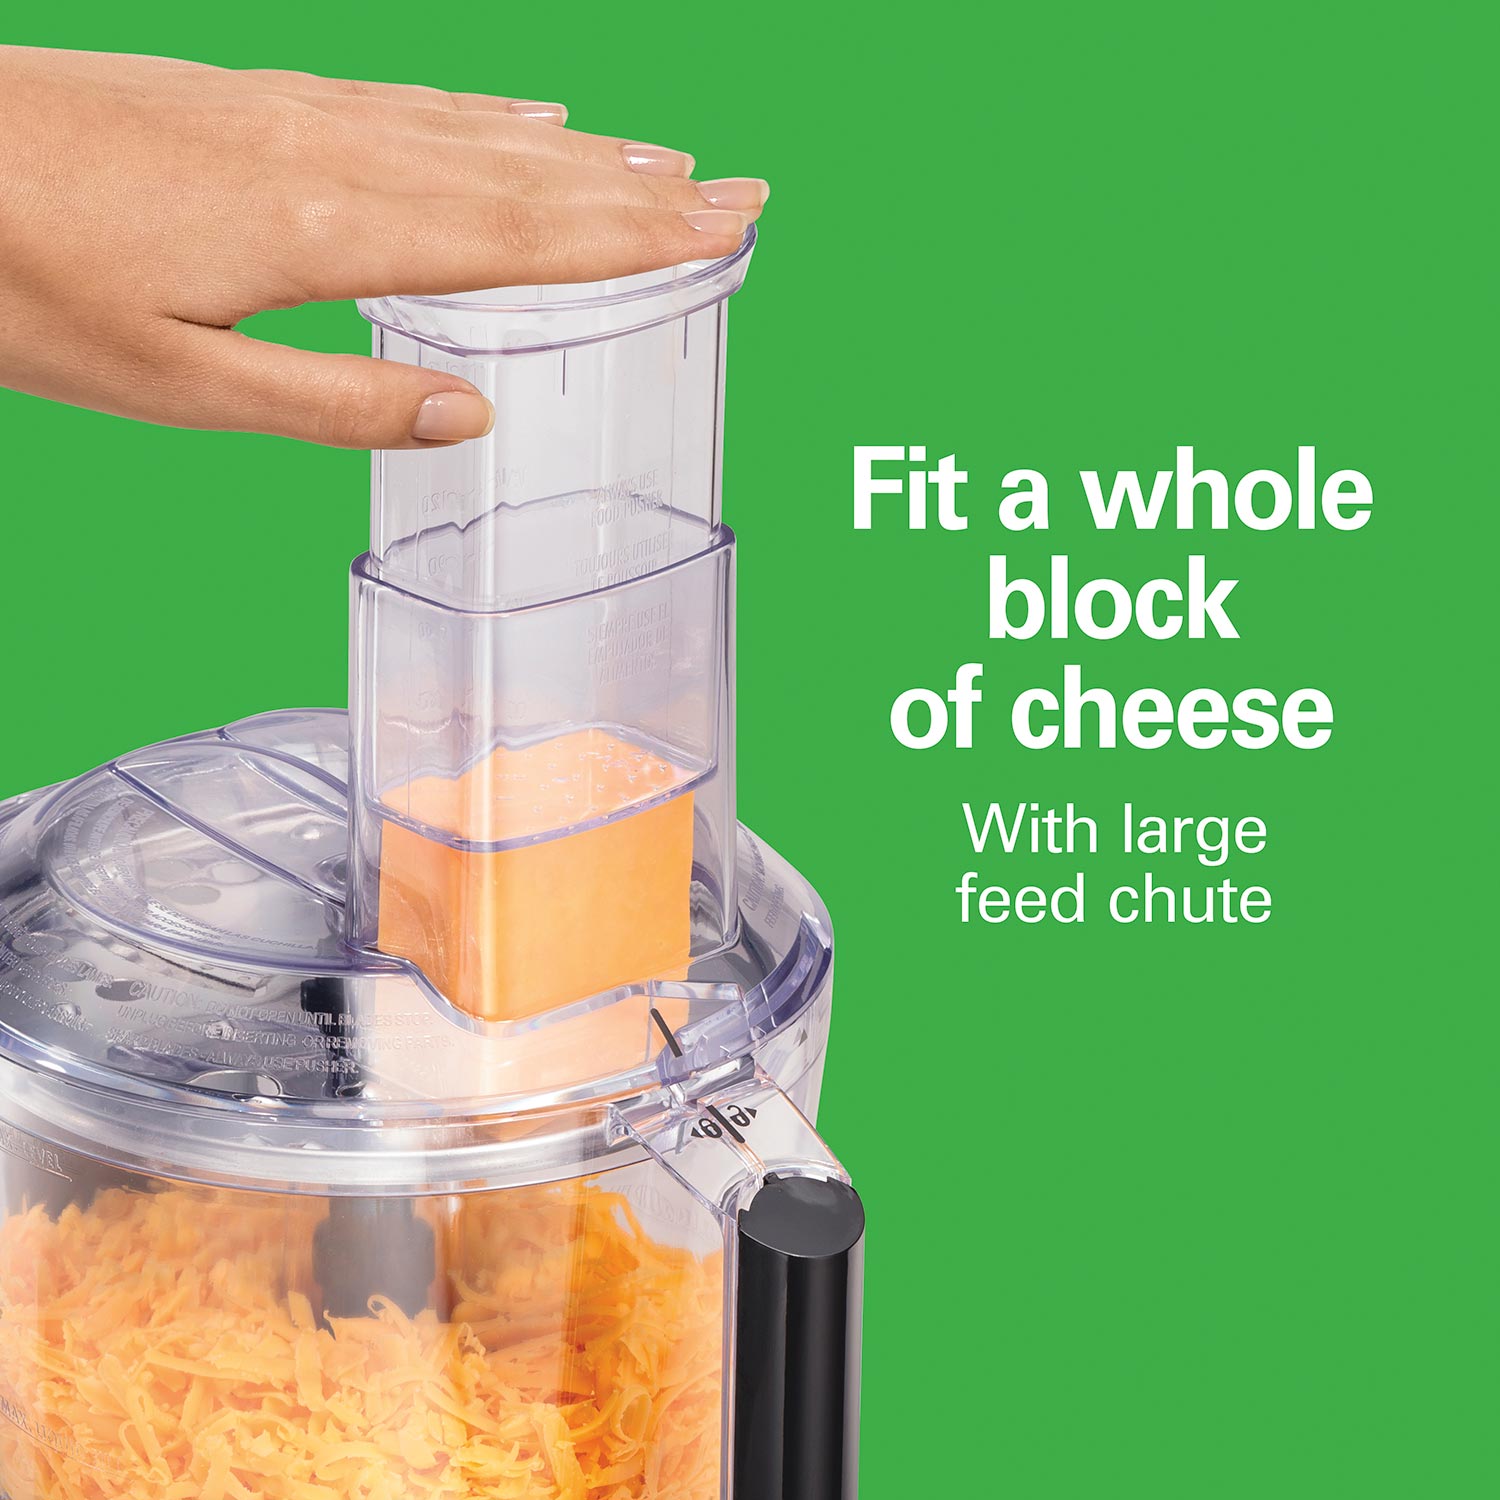
Cheddar, Monterey Jack, Gouda, Gruyère, and similar semi-hard cheeses shred best. Fresh soft cheeses like mozzarella can work if chilled. - Cheese size and temperature
Cut cheese into 1 to 1.5 inch cubes. Chill the cheese for 15–30 minutes. Cold cheese shreds cleanly and won’t clump.
Knowing how to shred cheese in a food processor starts with these choices. They prevent clumping and give the texture you want.
Step-by-step: how to shred cheese in a food processor
Follow these simple steps for reliable results. Read each step before you start.
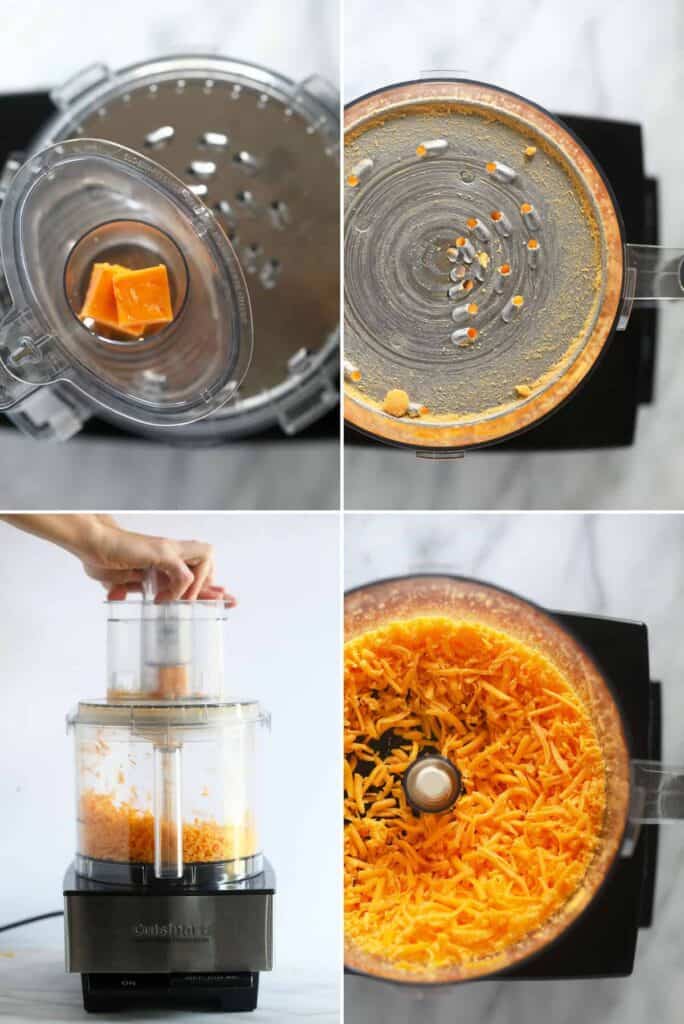
- Chill the cheese
Place the block in the fridge or freezer for 15–30 minutes. Cold cheese cuts cleaner. - Prep the machine
Attach the shredding disc and set the bowl and lid securely. Always follow your model’s safety steps. - Cut the cheese
Trim the block into 1 to 1.5 inch cubes or sticks. This helps feed the cheese evenly. - Pulse, don’t run continuously
Add a handful of cubes. Use short pulses until shreds form. Continuous running can overheat and smear the cheese. - Check and adjust
Stop and check texture. If shreds are too long, pulse less. If too coarse, use a finer disc if available. - Work in batches
Don’t overload the bowl. Small batches shred more evenly. - Store properly
Use shredded cheese immediately or store in an airtight container with a little flour or cornstarch to prevent clumping.
Repeat these steps when you need to know exactly how to shred cheese in a food processor for pizza, salads, or sauces.

Tips, tricks and troubleshooting
Simple changes fix most problems. Use these tips from hands-on experience.
- Clumping or sticky cheese
Chill longer. Toss shreds with 1 teaspoon cornstarch per cup to separate. Pulse in short bursts. - Too wet or smeared cheese
Cheese that is warm will smear. Always chill and use pulses. - Uneven shreds
Cut pieces evenly. Use the right disc and avoid overloading the bowl. - Small batches are better
Shred in small batches for consistency. I learned this after ruining a large batch for a party. - For fresh mozzarella
Freeze for 10–15 minutes before shredding. Soft cheeses need extra chill time. - Flavor and salt balance
Pre-shredded cheese often contains anti-caking agents and salt. Shredding fresh lets you control salt and texture.
These practical tips reflect real kitchen trials and save time and frustration when you practice how to shred cheese in a food processor.
Cleaning and safety
Cleaning and safety keep your machine lasting longer. Follow these steps every time.
- Unplug before removing blades
Always unplug the machine before handling discs or blades. - Use a brush for stuck bits
A small brush cleans the shredding disc safely. Avoid bare fingers on the blade. - Wash and dry parts promptly
Hand wash or use the dishwasher if parts are rated dishwasher safe. Dry fully to prevent rust. - Store carefully
Keep the shredding disc in a sleeve or safe spot to protect hands and the blade.
Safety and clean-up are part of learning how to shred cheese in a food processor. They protect you and the machine.

Frequently Asked Questions of how to shred cheese in a food processor
How long should cheese be chilled before shredding?
Chill most semi-hard cheeses for 15–30 minutes. Softer cheeses may need up to 45 minutes to firm up.
Can I shred frozen cheese in a food processor?
Lightly frozen cheese works well for soft varieties. Don’t let cheese freeze solid or it will be crumbly and hard to shred.
Will a food processor make shredded cheese clump?
It can. Prevent clumps by chilling cheese, pulsing, and tossing shreds with a small amount of cornstarch or flour.
Is the shredding disc necessary?
The shredding disc gives the best texture. Using a chopping blade will create coarse bits and can overwork the cheese.
How much cheese can I shred per batch?
Stick to one to two cups per batch depending on your machine size. Smaller batches shred more evenly and prevent jamming.
Can I use a food processor for hard cheeses like Parmesan?
Hard cheeses can work but grate best on a microplane or fine grater. If using a processor, chill and use short pulses to avoid crumbling.
Conclusion
Mastering how to shred cheese in a food processor makes meal prep faster and cleaner. Chill your cheese, use the shredding disc, pulse in small batches, and clean parts carefully to get great results every time. Try these steps on your next pizza night or taco bar and see the difference. If you found this helpful, try it tonight and share your experience or questions in the comments — and subscribe for more useful kitchen tips.


