Refinish cabinets by sanding, staining, and sealing for a refreshed, durable kitchen finish.
I have refinished dozens of cabinets over the last decade, helping homeowners update kitchens without a full remodel. This guide on how to refinish kitchen cabinets with stain walks you through every step, tools to buy, common pitfalls, and real tips from hands-on experience. Read on to save time, avoid costly mistakes, and get a long-lasting, beautiful result.
Why refinish kitchen cabinets with stain?
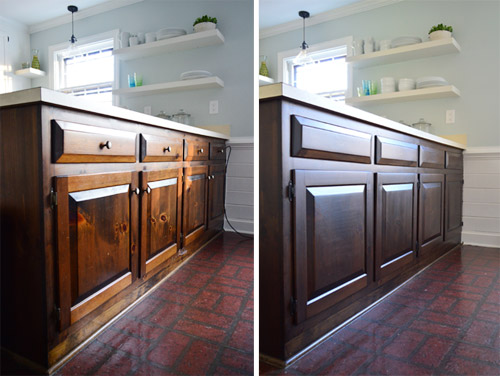
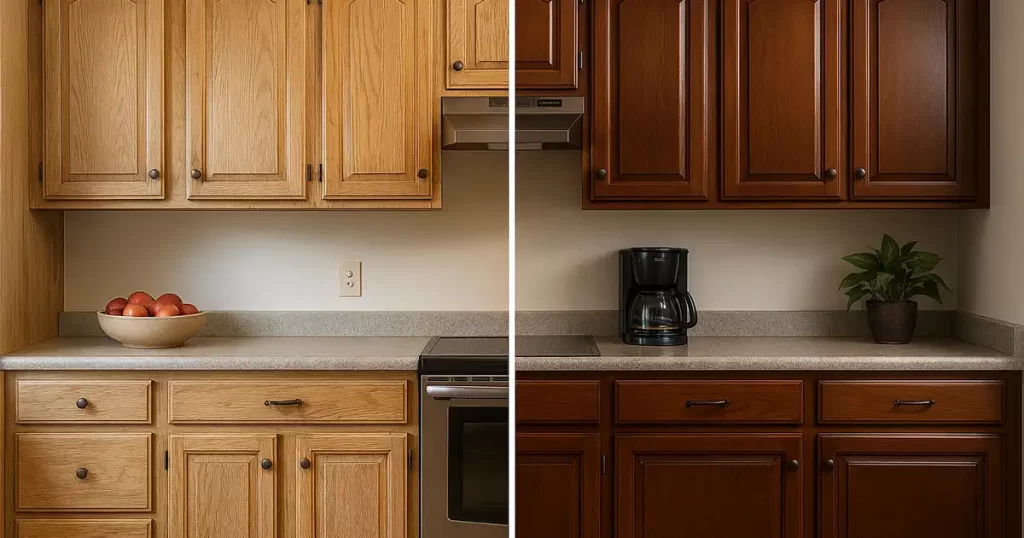
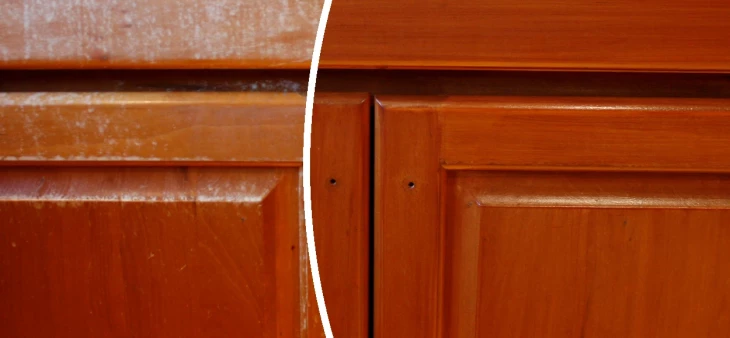
Refinishing with stain highlights wood grain. It updates color while keeping natural texture. Many homeowners choose stain to keep a classic or rustic look. Stain can deepen tone, hide wear, and increase resale appeal.
Benefits at a glance:
- Enhances natural wood grain and warmth.
- Often cheaper than replacing cabinets.
- Can match floors or new countertops.
- Creates a durable surface when sealed properly.
When you learn how to refinish kitchen cabinets with stain, you gain control over color and finish. You can go darker, lighter, or match an existing trim. I prefer stain when the wood has good grain. It keeps a rich, lived-in look.
Materials and tools you will need
Good prep and the right tools make the job easy. Below is a practical list for how to refinish kitchen cabinets with stain.
Essential supplies:
- Sandpaper (80, 120, 220 grit) and sanding blocks
- Chemical stripper (optional for old finishes)
- Tack cloths and lint-free rags
- Wood cleaner or degreaser
- Stain (oil, gel, or water-based)
- Wood conditioner (for softwoods or blotchy woods)
- Topcoat: polyurethane, water-based poly, or oil-based varnish
- Brushes, foam applicators, or lint-free rags for stain
- Respirator mask, gloves, and eye protection
- Drop cloths, painter’s tape, and screwdrivers
- Orbital sander (optional but speeds up work)
I learned to always buy a good brush and tack cloths. Cheap brushes leave bristles and streaks. Spend a little extra on sandpaper and poly. It pays off in the final look.
Step-by-step process to refinish kitchen cabinets with stain
This section breaks the job into clear steps. Follow them in order for the best result.
1. Remove doors, drawers, and hardware
- Label each piece so you can reinstall easily.
- Remove hinges, knobs, and drawer slides.
- Lay parts on a covered work table.
2. Clean surfaces
- Wipe with degreaser to remove oils and grime.
- Let everything dry completely.
3. Strip old finish (if needed)
- Use chemical stripper for thick lacquer or multiple coats.
- Follow safety instructions and work in a ventilated area.
- Scrape gently and rinse off residue.
4. Sand to bare wood or to scuff
- Start with 80–120 grit to remove old finish.
- Finish with 220 grit for a smooth surface.
- Sand with the grain to avoid scratches.
5. Apply wood conditioner (for softwoods)
- Condition prevents blotchy stain on pine or birch.
- Follow product directions for drying time.
6. Test stain on a scrap or hidden area
- Always test to confirm color.
- Try layers if you want a deeper tone.
7. Apply the stain
- Use a brush or rag to apply evenly with the grain.
- Wipe off excess within 2–5 minutes depending on product.
- Allow to dry per label directions.
- Add a second coat for deeper color, if desired.
8. Sand lightly between coats
- Use 320–400 grit for a smooth feel.
- Wipe with a tack cloth before the next coat.
9. Seal with a topcoat
* Choose oil-based for warmth or water-based for low odor.
- Apply thin coats and sand lightly between coats.
- Plan for 2–3 coats for durability.
10. Reassemble
- Let parts cure according to finish instructions.
- Reattach hardware, doors, and drawers carefully.
Following these steps shows exactly how to refinish kitchen cabinets with stain. I once rushed sealing and got fingerprints in the finish. Wait the full dry time. It matters.

Choosing the right stain and finish
Pick the right product for your wood and lifestyle. The wrong choice can lead to blotchy color or a finish that wears fast.
Stain choices:
- Oil-based stain: deep color, longer open time, strong odor.
- Water-based stain: quick dry, easier cleanup, brighter colors.
- Gel stain: thick, sits on top, good for vertical surfaces or uneven wood.
Finish choices:
- Oil-based polyurethane: durable, amber tone, longer cure.
- Water-based polyurethane: clear, low odor, quick dry.
- Varnish or conversion varnish: professional-grade, very durable for kitchens.
Match product to use case. For a family kitchen, pick a durable topcoat. If you want minimal odor, use water-based products. When I stained oak, oil-based stain made the grain sing. For a quick weekend project, water-based stain and poly saved time.
Common mistakes and how to avoid them
Learn from small errors. These save time and money.
Common mistakes:
- Skipping cleaning: oil blocks stain. Clean work surfaces well.
- Not testing stain: colors differ on wood species. Always test.
- Applying stain too thick: causes blotches and long dry times.
- Rushing dry times: finish will tack or bubble.
- Using the wrong brush: cheap brushes shed and leave marks.
Personal tips from experience:
- Label pieces and take photos to make reassembly smooth.
- Work in a warm, dust-free space. Dust shows in finishes.
- Keep a small notebook with stain mix and timing for future touch-ups.
Following these tips reduces wasted effort when you refinish kitchen cabinets with stain.

Time, cost, and project planning
Plan realistically. A full cabinet refinish often takes time and patience.
Time estimate:
- Prep and removal: 4–8 hours.
- Stripping and sanding: 4–12 hours, depending on condition.
- Staining and drying: 1–2 days with multiple coats.
- Sealing and curing: 2–7 days.
Cost factors:
- DIY basic kit: $150–$400.
- Higher-end stains and tools: $400–$1,200.
- Hiring a pro: $1,000–$5,000+ depending on kitchen size and finish.
Limitations and trade-offs:
- Stain highlights wood imperfections. Repair first.
- Not all laminate or veneered cabinets accept stain. Test before removing doors.
- Staining is less transformative than paint but keeps natural grain.
I once underestimated dry time and had to re-sand a door after a weekend. Build in buffer days.
Paint vs stain and other related options
Stain is not the only route. Compare options to pick the best one for your project.
Related choices:
- Paint: hides grain and gives modern look. Easier to match new decor.
- Reface: replace doors and veneers for a new style without repainting.
- Partial staining: stain frames and paint doors for a two-tone look.
- Distressing or glazing: adds character with aging effects.
If you are unsure, try one door first. This small test helps you see how stain works with your kitchen.
Frequently Asked Questions of how to refinish kitchen cabinets with stain
What is the difference between staining and painting cabinets?
Staining soaks into the wood and shows the grain. Painting covers the grain and gives a solid color. Stain keeps a natural look while paint hides flaws.
Can I stain over paint or varnish?
You generally cannot stain over paint or varnish. You must remove existing finishes or sand to bare wood. Gel stains can sometimes coat without full stripping, but testing is smart.
How long does stain and finish take to cure before heavy use?
Stain dries in hours but can take 24–48 hours to handle. Topcoats may cure in 2–7 days. Full hardness can take up to 30 days for some products.
Do I need a professional sprayer to get a smooth finish?
No. Brushes and foam applicators give great results with care. Sprayers speed the job and give a very smooth finish but increase prep needs.
Will staining work on laminate or veneered cabinets?
Staining works best on solid wood. Veneer may accept stain unevenly and laminate usually resists stain. Test a hidden area before you commit.
Conclusion
Refinishing kitchen cabinets with stain is a cost-effective way to refresh your kitchen while keeping wood character. Follow careful prep, test your stain, and seal well for lasting results. Start with one door as a trial. Take your time, learn from small mistakes, and enjoy the new look.
Ready to refinish your cabinets? Gather the right tools, pick a test panel, and try the first coat this weekend. Share your results or questions below — I’d love to help.


