
Measure the sink by recording overall length, width, bowl depth, cutout size, and drain/faucet locations.
I’ve measured dozens of sinks for remodels and replacements, so I know exactly how do you measure a kitchen sink the right way. This guide walks you through each measurement, explains why it matters, and shares real-world tips so your new sink fits perfectly. Read on for simple steps, examples, and common mistakes to avoid.

Why accurate measurements matter
Accurate measurements save time, money, and headaches during a kitchen remodel. Buying a sink that does not fit the countertop cutout or cabinet wastes money and may require expensive countertop work. When you know how do you measure a kitchen sink, you can shop confidently for replacements, upgrades, or custom pieces.
Good measurements also ensure plumbing lines, faucets, and accessories align. I once installed a sink that was 1/2 inch too large; fixing it cost more than the sink. Precise measuring avoids surprises and keeps installation straightforward.

Tools you need to measure a kitchen sink
You don’t need fancy tools to measure a sink. A few basic items do the job quickly and accurately.
- Tape measure, 25 to 30 feet, with a stiff blade for straight runs.
- Steel ruler or straight edge for cutout checks.
- Caliper or ruler for small gaps and rim widths.
- Notepad and pen or phone camera to record and photograph measurements.
- Level to check cabinet and countertop planes.
- Assistant for heavy sinks or awkward reaches.
Having the right tools makes measuring faster and prevents mistakes. I always take photos of the existing sink and cutout—those images helped me match a replacement in one afternoon.

How do you measure a kitchen sink: step-by-step guide
Follow these steps in order to capture every critical measurement. Repeat measurements twice for accuracy.
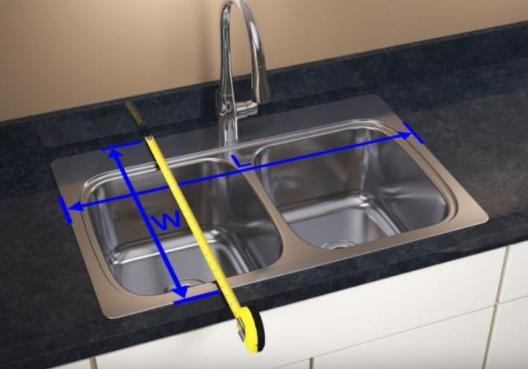
- Measure overall sink length and width
- Measure left-to-right at the widest points for length.
- Measure front-to-back at the deepest points for width.
- Record both exterior dimensions and bowl dimensions if visible.
- Measure bowl(s) length, width, and depth
- For single bowl sinks, measure the interior length and width of the bowl.
- For double bowls, measure each bowl individually.
- Measure depth from the top rim (or countertop plane for undermounts) to the bottom of the bowl.
- Measure rim or flange width
- For drop-in sinks, measure the rim width from edge to bowl opening.
- Note if the rim is flat or has an overhang, since this affects cutout adjustments.
- Measure cutout dimensions and shape
- From under the countertop, measure the actual cutout length and width.
- If you can’t access underneath, measure the visible top opening and subtract any rim overlap.
- Note rounded corners and their radius—these affect how the sink will sit.
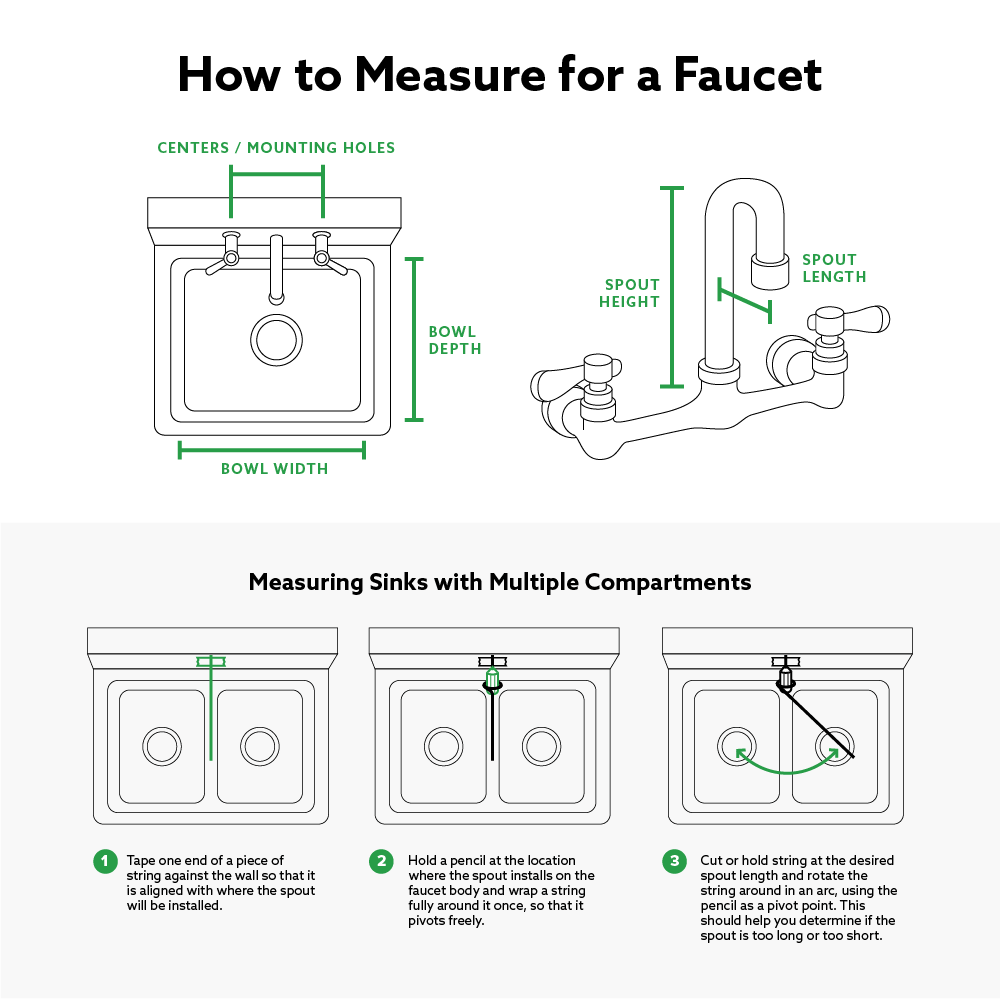
- Measure faucet and accessory hole locations
- Measure center-to-center distance from the faucet hole to the center of the sink.
- Record the number of faucet holes and their spacing.
- Measure locations for soap dispensers, spray hoses, and accessory holes.
- Locate drain and tailpiece positions
- Measure distance from the back wall to the center of the drain.
- Measure distance from cabinet centerline to drain center.
- Note if the drain is centered, offset, or rear-set.
- Check cabinet and countertop clearance
- Measure cabinet opening width and depth.
- Measure the distance from the cabinet face to the back wall and to the cabinet bottom.
- Check for obstructions like braces, disposal clearance, or shelving.
- Create or check a template
- If a template exists, measure it and compare to sink specs.
- If installing new, trace a cutout on kraft paper or follow manufacturer template.
Taking each step ensures you capture the full set of dimensions installers will need. Always double-check measurements and photograph each stage.

Measuring different sink types and cutouts
Sink types change what and how you measure. Below are common types and key measuring points.
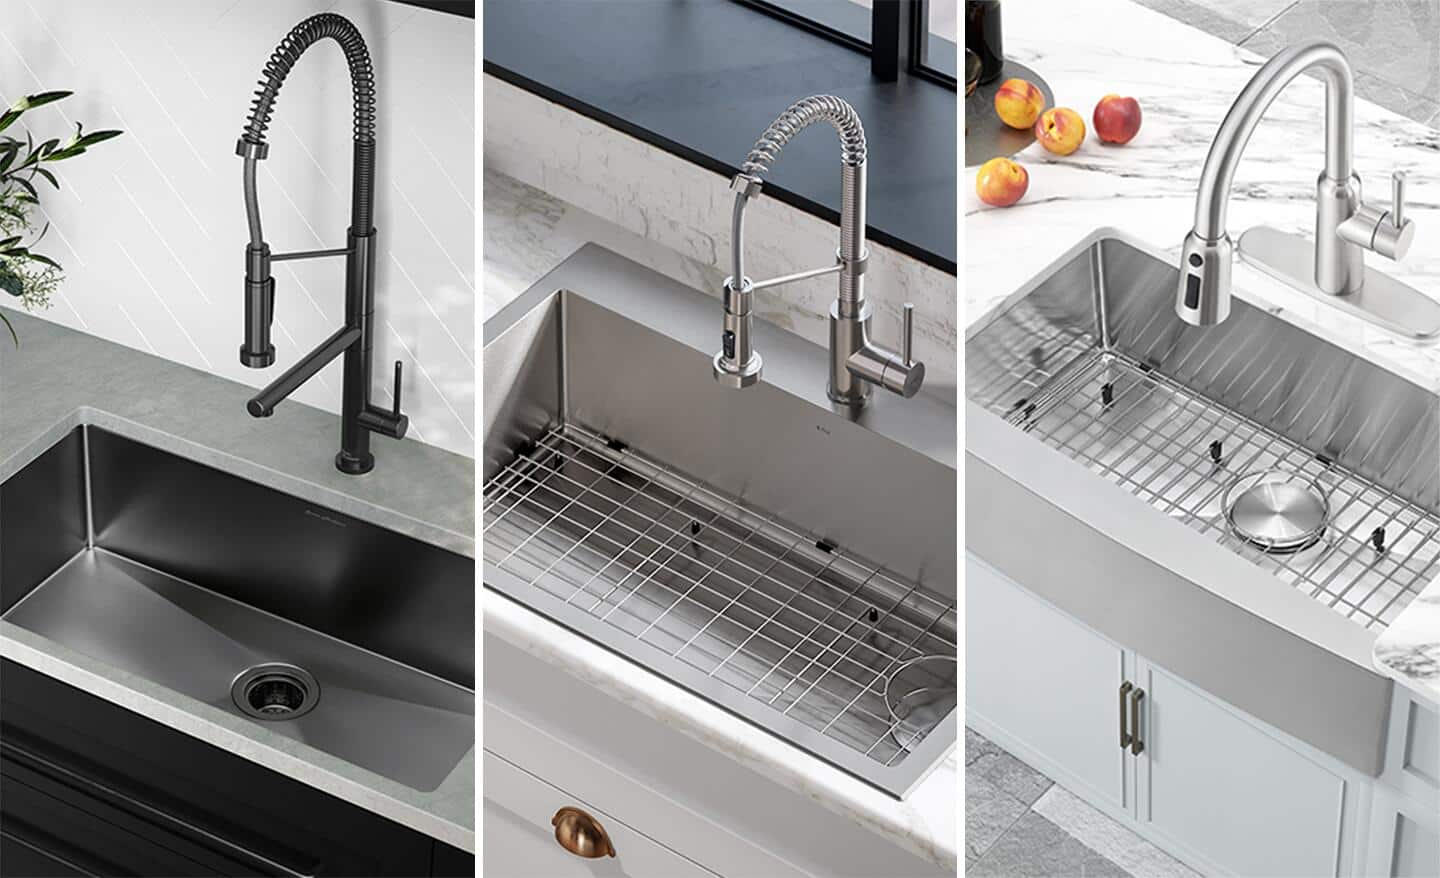
- Drop-in (top-mount)
- Measure rim width and overall top dimensions.
- Measure cutout under the rim; account for lip overlap.
- Undermount
- Measure cutout in the countertop precisely; the sink mounts under that edge.
- Measure the visible countertop reveal and underside for mounting clips.
- Farmhouse (apron-front)
- Measure the apron face height and the distance from the cabinet face to the countertop edge.
- Check the cabinet opening width, since apron sinks need front clearance.
- Integrated and solid surface sinks
- Measure the entire countertop opening and confirm edge profiles.
- Workstation and accessory sinks
- Record accessory rail positions, perforations, and depth for accessories.
When replacing a sink, compare old sink specs to new sink specs. If changing sink type—say from drop-in to undermount—you may need countertop work. I once advised a homeowner to switch from a drop-in to undermount; we adjusted the countertop edge and saved them long-term usability.
Cabinet, countertop, and drain location measurements
These measurements ensure the sink fits the space and lines up with plumbing.
- Cabinet opening
- Measure across the cabinet face and inside width.
- Measure from front face to back wall for depth.
- Countertop thickness and overhang
- Measure top thickness where the sink will mount.
- Note any overhang or lip that changes mounting depth.
- Drain and P-trap clearance
- Measure the vertical distance from cabinet bottom to underside of sink drain.
- Check disposal space and trap arm clearance from wall.
Plumbing often dictates sink placement. If drain center is off or trap arm hits a brace, you may need a plumber to re-route. In one remodel, moving the drain 2 inches saved us from cutting a new cabinet brace.

Common mistakes and expert tips
Avoiding these pitfalls will save time and money.
- Mistake: Measuring only the visible top dimensions
- Tip: Always check the underside for bracket, support, or cutout differences.
- Mistake: Ignoring corner radii
- Tip: Measure corner radii for accurate templates, especially for stainless sinks.
- Mistake: Not accounting for faucet and accessory spacing
- Tip: Mock up faucet placement with tape to ensure ergonomic reach.
- Mistake: Assuming standard sizes will fit
- Tip: Always measure; cabinets and countertops often vary from nominal sizes.
Personal tip: bring your tape measure and a photo of the cabinet to the store. Many manufacturers list cutout templates online; compare your measurements to those templates before buying.

Experience-based examples and measurement scenarios
Here are practical examples to make the process clear.
Example 1: Replacing a standard single-bowl top-mount
- Overall sink top: 33" by 22"
- Bowl interior: 30" by 18"
- Depth: 9"
- Cutout to check: 32.5" by 21.5"
This shows you need a new sink with a slightly smaller top dimension than the counter opening.
Example 2: Fitting an undermount double-bowl into granite
- Cutout measured: 33" by 22"
- Drain centers: bowls 14" and 19" from back wall
- Cabinet inside width: 33"
You must match the sink’s mounting bracket spread to the countertop thickness.
These scenarios reflect real jobs I’ve done and help you visualize measurements.
Related concepts: custom sinks, templates, and professional help
Some situations require extra steps.
- Custom sinks
- Get full templates and precise mounting notes from the fabricator.
- Templates
- A manufacturer template is the most reliable way to cut the countertop.
- When to call a pro
- Hire a pro for stone or solid-surface countertops, complex plumbing, or custom sink fabrication.
If you’re unsure, a pro can verify measurements quickly. I’ve seen many DIYers save money by paying a pro to confirm measurements before cutting a countertop.
Frequently Asked Questions of how do you measure a kitchen sink
How do I measure my sink for a replacement?
Measure overall top dimensions, interior bowl length and width, bowl depth, cutout size, and faucet/drain locations. Double-check cabinet opening and underside clearances.
Can I switch from a top-mount to an undermount sink using the same measurements?
No, undermounts require precise cutout shapes and may need countertop edge finishing. You must measure the countertop thickness and cutout geometry for an undermount.
What is the standard kitchen sink size I should expect?
Common sink sizes are 22" by 33" or 24" by 36", but sizes vary widely. Always measure your actual cutout rather than relying on standard sizes.
How deep should a kitchen sink be measured?
Measure depth from the top rim or countertop plane to the bottom of the bowl. Typical depths range from 7 to 10 inches, but deeper bowls are available.
Do I need to measure corner radii of my sink?
Yes, corner radius affects how a sink fits the cutout and how it seals. Measure the radius for accurate template matches, especially with stainless or composite sinks.
How close should the faucet be to the sink edge?
Measure center-to-center from the faucet hole to the sink bowl to ensure reach and clearance. A comfortable distance is usually 2 to 4 inches from the back edge, but personal preference varies.
Conclusion
Measuring a kitchen sink is a straightforward process when you follow clear steps: record overall and bowl dimensions, measure cutouts and mounting details, and check cabinet and plumbing clearances. Accurate measurements prevent costly mistakes and make installation smoother. Take photos, double-check numbers, and if in doubt, use a manufacturer template or consult a pro. Now grab your tape measure and apply these tips—your next sink install can be simple and successful. Leave a comment with your measurement questions or share a photo of your sink project to get tailored advice.