Use day-old bread, dry it in the oven or toaster, then crush with a grater or rolling pin.
I’ve spent years cooking for family and teaching friends simple kitchen hacks, so this guide on how to make bread crumbs without food processor will give you clear, tested steps and smart shortcuts. Read on to learn multiple hands-on methods, seasoning ideas, storage tips, and common mistakes to avoid so you can make perfect bread crumbs anytime, even when you don’t have a food processor.

Why make bread crumbs at home
Making bread crumbs at home saves money and gives you fresh texture and flavor. Store-bought crumbs can be bland and have additives. Making your own allows you to control salt, herbs, and crumb coarseness. I prefer homemade crumbs for crisp coatings and better flavor in meatballs and gratins.
Types of breadcrumbs and when to use them
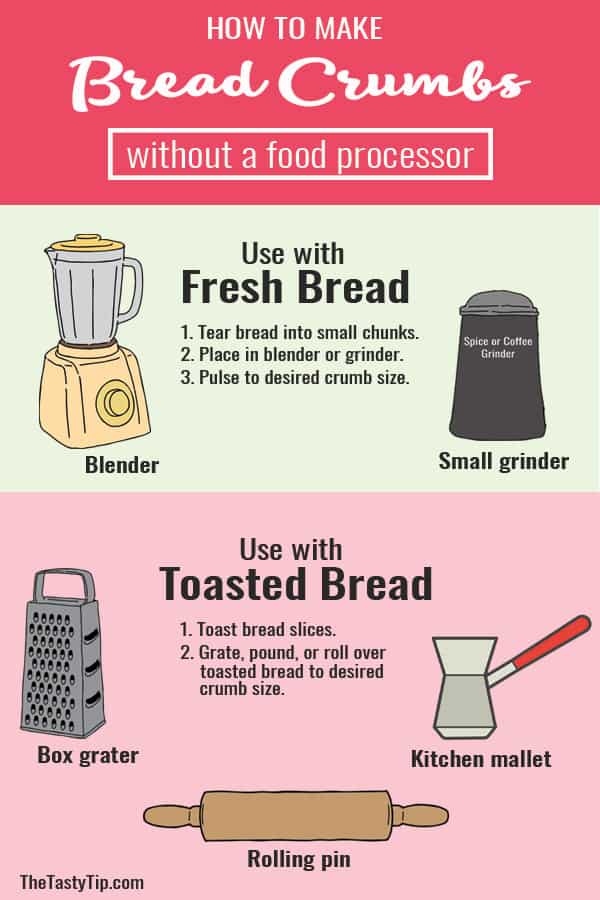
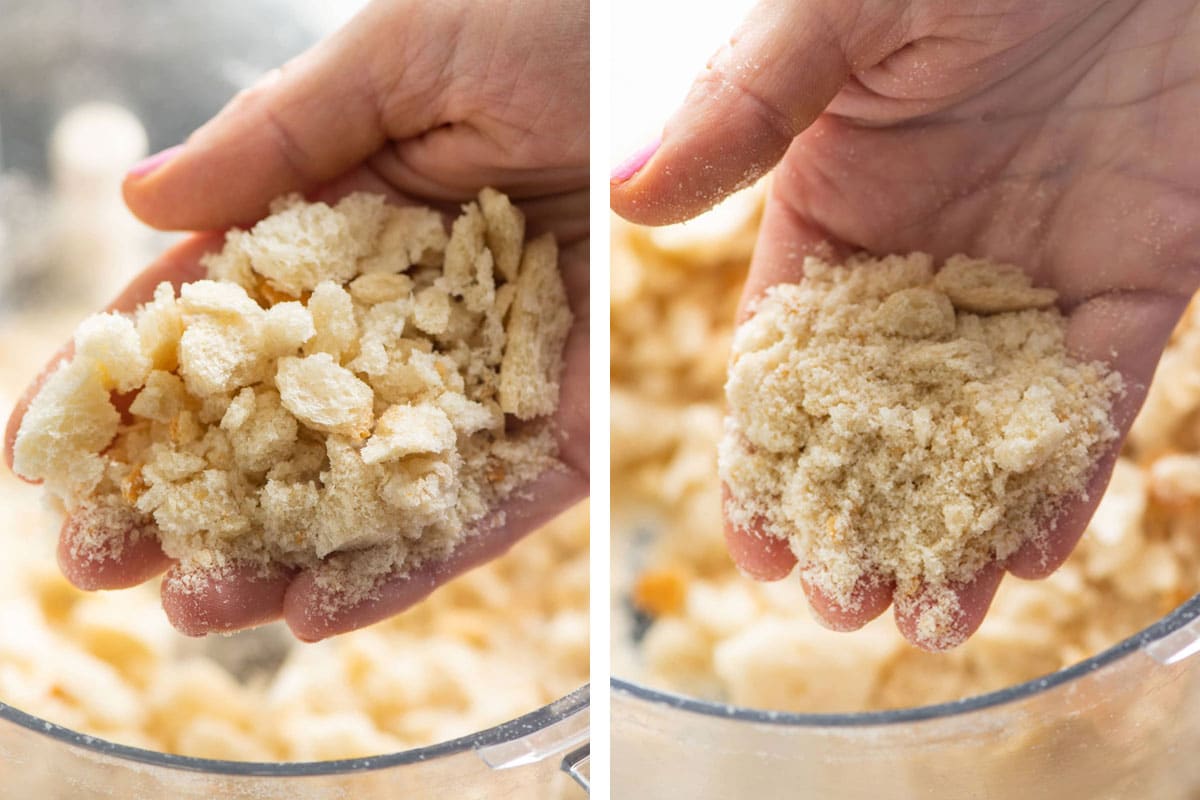
There are two main types you can make without a food processor: coarse and fine. Coarse crumbs work well for crusts and toppings. Fine crumbs are best for binding and smooth coatings. You can also make panko-style crumbs by tearing bread into flakes and toasting lightly for extra crunch. This guide covers how to make bread crumbs without food processor for each style.

Ingredients and tools you'll need
You need simple items you likely already have at home.
- Bread: day-old, slightly stale, or lightly toasted fresh bread.
- Tools: box grater, rolling pin, heavy pan or meat mallet, chef’s knife, zip-top bag, baking sheet, oven or toaster.
- Optional: salt, dried herbs, grated cheese for seasoning.
Knowing how to make bread crumbs without food processor starts with picking the right bread and the right tool for the texture you want.
Source: thetastytip.com
Method 1: Using a box grater
This is the fastest no-machine method for fine crumbs.
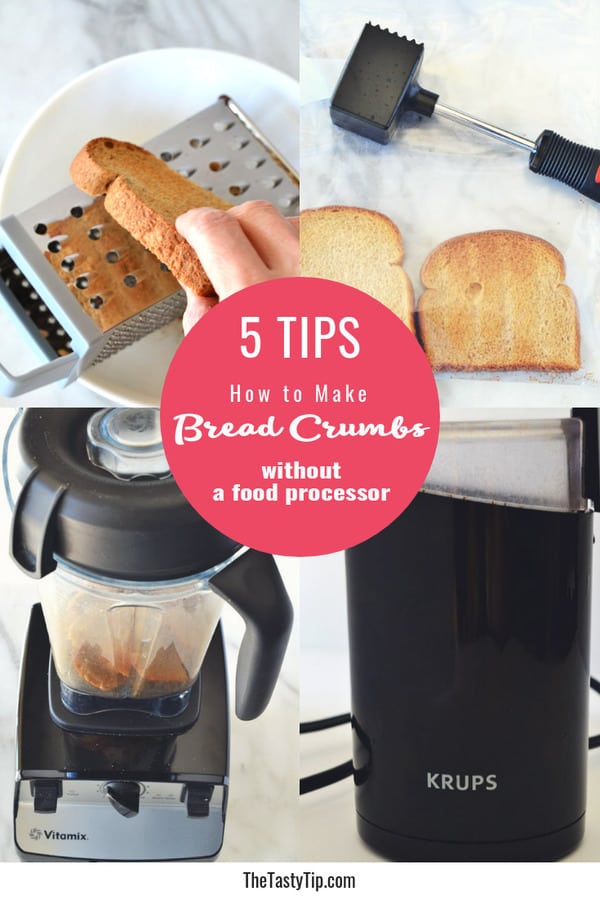
- Use slightly stale bread or toast fresh slices for a few minutes.
- Press a slice flat with your hand to make grating easier.
- Run the bread over the small-hole side of a box grater into a bowl.
- Pulse larger pieces on the grater or re-grate until even.
A box grater gives consistent results and is great when you need fine crumbs for binding or coatings. This is one of my go-to ways to make bread crumbs without food processor when I need speed and control.

Source: youtube.com
Method 2: Rolling pin and bag (best for coarse crumbs)
This method is gentle and gives rustic crumbs.
- Put torn or cubed bread into a sturdy zip-top bag.
- Seal the bag, removing excess air.
- Use a rolling pin to crush the bread until you reach the desired size.
- Sift out very fine flour bits or re-crush larger pieces.
This technique is ideal for panko-style crumbs and for kids to help with. I often use it when I make fish fry or baked mac and cheese toppings because it gives a light, flaky texture.
:max_bytes(150000):strip_icc()/101329520-Slicing-slices-of-bread-for-breadcrumbs-Photo-by-Meredith-165a695c7ced421aa22d58543d6c7ef4.jpg) chopping board”
chopping board”
style=”max-width: 100%; height: auto; border: 2px solid black; border-radius: 10px; display: block; margin: 0 auto;”
loading=”lazy”
/>Source: allrecipes.com
Method 3: Knife and chopping board
Chopping is precise and works well for moist or fresh bread.
- Stack slices and slice into thin strips.
- Turn the strips and chop crosswise into small cubes.
- Chop repeatedly until the pieces are the size you want.
- Spread on a tray and toast briefly if crumbs are too soft.
When you don’t want to dry bread first, chopping is a reliable route. I use this when the kitchen is quiet and I want an exact crumb size. This is another practical approach to how to make bread crumbs without food processor.
Source: themom100.com
Method 4: Mortar and pestle or meat mallet
Use physical force for small batches or very coarse crumbs.
- Tear bread into small pieces and put into a sturdy bowl or mortar.
- Smash with a meat mallet or pestle until you get the texture you want.
- For even results, strain and re-mash larger pieces.
This method works well for crunchy toppings or when you want an uneven, rustic crumb. It’s also perfect when you’re camping or lack kitchen gadgets. Learning how to make bread crumbs without food processor gets easier with a few hands-on techniques like this.
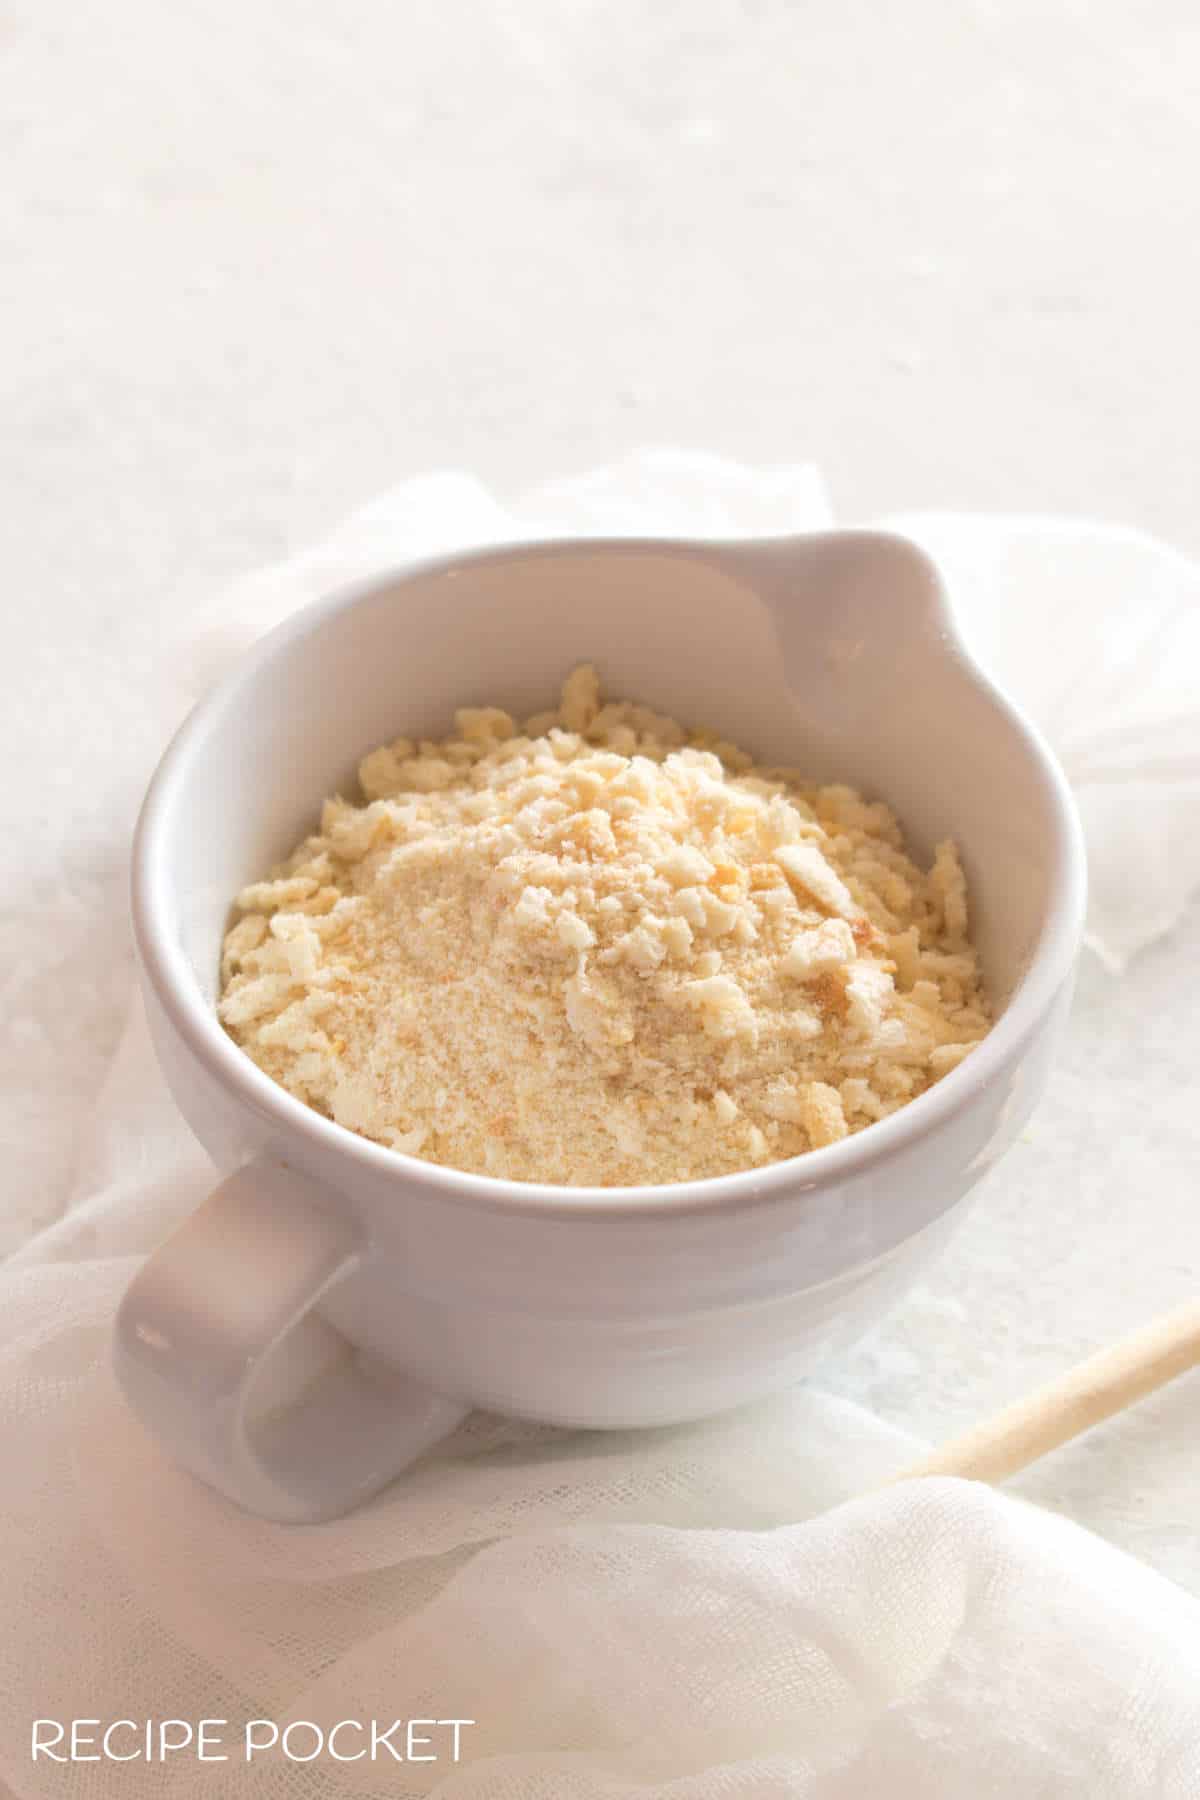
Source: recipepocket.com
Drying and toasting breadcrumbs
Drying helps shelf life and crunch.
- Oven method: Spread crumbs on a baking sheet and toast at 250°F (120°C) for 10–15 minutes, stirring once.
- Skillet method: Toast over medium low heat, stirring until golden and dry.
- Toaster method: Toast slices first, then crush.
Cool completely before storing. Proper drying is key when learning how to make bread crumbs without food processor because moisture leads to spoilage.

Source: gingerandseasalt.com
Flavoring and seasoning your breadcrumbs
Seasoning customizes crumbs for many dishes.
- For savory coatings: mix salt, pepper, garlic powder, and dried herbs.
- For Italian-style crumbs: add grated Parmesan and dried oregano.
- For sweet crumbs: mix cinnamon and a touch of sugar for streusel or crumb toppings.
Taste as you go. I once over-salted an entire batch; now I season lightly and adjust in the final dish. Making bread crumbs without food processor lets you add flavor right at the start.
Storage and shelf life
Store crumbs properly to keep flavor and texture.
- Short-term: airtight container at room temperature for up to 3 days if not fully dried.
- Long-term: airtight container in the freezer for up to 3 months.
Label with date. If crumbs smell stale or show moisture, discard. I always freeze a portion because it saves time and ensures I have homemade crumbs ready when I need them. This is a practical part of how to make bread crumbs without food processor that many cooks overlook.
Troubleshooting and pro tips
Quick fixes and tips to get perfect crumbs every time.
- If crumbs clump: they may still be moist. Re-toast briefly.
- If crumbs are too fine: use a coarser grater or roll gently rather than crush hard.
- If crumbs taste flat: add a pinch of salt or a bit of grated cheese.
- Scale up: use multiple baking sheets and the oven-dry method for large batches.
A mistake I made early on was using fresh, soft bread without drying it. The crumbs turned gummy. Dry first, then crush; that tip will save you time. Practicing these tips will improve how to make bread crumbs without food processor quickly.
Frequently Asked Questions of how to make bread crumbs without food processor
How long should I dry bread before making crumbs?
Toast or oven-dry bread until it feels dry and crisp but not browned. This usually takes 10–20 minutes at low heat, depending on slice thickness.
Can I use fresh bread to make crumbs without a food processor?
Yes, but fresh bread should be toasted or left to stale for a few hours first; otherwise, crumbs can be soggy and clump.
How do I make panko-style crumbs without a food processor?
Tear bread into pieces, toast lightly, then crush with a rolling pin or hands to keep larger flaky pieces for panko-like texture.
Are homemade bread crumbs gluten-free?
Only if you use gluten-free bread. The method of making crumbs without a food processor does not change the gluten content.
What is the best bread to use for crunchy crumbs?
Crusty breads like baguette or sourdough make the crunchiest crumbs; softer sandwich bread gives a finer, denser crumb.
Conclusion
Making bread crumbs without food processor is easy, flexible, and often tastier than store-bought options. Use a grater for fine crumbs, a rolling pin for flaky crumbs, or a knife for precision, and always dry crumbs well before storing. Try one method today and tweak seasonings to match your dish; you’ll save money and gain a useful kitchen skill. Share your results, subscribe for more kitchen tips, or leave a comment with your favorite crumb trick.


