
Most often a poor seal, blocked vent, or not enough liquid keeps pressure from building.
I’ve fixed and tested dozens of pressure cookers in home kitchens and rentals, so I know why pressure build-up fails and how to fix it. This guide explains why is my pressure cooker not building pressure, shows clear troubleshooting steps, points out common part failures, and gives safety tips you can use right away. Read on to solve the issue quickly and safely.

Why a pressure cooker fails to build pressure
Pressure cookers trap steam to raise pressure and speed cooking. If the pot can't trap steam, pressure never rises.
Common root causes include faulty seals, blocked vents, too little liquid, warped lids, and incorrect locking. When you search why is my pressure cooker not building pressure, you want simple checks and safe fixes. Below you’ll find easy steps to diagnose and repair the problem.
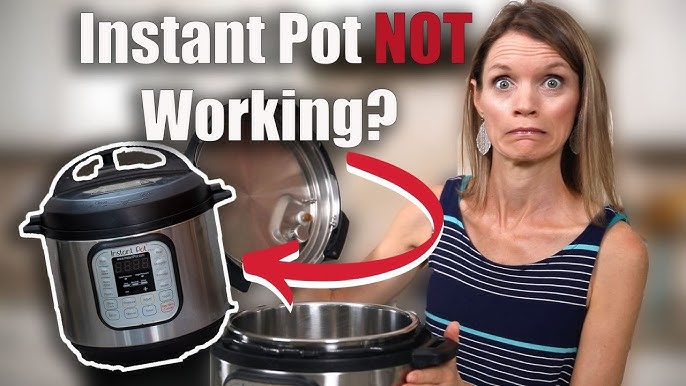
Step-by-step troubleshooting guide
Follow these steps in order. Each step takes a few minutes and can save time and money.
- Check liquid level: Ensure the recipe calls for the correct liquid amount and the base has at least the minimum water for your cooker. If there’s too little liquid, steam runs out faster than it can build pressure.
- Inspect the sealing ring: Remove and look for cracks, stretching, or food trapped along the ring. A worn or dirty ring is the top reason why is my pressure cooker not building pressure.
- Clean the vent and valves: Remove food debris from the pressure release, float valve, and vent tube with a soft brush or toothpick. A partial or full blockage prevents pressure rise.
- Verify lid lock and alignment: Re-seat the lid correctly; many models require a specific notch and twist to lock. If the lid is not aligned, locking pins won’t engage and pressure will leak.
- Test the float valve: Press the float (when cold) to see if it moves freely. If it sticks, it will not seal and pressure will not build.
- Try a simple boil test: Add the proper water amount, close the lid, heat and time how long to reach pressure. If pressure never appears, you have a mechanical issue.
I once spent an hour chasing leaks until I found a tiny pasta piece in the vent. Small things often cause big headaches.
Parts to inspect and common faults
Knowing the parts helps you find the problem fast. Here are the components to check and what to look for.
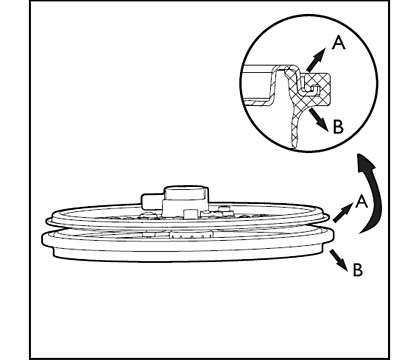
- Sealing ring (gasket): Look for tears, flattening, or compression set. Gaskets normally need replacement every 12–36 months with regular use.
- Vent pipe and pressure valve: Clear any grease or debris that jams this pathway. Build-up here is a frequent cause of "why is my pressure cooker not building pressure."
- Lid and locking mechanism: Check for dents, warping, or damaged locking tabs. Warped lids may not seat properly.
- Float pin assembly: Make sure the pin slides and pops up under pressure. Sticky pins mean pressure can't be retained.
- Safety valves and secondary seals: If a safety valve is damaged, the cooker will vent at a low pressure to stay safe.
If a part looks damaged or brittle, replace it. Use manufacturer parts for best fit and safety.

Safety, maintenance, and best practices
Safety matters most when dealing with pressure. Follow these practical rules to avoid problems and keep your cooker working.
- Always use the required liquid amount listed in the manual or recipe. Without enough steam, pressure won't build.
- Clean the lid, gasket, and vents after each use to avoid blockages. Regular cleaning prevents common failures.
- Replace the gasket per manufacturer recommendations or when you see wear. A new gasket restores sealing performance.
- Never force open a cooker until the pressure has fully released. Forcing the lid can injure you and damage parts.
- Store the gasket outside the lid if recommended to avoid permanent deformation. Some cooks keep the ring separately to keep its shape.
Good maintenance saved me from replacing a whole unit after only a year of heavy use. Small habits prevent big repairs.

When to repair or replace your pressure cooker
Decide to repair when parts are replaceable and economical. Replace when the body is warped or safety systems fail.
Consider repair if:
- The gasket, float, or valve needs replacement.
- The issue is a small part that costs less than half the unit’s value.
Consider replacement if:
- The lid or pot is dented or warped.
- Safety valves or pressure regulators are irreparably damaged.
- The cooker is old and no longer has replacement parts available.
If you find recurring leaks after replacing parts, stop using the unit and get professional advice or replace it.

Frequently Asked Questions of Why is my pressure cooker not building pressure
Why is my pressure cooker not building pressure after filling with water?
If pressure isn’t building, check the sealing ring, vent, and float. Also confirm the lid is locked and the correct water level is used.
Could a warped lid stop pressure from building?
Yes. A warped lid can prevent a tight seal and cause constant leaks, so pressure cannot rise.
How much liquid do I need for pressure to build?
Follow your cooker’s manual; most require at least 1 cup or minimum fill marks. Too little liquid means not enough steam to pressurize the pot.
Can a dirty vent really stop pressure build-up?
Absolutely. Grease or food in the vent blocks steam flow and prevents pressure from building properly.
Is it safe to use a pressure cooker with a damaged gasket?
No. A damaged gasket prevents sealing and risks leaks during cooking. Replace the gasket before further use.
How do I test the float valve?
With the cooker cool, press and release the float to ensure it moves freely. A sticky float often signals cleaning or replacement is needed.
When should I seek professional repair?
Seek professional help if safety valves fail or the cooker has internal damage. Do not use a cooker with compromised safety systems.
Conclusion
You can usually solve why is my pressure cooker not building pressure by checking the gasket, vents, liquid level, and lid alignment. Start with simple cleaning and visual checks, then replace small parts if needed. If safety systems or the body are damaged, replace the unit. Try the troubleshooting steps today, and leave a comment with your model and symptoms if you need more help. Consider subscribing for more easy kitchen fixes and guides.