Use a zone system, clear stackable containers, consistent labels, and a simple rotation plan.
I have organized dozens of kitchens and helped families reclaim shelves and drawers using practical systems. This guide on how to organize kitchen storage containers draws on hands-on experience, smart principles, and easy steps you can use today to make your kitchen calm, efficient, and safe.
Why organized containers matter
A tidy container system saves time, reduces waste, and keeps food fresh. When you learn how to organize kitchen storage containers, you cut meal prep time and lower grocery costs. Clear rules and zones make the space usable for everyone in the home.
:max_bytes(150000):strip_icc()/thd-busymom-tupperware-0315_vert-1-2000-horiz-1222-25bee70a3aa941c3b8d416056ade6392.jpg)
Step-by-step system to organize kitchen storage containers
Follow this simple flow to tackle containers fast and well.
- Empty and sort
- Remove all containers and lids from cabinets and drawers.
- Group like with like: lids, small containers, large containers, odd pieces.
- Purge and keep essentials
- Toss warped, cracked, stained, or mismatched lids and bases.
- Keep a core set: small, medium, large, and 1-2 nesting bowls.
- Match lids to containers
- Stack containers by nesting size and put matching lids together.
- Use a bin or lid organizer for lids only.
- Assign zones
- Create a "frequent use" zone near the prep area for daily containers.
- Store seasonal or rarely used items in higher or lower cabinets.
- Arrange for access
- Put clear, stackable sets at the front.
- Use vertical dividers or pull-out trays for lids and shallow containers.
- Label and maintain
- Label shelves or containers so everyone can return items correctly.
- Do a quick tidy monthly to spot missing lids or broken pieces.
This step-by-step approach shows how to organize kitchen storage containers with a focus on ease and habit. Stick to the system and it will pay off every week.
Choosing the right containers
Pick containers for your cooking style and storage needs. When thinking how to organize kitchen storage containers, favor these features:
- Clear material so you see contents at a glance.
- Stackable shapes that nest when empty and stack when full.
- Airtight seals for dry goods and leftovers.
- A mix of sizes to match common portions and cookware.
Avoid buying many odd shapes. I once kept mismatched boxes for months. Replacing them with a few uniform sizes cut clutter and made it simpler to organize kitchen storage containers.
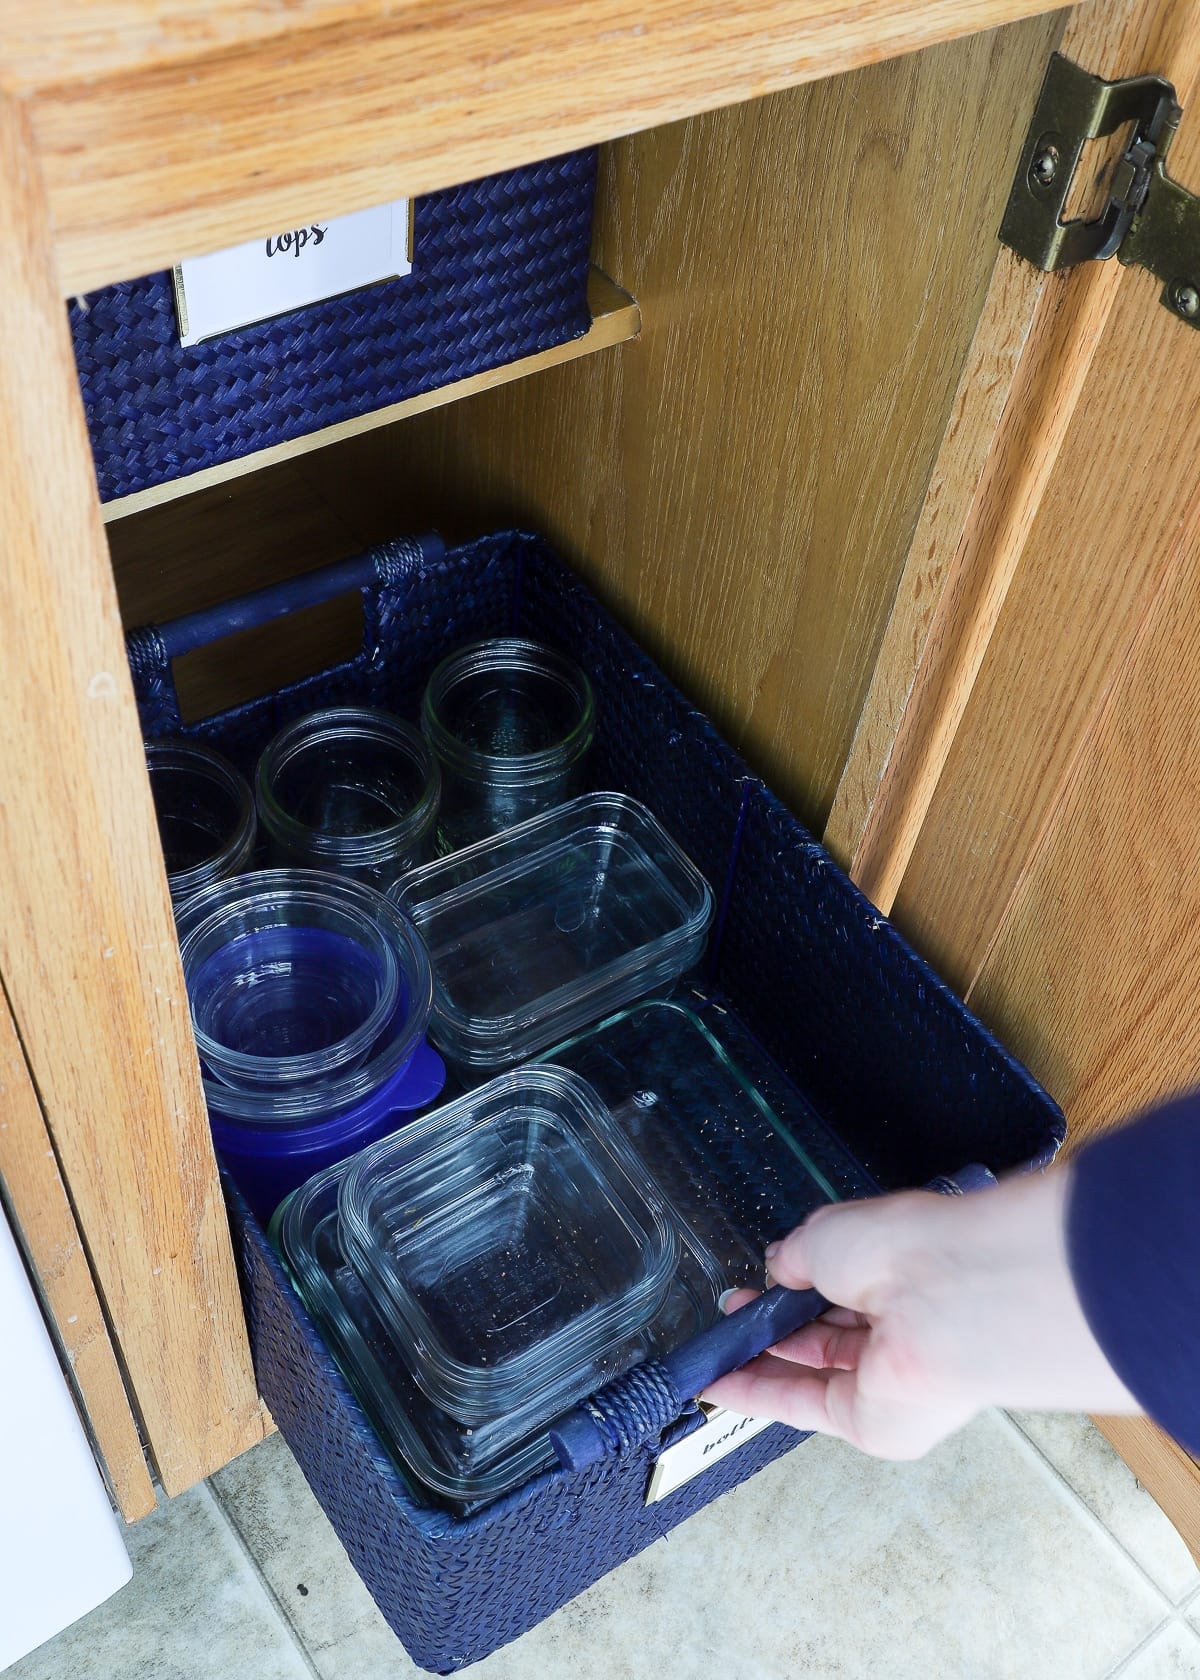
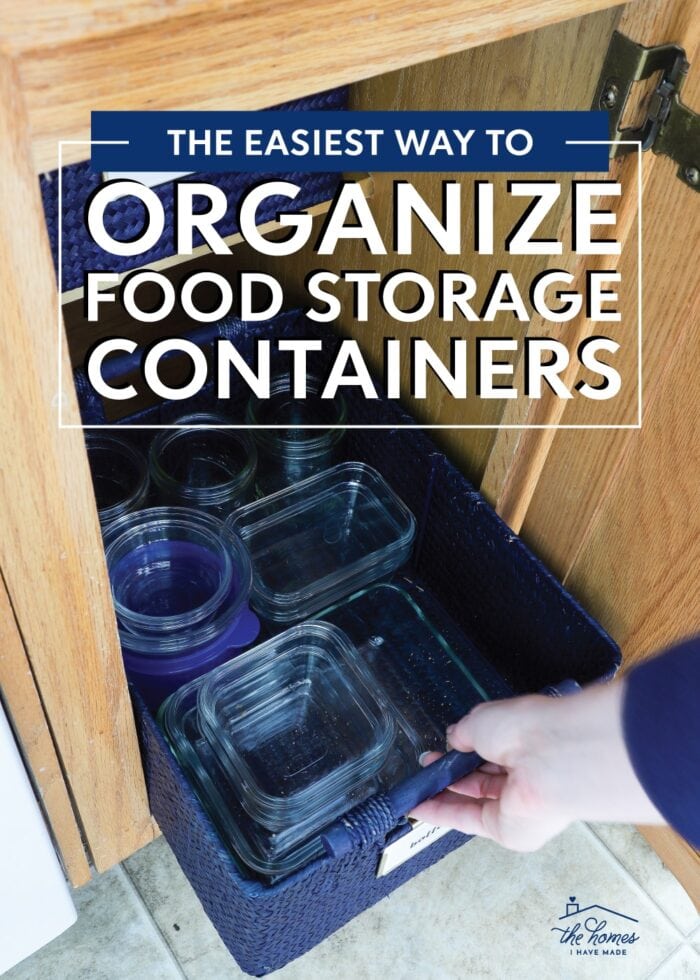
:strip_icc()/plastic-bins-in-cupboard-for-storage-container-organization-c532e2a5-db746fa3bbeb4c3abb005eeca27adeb9.jpg)
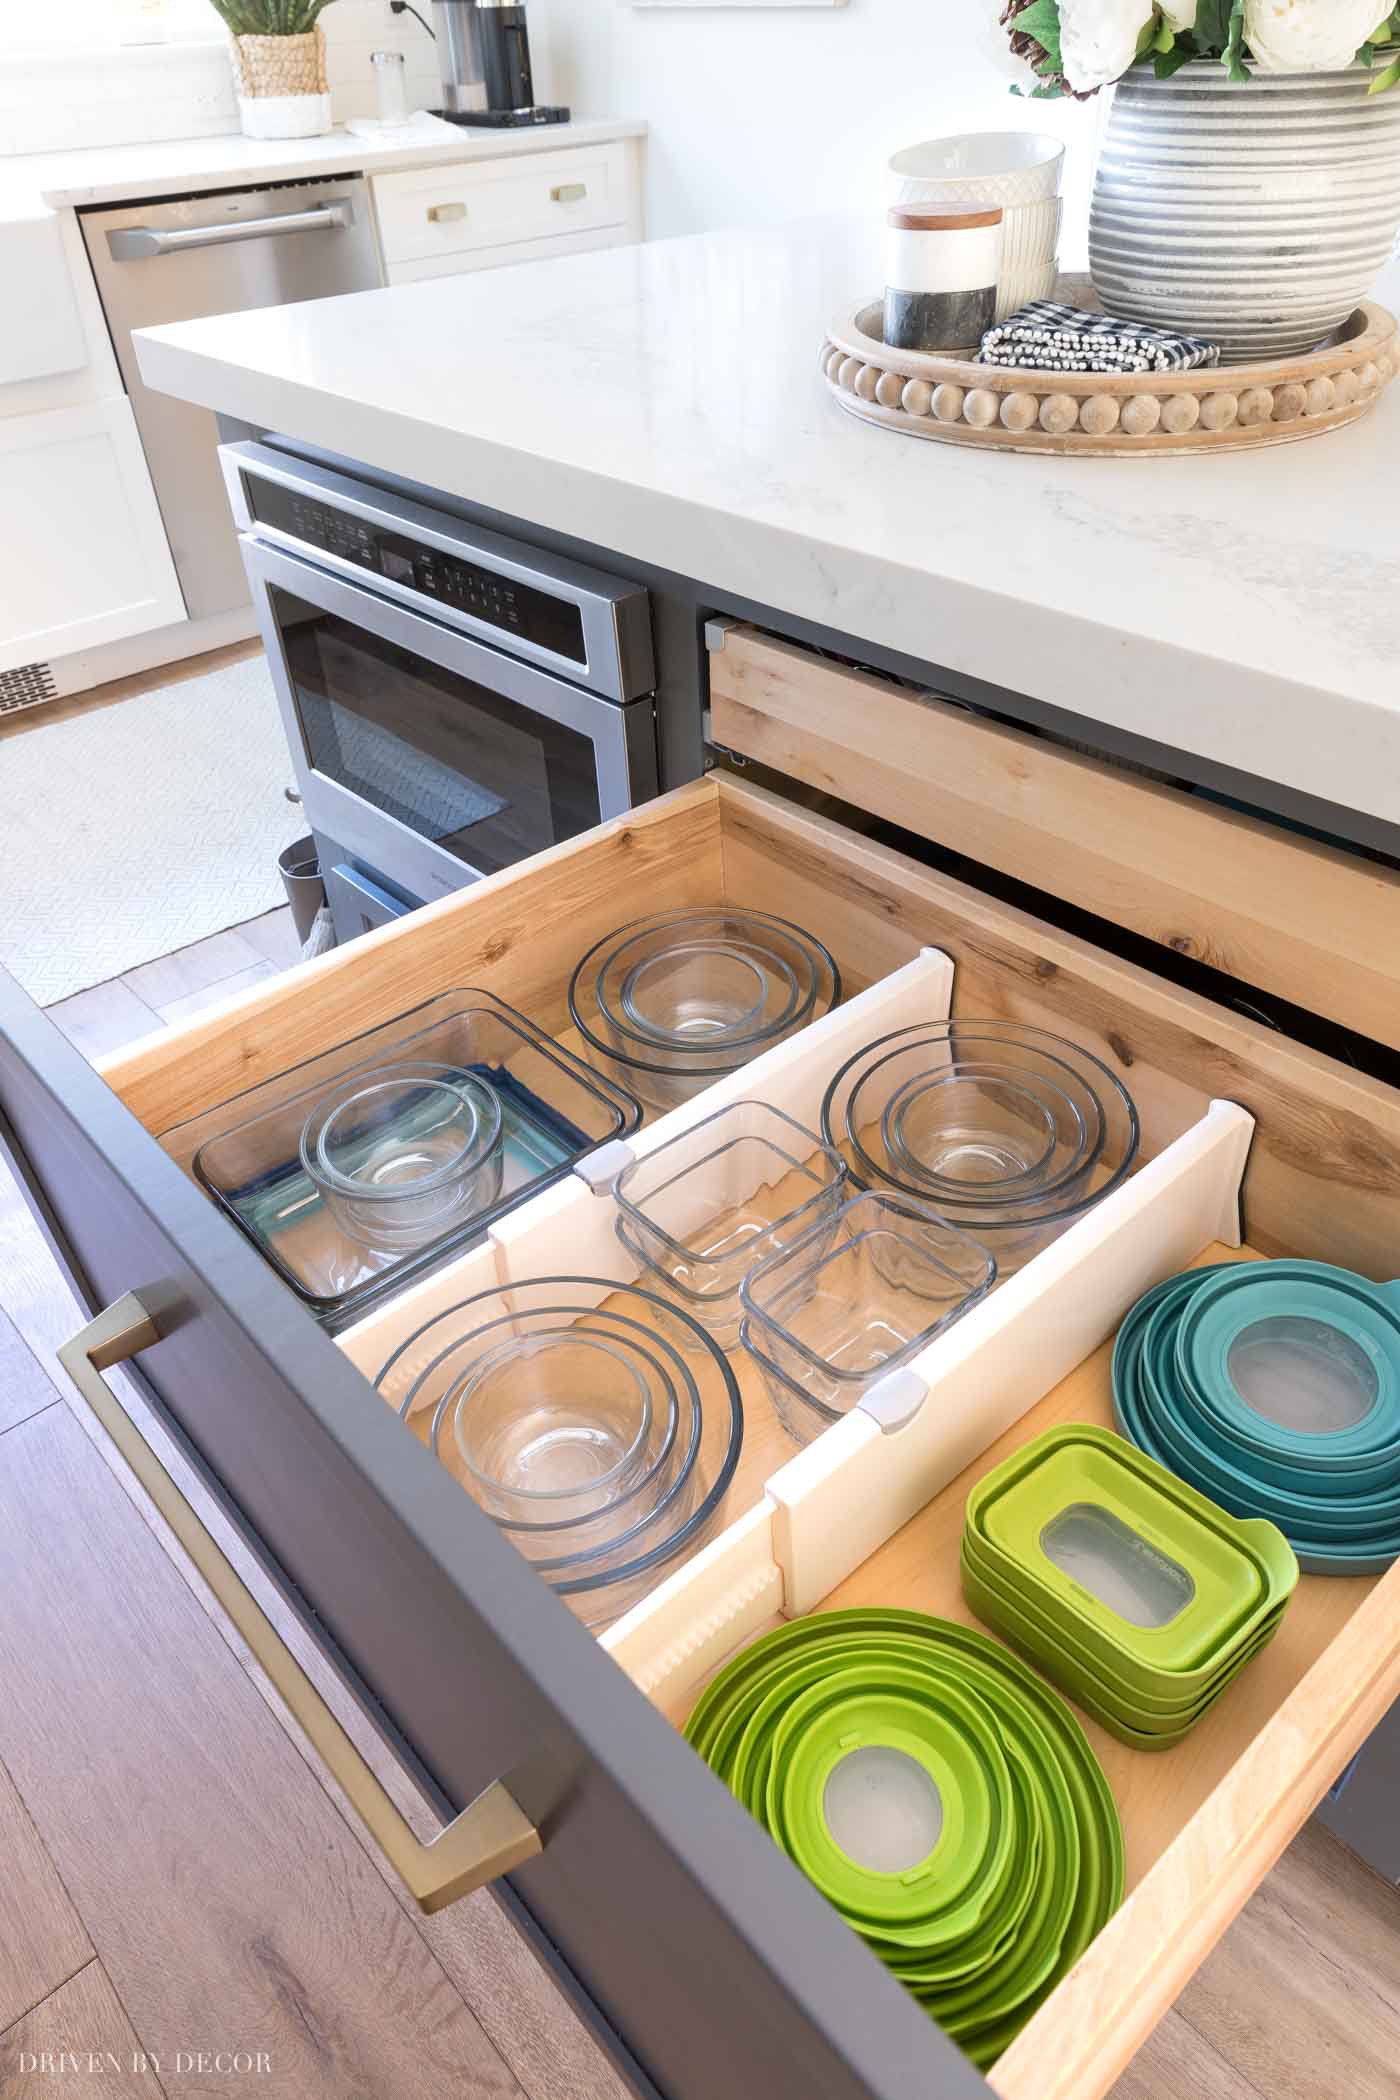
Layout and storage solutions
A good layout keeps containers close to the tasks they support. Here are easy placement ideas when you decide how to organize kitchen storage containers:
- Drawers near prep areas for lids and small containers.
- Upper cabinets for lightweight, frequently used sets.
- Deep lower cabinets for large containers and nesting bowls.
- Pull-out shelves or trays for easy reach and neat stacking.
- Door-mounted racks or lid organizers to free shelf space.
Try a trial layout for one week and tweak it. Small changes help you lock in the best plan for your workflow.

Labeling, inventory, and rotation
Labels and a simple inventory stop waste and confusion. Use a short system to maintain order and show how to organize kitchen storage containers long-term.
- Use consistent labels: shelf labels or container labels with dates.
- Mark leftovers with dates to use older food first.
- Keep a short inventory list for bulk goods in containers.
- Rotate seasonal or bulk items so nothing gets lost at the back.
I label lids with a small dot system for sizes. It sounds fussy but it saves time when I'm cooking for guests.
:strip_icc()/blue-plastic-storage-containers-in-drawer-7faa034c-670408b7f3a94e3e9fb204cedaed2938.jpg)
Common mistakes and fixes
Avoid these pitfalls when you learn how to organize kitchen storage containers.
- Mistake: Keeping unmatched lids separate from bases. Fix: Group lids in a bin and stack bases by nest size.
- Mistake: Using too many specialty containers. Fix: Return to a core set of versatile sizes and store extras for special use.
- Mistake: Storing containers far from prep areas. Fix: Move daily-use containers to the main work zone.
- Mistake: Not labeling. Fix: Add simple labels and a habit of dating leftovers.
Addressing these common issues keeps the system working and helps others in the home follow it too.
Tips from my experience
Real homes teach better than theory. From years of organizing kitchens I share these quick tips for how to organize kitchen storage containers that actually stick:
- Start with one cabinet. Small wins build momentum.
- Take photos before and after. Photos help you keep the setup consistent.
- Use shallow drawers for lids and tall cabinets for nesting sets.
- Keep lids vertical or in a flat bin labeled by size.
- Keep a small repair kit for cracked lids temporarily, then replace as needed.
One family I worked with kept lids loose in a drawer. Adding a simple basket and a label cut the search time in half. Little changes add up fast.

Frequently Asked Questions of how to organize kitchen storage containers
How many containers should I keep?
Keep a practical set: about 6 small, 6 medium, 4 large, and 2 nesting bowls. Adjust by household size and how often you cook.
Should I match all lids and bases or buy a set?
Buying a matched set is ideal for ease and stacking. If you already have many pieces, sort and keep matching sets for daily use.
Are glass or plastic containers better?
Glass is durable and stain-resistant; plastic is lighter and less breakable. Choose based on safety, use, and storage needs.
What is the best way to store lids?
Store lids vertically in a narrow bin or use a lid holder. This saves space and makes finding matches faster.
How often should I purge containers?
Purge every 3 to 6 months. Toss warped or missing-lid items and replace only if needed.
Conclusion
Organizing your containers is a small project with big returns. Use zones, clear stackable sets, consistent labels, and a simple rotation to keep things tidy and fast. Start with one cabinet, apply the steps here, and you’ll see more free counter space and less stress. Try one change this weekend, and share your results or questions below — I’d love to help you refine the setup.


