Attach crown moulding to kitchen cabinets by measuring, coping or mitering corners, and nailing with adhesive.
I’ve installed crown on many kitchens, so I’ll walk you through exactly how to attach crown moulding to kitchen cabinets with clear steps, smart tips, and mistakes to avoid. This guide covers tools, measuring, cutting, fastening, finishing, and common fixes so you can get a tight, professional look without guesswork.

Why add crown moulding to kitchen cabinets?
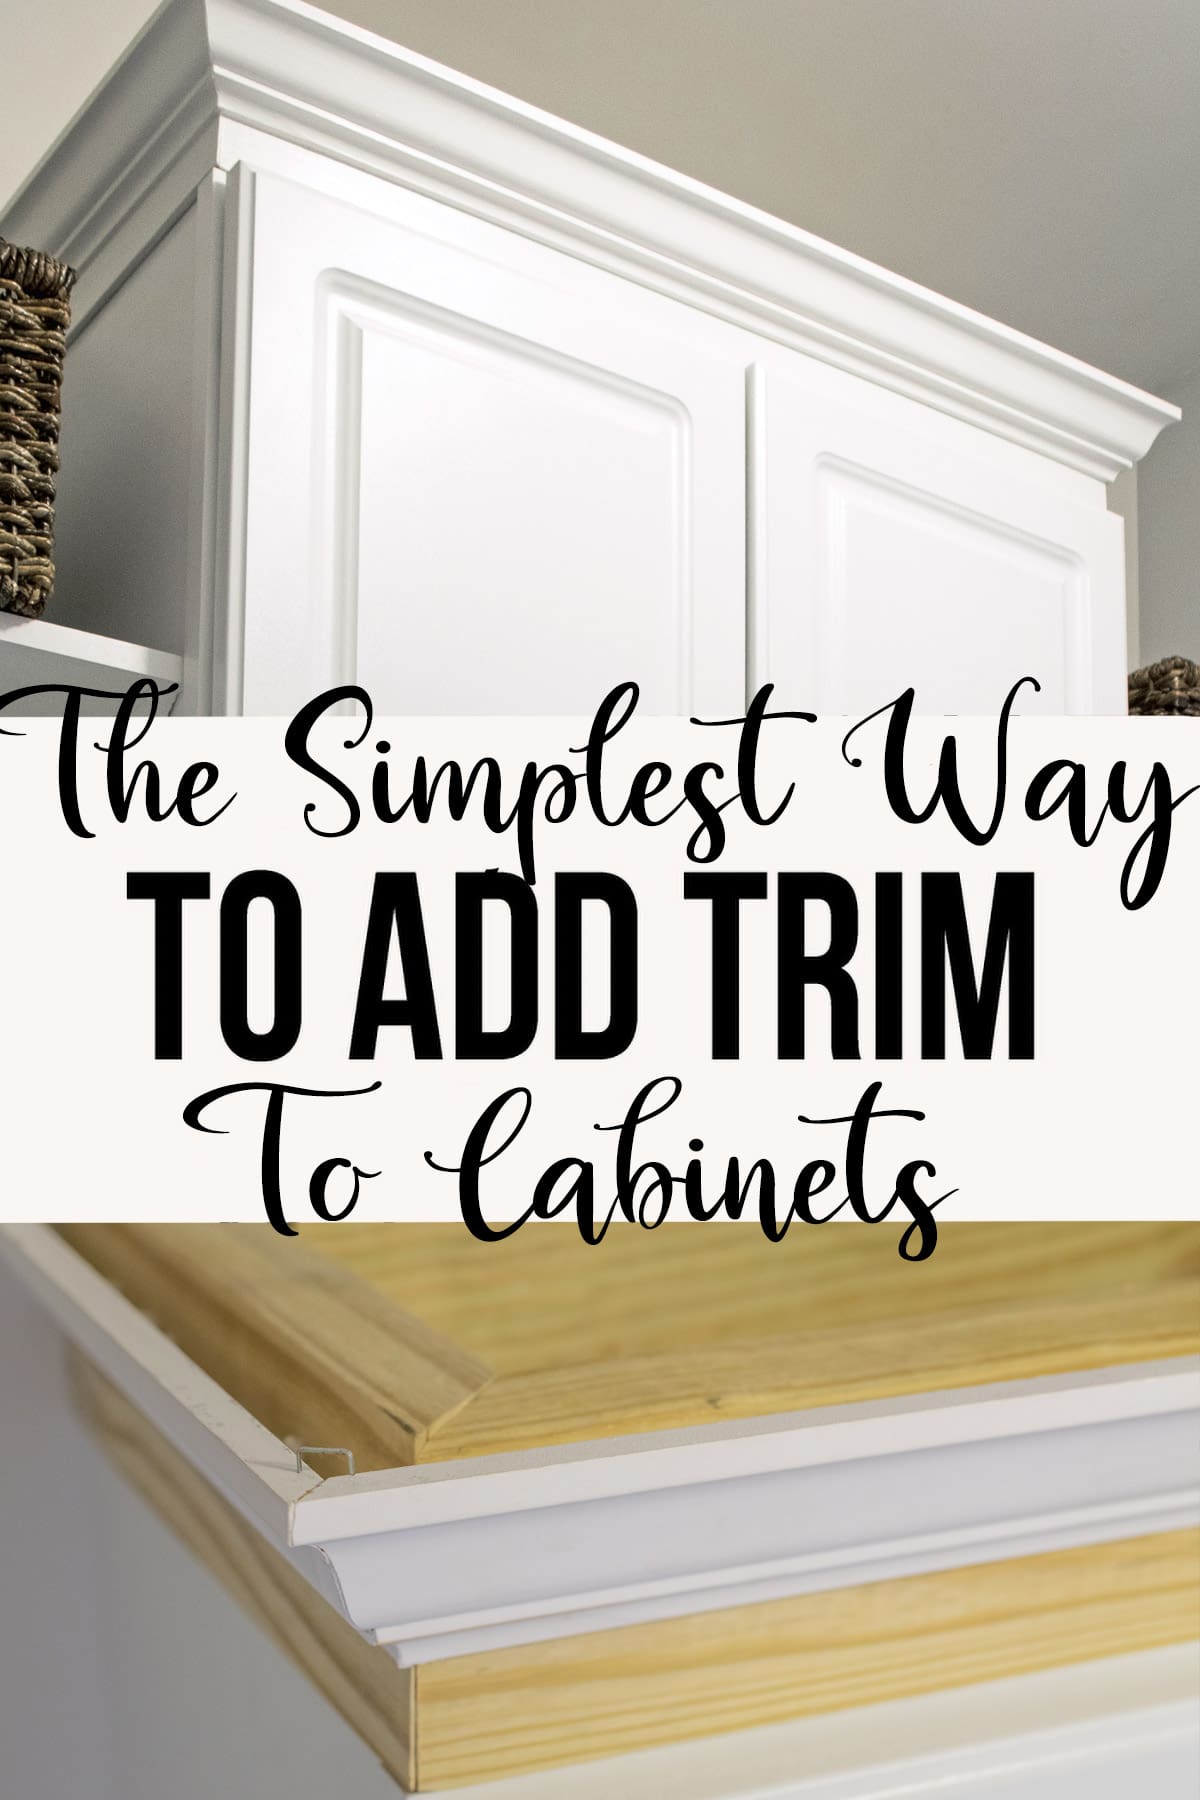
Crown moulding finishes the top of cabinets. It hides gaps, adds style, and raises the value of your kitchen. Knowing how to attach crown moulding to kitchen cabinets helps you get a clean, custom look that lasts. I’ll show easy methods for framed and frameless cabinets and for uneven walls.
Tools and materials you’ll need
Use these to attach crown moulding to kitchen cabinets with speed and accuracy.
- Miter saw for clean angle cuts.
- Coping saw for inside corners if you cope joints.
- Tape measure and speed square for layout.
- Pneumatic finish nailer or brad nailer and 2-inch nails.
- Construction adhesive or polyurethane glue for strong bonds.
- Caulk, wood filler, and painter’s caulk for seams.
- Sandpaper, primer, and paint or stain.
- Clamps and scrap wood for temporary holds.
- Safety gear: glasses and hearing protection.

Preparing cabinets and moulding
Preparation saves time and prevents gaps.
- Clean the top of cabinets and remove dust. A flat surface helps the moulding sit tight.
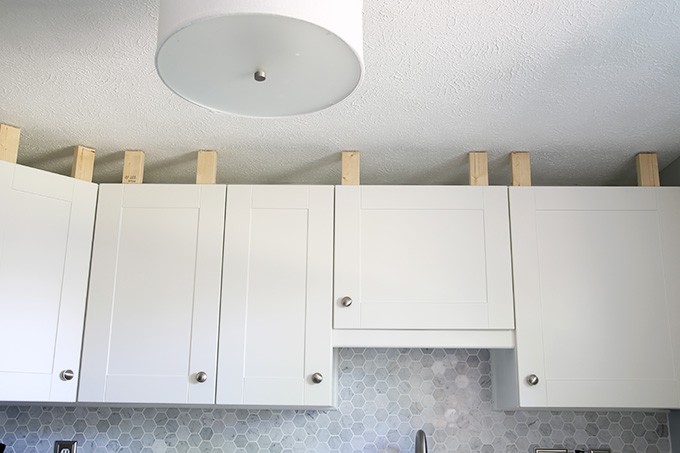
- Decide whether the crown sits on top of the cabinet or is fastened between the top and the wall. This affects how you cut the moulding.
- Prepaint or prime the moulding if you prefer a smooth finish. It is easier to paint before final installation.
- Mark studs and blocking behind the cabinet top. You want nails to hit solid wood when possible.

How to attach crown moulding to kitchen cabinets: step-by-step
These steps explain how to attach crown moulding to kitchen cabinets for a neat, durable result.
- Measure each run carefully. Add 1/8 inch for adjustments, but cut to exact length when final.
- Choose orientation. Many installers place crown so the decorative face rests against the wall. Decide based on profile and gaps.
- Cut outside corners on the miter saw. Use 45-degree angles for simple runs when walls are plumb.
- For inside corners, choose coping or mitering. Coping gives tighter seams on imperfect walls. Mitering is faster on perfect walls.
- Dry-fit each piece. Hold moulding in place to check gaps and make notes. Use small blocks to simulate cabinet height.
- Apply construction adhesive to the back edge that contacts the cabinet top. This reduces nail counts and helps with uneven surfaces.
- Nail through the moulding into the cabinet face frame or blocking. Use 2-inch finish nails spaced every 12–16 inches. Countersink nails slightly.
- When possible, shoot a nail at a downward angle into the cabinet top edge to pull the moulding tight to the wall and cabinet.
- Fill nail holes with wood filler, then sand smooth. Use painter’s caulk on top and bottom seams to hide tiny gaps.
- Touch up paint or stain. If you prepainted, do a light final coat to seal seams.
- Add end returns where a run terminates or meets an adjacent cabinet face. Returns make the finish look built-in.
- Clean the work and inspect seams. Re-caulk any visible gaps and retouch paint as needed.
This is the core process for how to attach crown moulding to kitchen cabinets. Work slowly on corners and check fit often.

Corner methods: coping vs miter
Corners make the biggest difference in final fit.
- Coping
- Cut one piece square and the mating piece is coped. This yields very tight inside corners.
- Best for imperfect walls and older homes with small shifts.
- Mitering
- Cut both pieces at 45 degrees. Works well on straight walls and when you have precise tools.
- Faster and cleaner on perfect jobs.
Use coping when you want a seam that hides movement. Use mitering for speed on well-constructed cabinets. Practice on scrap moulding until cuts are clean.

Dealing with uneven cabinets, ceilings, and gaps
Real kitchens are rarely perfect, so plan for fixes.
- Shim behind moulding at the cabinet top to bridge gaps. Small shim pieces level the moulding.
- Use backing strips or blocks when you can’t nail into blocking. Screw blocks to the cabinet top, then nail the moulding to the block.
- For gaps between moulding and ceiling, add a crown filler or spacer strip to match height and angle.
- Flexible caulk hides small gaps. Use paintable caulk for a seamless look.
These solutions keep the crown aligned and reduce visible separation over time.

Fastening options and safety tips
Choose the right fastener for durable results.
- Use a 16- or 18-gauge finish nailer for most wood crown mouldings. For dense hardwoods, use finishing nails that penetrate deeply.
- Adhesive plus nails gives a strong hold and helps on thin cabinet tops.
- If using screws, countersink and plug the holes for a clean finish. Screws are best when cabinets are frameless and you need extra holding power.
Safety tips - Always wear eye and ear protection when cutting and nailing.
- Cut away from your body and clamp moulding while cutting or coping.
- Check for wiring or plumbing before driving screws or long nails into cabinet tops.
People also ask
How long does it take to attach crown moulding to kitchen cabinets?
Most single runs for an experienced DIYer take a few hours. Full kitchen installs commonly require one to three days, depending on complexity.
Can I attach crown moulding to frameless cabinets?
Yes. Add blocking or screw-in backing behind the cabinet top so you can nail and glue the moulding securely.
Should I paint crown moulding before or after installation?
Painting beforehand is easier for tight spots, but a final touch-up after installation ensures clean seams and spots covered.
Personal experience and pro tips
I’ve fit crown moulding in tight galley kitchens and open, airy kitchens. A few lessons I learned will save you time.
- Prepaint whenever possible. It cuts touch-up time later.
- Always dry-fit on scraps. I wasted less wood after this habit.
- Use double-sided tape to hold small or tricky pieces during final nailing. It keeps things steady and saves clamps.
- Watch grain direction. On stain-grade moulding, match grain and color pieces to avoid visible shifts.
My worst mistake was rushing corners. A slow, careful cut made the final seam nearly invisible.
Frequently Asked Questions of how to attach crown moulding to kitchen cabinets
What is the best way to secure crown moulding to cabinet tops?
Use a combination of construction adhesive and finish nails into the face frame or blocking. This provides both immediate hold and long-term strength.
Do I need to prepaint crown moulding?
Prepainting is helpful. It makes painting edges and inside corners easier and reduces finish work after installation.
How do I handle gaps between moulding and wall?
Use a foam backer or thin shims for large gaps and paintable caulk for small gaps. You can also add a filler strip to match angles.
Can I install crown moulding alone?
Yes, but having a helper speeds things up. For long runs, use temporary supports or blocks to hold pieces while you nail.
What nail size should I use to attach crown moulding?
Use 1 1/4 to 2-inch finish nails for most mouldings. Choose length so the nail penetrates the cabinet frame or blocking.
Conclusion
You now have a clear, practical plan for how to attach crown moulding to kitchen cabinets. Measure well, choose coping or mitering for corners, use adhesive plus nails, and finish seams with caulk and paint. Take your time on corners and dry-fit pieces first. Try one small run to build confidence, then move through the rest of the kitchen. If this guide helped, leave a comment with your project photos or subscribe for more step-by-step home projects.


