Disconnect plumbing, remove mounting clips, lift out the old sink, set the new sink with sealant, reconnect.
I’ve replaced dozens of sinks and will walk you through how to replace a drop in kitchen sink with clear steps, practical tips, and real-world troubleshooting. This guide mixes hands-on experience, safety best practices, and simple language so you can confidently learn how to replace a drop in kitchen sink, avoid common mistakes, and finish with a leak-free, solid installation.
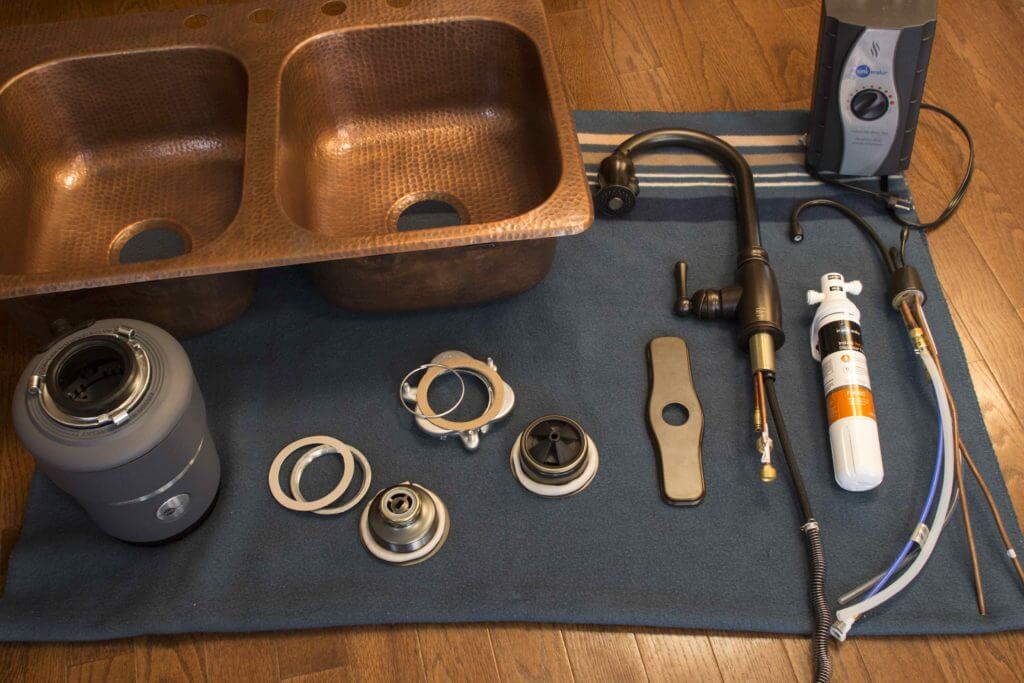
Tools and materials you’ll need
Before you start, gather the right tools and parts. Preparing upfront saves time and frustration when you learn how to replace a drop in kitchen sink.
- Adjustable wrench for supply lines and trap nuts.
- Plumber’s putty or silicone caulk to seal the rim.
- Putty knife or scraper to remove old sealant.
- Bucket and rags to catch water and wipe surfaces.
- Screwdriver set for clips and brackets.
- Utility knife for cutting caulk and tape.
- New drop-in sink and mounting clips (verify size and hole layout).
- Plumber’s tape (Teflon tape) for threaded connections.
- Masking tape and marker for labeling supply lines.
- Safety gear: gloves and eye protection.

Preparation and safety
Good prep keeps you safe and reduces surprises. When you learn how to replace a drop in kitchen sink, these steps make the job smooth and safe.
- Turn off the hot and cold water shutoff valves under the sink. If there are none, shut off the home’s main water.
- Turn on the faucet to relieve pressure and drain remaining water.
- Put a bucket under the trap to catch water when disconnecting plumbing.
- If your sink area has power outlets or garbage disposal, turn off power at the breaker.
- Measure the countertop hole and confirm the new sink fits. Keep the old sink as a template.
Step-by-step: remove the old drop-in sink
Follow these steps to remove the old sink. Clear steps matter when you’re learning how to replace a drop in kitchen sink.
- Disconnect plumbing
- Place a bucket under the P-trap.
- Loosen the slip nuts on the trap and remove it.
- Disconnect supply lines from faucet with an adjustable wrench.
- Disconnect garbage disposal or dishwasher hose if present
- Unplug disposal or switch off power.
- Remove mounting hardware and disconnect the discharge hose.
- Remove mounting clips and sealant
- From under the countertop, find and remove the sink mounting clips.
- Use a putty knife to cut old sealant around the sink rim.
- Lift out the sink
- With help if the sink is heavy, lift straight up and out.
- Clean the countertop surface of old putty, debris, and grime.
Tips from experience: label any odd hoses with masking tape before you disconnect. I once swapped supply lines and had to trace them for ten minutes—labeling saved me time on later jobs.

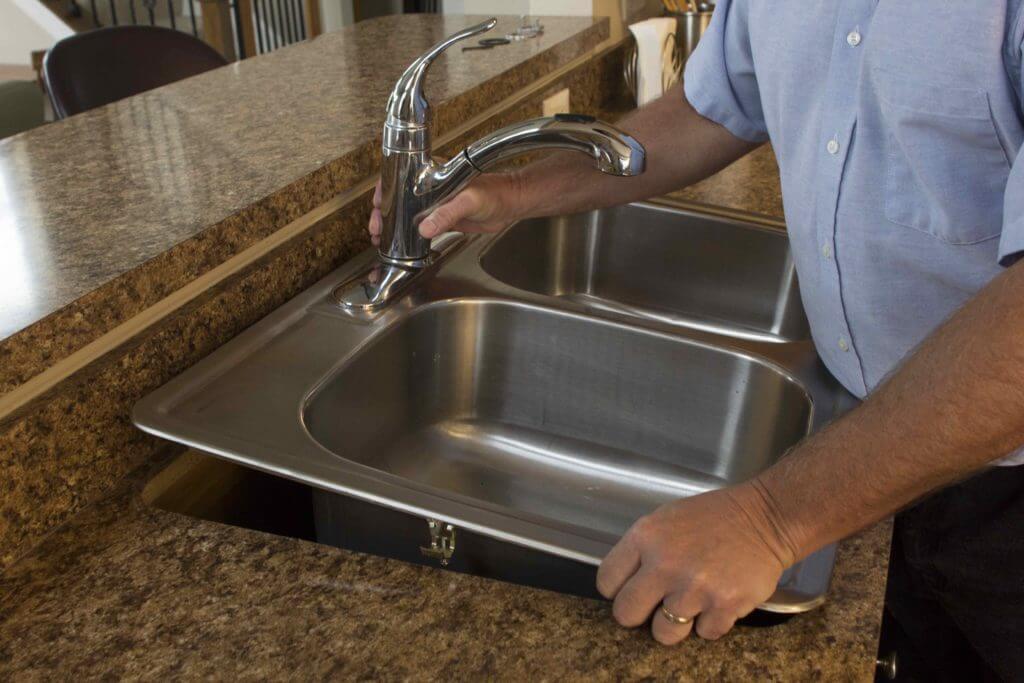
How to fit and install the new drop-in sink
Installing the new sink is straightforward if you follow the order. This section explains how to replace a drop in kitchen sink without rushing.
- Dry fit the sink
- Place the new sink in the hole to check alignment and clearance for faucets and accessories.
- Make small adjustments to the countertop cutout if needed.
- Apply sealant
- Roll plumber’s putty into a rope or apply a bead of silicone around the sink rim.
- For tight, long-lasting seals I prefer silicone where moisture is constant.
- Set the sink and tighten clips
- Lower the sink straight into place.
- From underneath, attach mounting clips and tighten evenly to avoid warping the rim.
- Reinstall faucet, drain, and accessories
- Install faucet and drain assembly per manufacturer instructions.
- Use plumber’s tape on threaded connections for a secure seal.
Real-life tip: I once over-tightened clips and cracked a porcelain rim. Tighten clips firmly but in small increments and check the top rim for flat seating.
Reconnect plumbing and test for leaks
After seating the sink, reconnect plumbing correctly. Proper testing prevents surprises later.
- Reinstall the P-trap and any disposal or dishwasher hoses. Ensure hose clamps are snug.
- Turn water back on at the shutoff valves. Check for leaks at supply lines, faucet base, and trap.
- Run hot and cold water for several minutes. Watch for drips and feel under the sink for moisture.
- If you see small leaks, tighten fittings slightly and recheck. For persistent leaks, remove the fitting and add plumber’s tape.
When I replaced a sink in a rental, a small drip hidden behind the trap caused damage. I now always run water and inspect for at least five minutes.

Common problems and troubleshooting
Even with care, small issues can appear. Knowing fixes helps when you learn how to replace a drop in kitchen sink.
- Sealant gaps
- If water pools around the sink edge, remove the sink, clean the rim, and reapply silicone.
- Misaligned faucet holes
- Use an adapter plate or choose a faucet designed for your hole layout.
- Leaky drain connections
- Tighten slip nuts evenly. Replace worn washers or gaskets when needed.
- Clips that won’t reach
- Use longer mounting hardware or add a thin shim under the clip to increase grip.
PAA-style quick questions
What is the easiest way to seal a drop-in sink?
- Silicone caulk gives a durable, waterproof seal and is easier to clean than old-style putty.
How long does it take to replace a drop-in sink?
- For a homeowner with basic tools, plan 2–4 hours depending on plumbing complexity.
Should you replace the faucet when replacing the sink?
- It’s a good time to replace it if the faucet is old or doesn’t match the new sink’s hole pattern.
Cost, time, and when to hire a pro
Budget and time choices matter. Understand when a pro is better and how much the project can cost.
- Typical DIY cost
- Basic sinks can be $50–$300. Mid-range sinks with new faucets and parts often total $300–$700.
- Professional costs
- Hiring a plumber usually adds $150–$400 for labor, depending on complexity.
- When to hire a pro
- If you need new countertop cuts, have corroded plumbing, or lack confidence with water and electrical safety, call a professional.
From my experience, small jobs sometimes grow. If you discover mold, rotted wood, or major pipe corrosion, stop and call a licensed plumber to prevent bigger problems.

Final checks and finishing touches
Finish strong to ensure a long-lasting job. These small steps improve durability and appearance.
- Clean excess sealant and polish the sink edge.
- Tighten all connections one more time after a full water run.
- Verify disposal and dishwasher connections are secure and leak-free.
- Keep the installation manual and part receipts for future reference.
Frequently Asked Questions of how to replace a drop in kitchen sink
How long does it take to replace a drop in kitchen sink?
Most DIY replacements take 2–4 hours for a single sink, depending on plumbing and access.
Do I need special tools to replace a drop in kitchen sink?
You usually need basic tools: wrench, screwdriver, putty knife, utility knife, and plumber’s tape—no special tools required.
Can I reuse the old plumbing when I replace the sink?
You can reuse many parts but inspect for corrosion and wear; replace damaged or old washers and gaskets for a reliable seal.
Is plumber’s putty or silicone better for sealing a drop-in sink?
Silicone is more water-resistant and durable long-term; plumber’s putty is traditional but can dry and discolor.
What if the new sink doesn’t fit the countertop hole?
You may need to trim the hole, use a sink adapter, or return the sink and choose the correct size to avoid leaks and instability.
Conclusion
You now have a clear, step-by-step path for how to replace a drop in kitchen sink. Start with good prep, the right tools, and patient, even tightening. If you run into plumbing issues beyond your comfort zone, call a licensed plumber to protect your home. Try the project on a weekend, follow the checklist, and share your results or questions below — I’d love to hear what worked for you or help troubleshoot any hiccups.


