
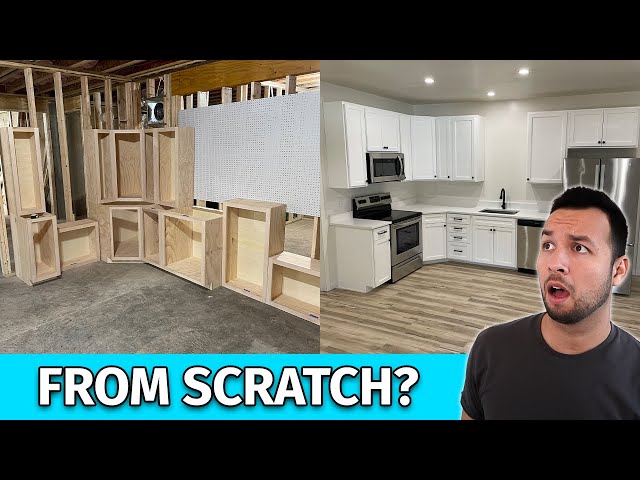
Build kitchen cabinets by measuring, cutting plywood, assembling boxes, and installing doors and hardware.
I’ve taught and built cabinets for years, and this guide on how to build kitchen cabinets will walk you step-by-step from planning to installation. You’ll get clear methods, tool choices, real-world tips, and common mistakes to avoid. Read on to learn practical, reliable techniques to build kitchen cabinets that last.

Materials and tools you need for how to build kitchen cabinets
Choosing the right materials and tools makes building kitchen cabinets far easier. Use quality plywood or MDF for boxes, hardwood for face frames, and durable hardware for hinges and slides. Good tools save time and improve fit.
Essential materials
- 3/4" plywood or high-quality cabinet-grade plywood for carcases
- 1/4" plywood for backs
- Hardwood or 3/4" plywood for face frames and rails
- Drawer slides, hinges, screws, glue, and finish
- Sandpaper, primer, paint, or stain and sealer
Essential tools
- Circular saw or table saw for ripping plywood
- Kreg jig or pocket-hole jig for joinery
- Router with straight bit for dados and edge work
- Drill/driver and countersink
- Clamps, combination square, tape measure, and level
- Jigsaw for cutouts and toe-kick
Why these choices matter
- Plywood resists warping. MDF can work for painted cabinets but is heavier.
- Solid hardwood for face frames gives strength and a nice finish.
- Reliable hardware ensures smooth operation and long life.
From my experience, investing in a good table saw or renting one early saves many small errors and rework. The right tools are an upfront cost that pays off in speed and quality.

Planning, layout, and measuring before you build kitchen cabinets
Good work starts with solid planning. Measure twice, build once applies especially when learning how to build kitchen cabinets.
Steps to plan
- Sketch your layout. Note appliance, sink, and window locations.
- Measure carefully. Record floor-to-ceiling height, wall length, and outlet placements.
- Choose cabinet sizes. Standard base depth is 24", upper cabinets are usually 12" deep.
- Create a cut list. List all panels, shelves, face frames, doors, and drawer fronts.
- Decide on face-frame or frameless build. Face-frame is more forgiving for DIY builds.
Pro tip on measurement
- Use a laser distance measurer for long walls and a fixed straight edge for cabinet rows. Mark high and low points on walls. Shim where needed when installing.
Planning helps avoid wasted material and mistakes. I once mis-measured stud locations and had to move a hanging cabinet—an avoidable delay that taught me to double-check stud placement early.
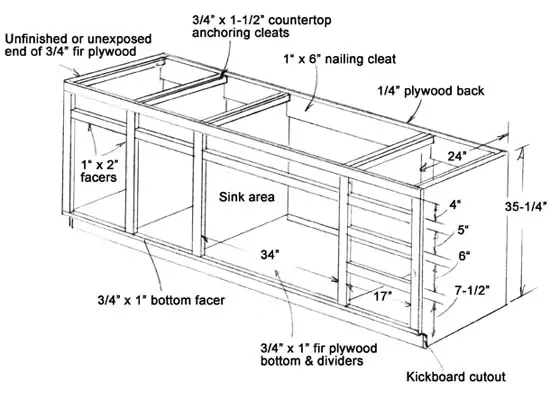
Step-by-step: building the cabinet box (carcase) when you build kitchen cabinets
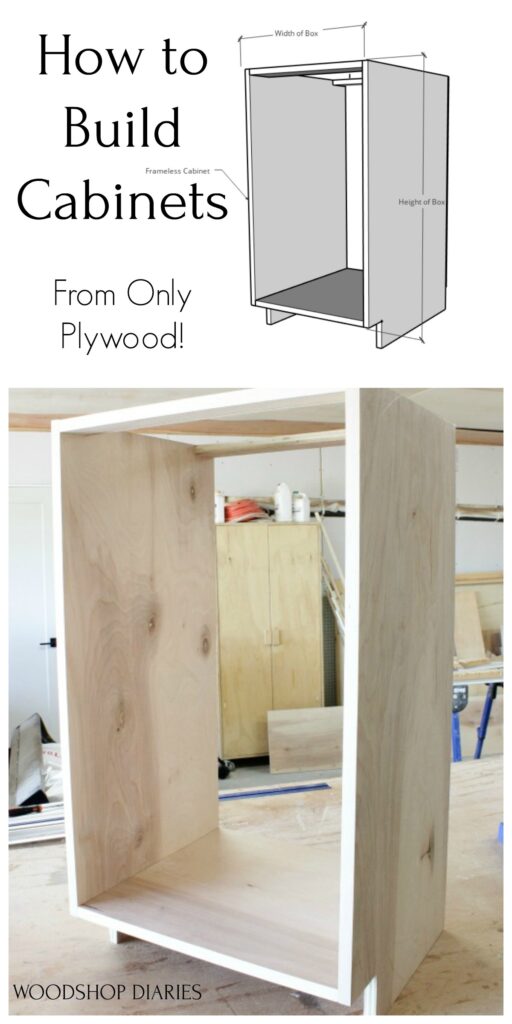
The cabinet box is the core structure. Learn this well and the rest becomes easier.
Basic method
- Cut panels to size. Use 3/4" plywood for sides, top, and bottom.
- Cut dados and rabbets. Dados for shelves and a rabbet for the back panel help alignment.
- Assemble sides, top, and bottom. Use pocket screws or glue and screws for strong joints.
- Add shelf pins or fixed shelves. Mark locations and drill pocket holes or dados.
- Install back panel. Use 1/4" plywood, glue, and screws or nails into the rabbet.
Joinery tips
- Pocket holes give fast, strong joints and are easy for first-timers.
- Glue plus screws into plywood delivers long-lasting strength.
- For frameless cabinets, use confirmat screws for best holding power.
Edge banding and finishing
- Apply edge banding to exposed plywood edges for a finished look.
- Sand and prime internal surfaces if painting inside cabinets for durability.
From practice: Always dry-fit before glue. I learned this the hard way when a warped shelf barely fit after glue-up. Dry-fitting saves time and materials.
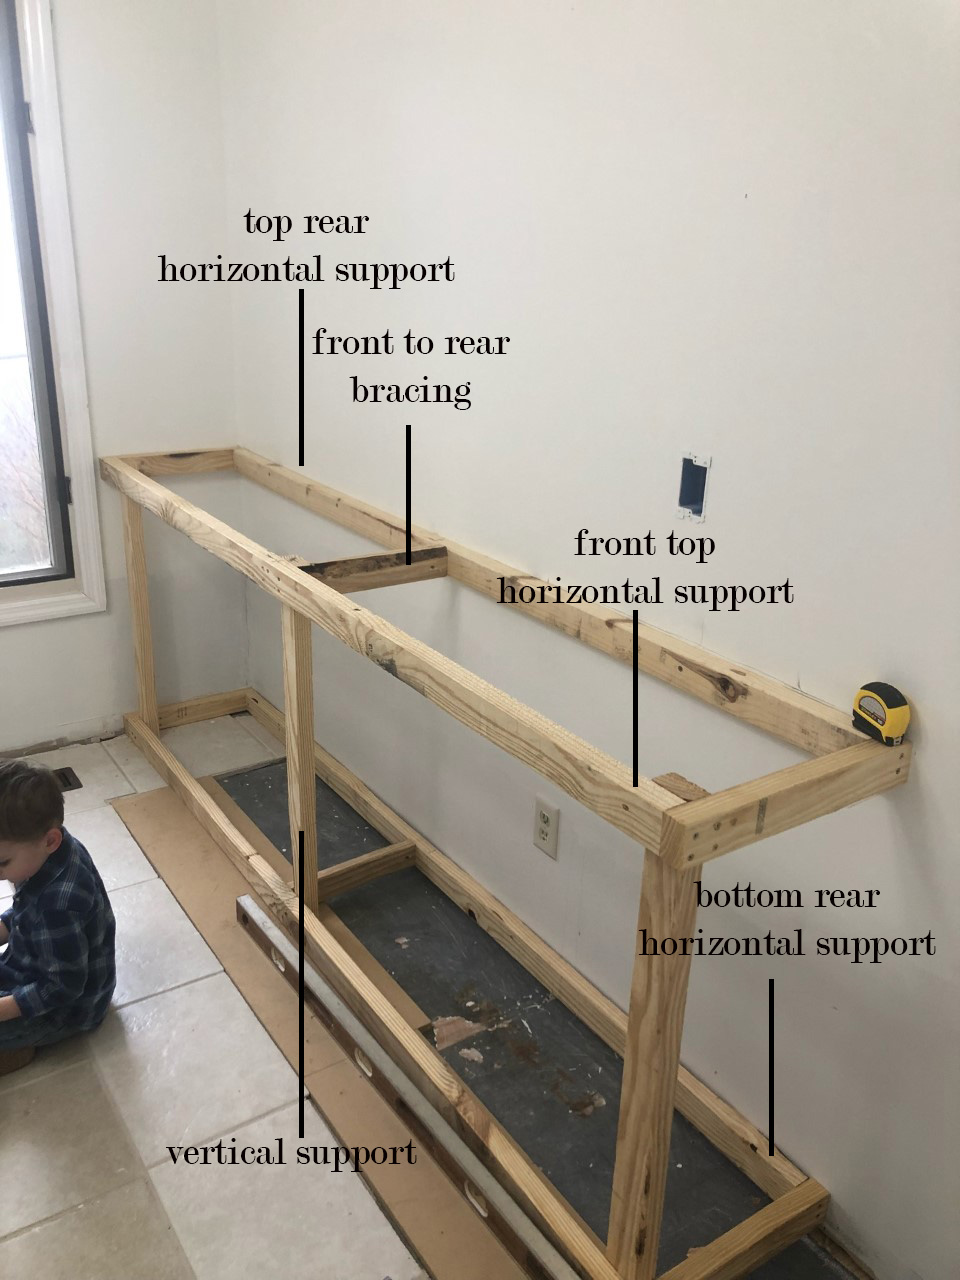
Building face frames, doors, and drawers — key details for how to build kitchen cabinets
Face frames, doors, and drawers define the look and function. Getting these right makes your cabinets feel custom.
Face frame basics
- Use 1×2 or 1×3 hardwood for face frames. Mortise and tenon, pocket screws, or biscuit joinery work well.
- Attach frames to boxes with glue and screws through the inside edge.
Door styles and making doors
- Shaker, slab, and raised panel are common styles. Shaker doors are easiest for DIY.
- Use rails and stiles with glue and clamps, or buy pre-made doors to save time.
Drawer construction
- Use dovetail joints or pocket screws for drawer boxes.
- Choose full-extension ball-bearing slides for easy access.
- Fit drawer fronts after installing boxes for best alignment.
Note on hardware
- Soft-close hinges and slides add a professional feel.
- Measure for overlay or inset door styles early to plan reveal gaps.
Personal tip: I found that building one prototype drawer and door first gave me a template. That saved time and ensured matching fits across the whole kitchen.
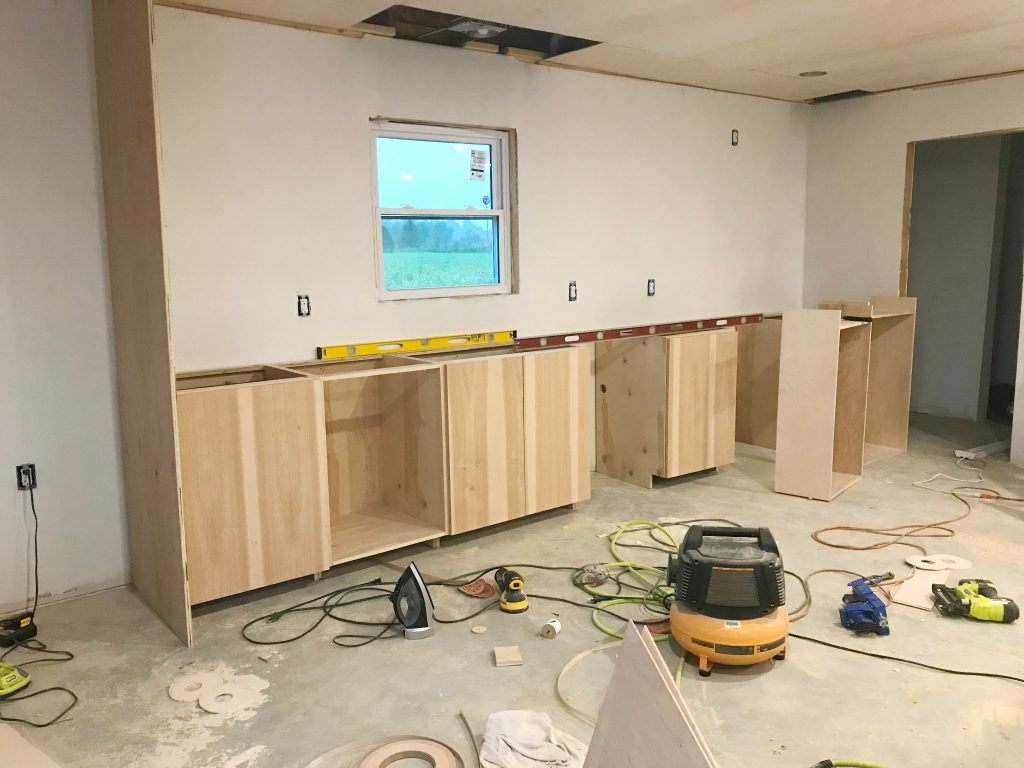
Finishing and hardware: how to finish and protect your cabinets
Finish and hardware complete the build. A careful finish protects wood and creates the final look.
Finishing steps
- Sand to 120–220 grit as needed. Clean with tack cloth.
- Apply primer and paint or stain and sealer. Use thin coats and light sanding between coats.
- Mount hinges, slides, and handles. Use jigs or templates for consistent placement.
- Adjust doors and drawers. Check gaps and alignment, then fine-tune hinge tension and slide positions.
Durability tips
- Use water-based finishes in humid kitchens to reduce yellowing.
- Seal all exposed plywood edges and interior shelf ends to slow moisture ingress.
From experience: Rushing finish leads to runs and uneven color. I now apply multiple thin coats and let each dry fully. The time investment pays back in a durable finish.
:max_bytes(150000):strip_icc()/CabinetsDwg1-606042c79d87434d89d04dd82d1c7028.png)
Installation and leveling when you install kitchen cabinets
Installing is where the project becomes real. Level and secure cabinets carefully.
Installation steps
- Mark a level reference line on the wall for base cabinet tops.
- Install corner or end cabinets first, square them, and screw through the back into studs.
- Shim under cabinets to achieve perfect leveling. Screw cabinets together at adjacent faces for a tight seam.
- Install countertops, then hang upper cabinets. Use a ledger or temporary cleat for upper cabinets to ease positioning.
Anchoring and safety
- Always anchor cabinets to studs or use strong wall anchors for heavy loads.
- Work with a helper for large units to avoid injury.
Common installation mistakes
- Relying on floor level. Floors are often not flat; use a level line on the wall.
- Not pre-drilling holes for screws; this can split wood or misalign cabinet faces.
Common mistakes, tips, and advanced options for how to build kitchen cabinets
Avoid these pitfalls and consider upgrades to make your cabinets better and longer lasting.
Common mistakes to avoid
- Poor measuring and no dry-fit. Always dry-fit first.
- Using low-quality plywood that warps. Spend more on cabinet-grade plywood.
- Rushing finish and hardware layout. Take time to align hinges and doors.
Helpful tips
- Build a single test cabinet to refine cuts and joinery.
- Label parts and keep a clear cut list. This reduces confusion during assembly.
- Use jigs for repeatable cuts and drilling. A simple hinge template speeds installs.
Advanced options
- Soft-close drawers, pull-out shelves, and built-in organizers improve usability.
- Frameless “European” style saves time but needs precise sizing.
- Inset doors look high-end but require precise cabinet building skills.
My lesson learned: Start with a small project cabinet if you’re new. The first full kitchen I built took longer than expected. After I built three practice cabinets, the rest flowed smoothly and I avoided mistakes I had made earlier.

Related quick questions about how to build kitchen cabinets (PAA-style)
What is the easiest way to build kitchen cabinets?
- Using a face-frame cabinet method with pocket screws and basic tools is the easiest route for most DIYers. Buying pre-cut doors speeds the process.
How long does it take to build kitchen cabinets?
- A single basic cabinet can take 3–6 hours for a beginner. A full kitchen often takes several weekends or a few weeks depending on complexity.
Should I buy cabinet-grade plywood or MDF for kitchen cabinets?
- Choose cabinet-grade plywood for the carcase to resist moisture and warping; MDF can be used for painted doors but is heavier and less durable.
Frequently Asked Questions of how to build kitchen cabinets
What skills do I need to build kitchen cabinets?
Basic woodworking skills are enough to start: measuring, cutting, drilling, and sanding. Learning joinery like pocket screws or dados helps improve durability and fit.
Can I build kitchen cabinets without a table saw?
Yes. You can use a circular saw with a straightedge guide and a track saw if available. A table saw speeds work and improves accuracy, but it’s not strictly required.
How much material do I need for a typical kitchen?
Material needs vary by layout, but estimate 1–2 sheets of 4×8 plywood per small cabinet. Create a full cut list from your layout for precise material planning.
Are frameless cabinets harder to build than face-frame cabinets?
Frameless cabinets need tighter tolerances and accurate cuts, so they are slightly harder for beginners. Face-frame cabinets are more forgiving and easier to align.
How do I ensure doors and drawers line up correctly?
Measure and fit drawer fronts after installing the boxes, and use adjustable hinges for doors. Clamp and screw cabinets together during installation for consistent gaps.
Is it cheaper to build kitchen cabinets or buy them?
Building can be cheaper if you have tools and time, and want customization. Factor in material cost, hardware, and potential mistakes when comparing to pre-built or semi-custom options.
Conclusion
You now have a clear, actionable path for how to build kitchen cabinets: plan carefully, use quality materials, practice joinery, finish well, and install with patience. Start with a test cabinet, learn from mistakes, and add upgrades like soft-close hardware as you gain confidence. Ready to try a project? Gather your plans, tools, and a helper, and begin building your first cabinet this weekend. If you found this helpful, leave a comment, share your results, or subscribe for more woodworking guides.