
Build a durable, stylish island using affordable stock cabinets and simple tools.
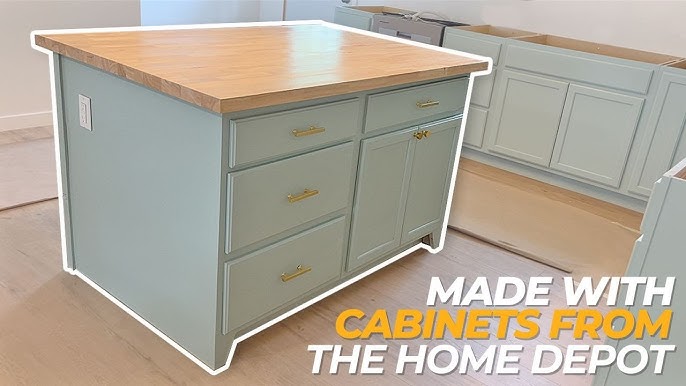
I’ve built several kitchen islands using stock cabinets and learned what works. This guide shows clear steps on how to build a kitchen island with stock cabinets. You’ll get planning tips, a tool list, a step-by-step build, finishing ideas, cost estimates, and real lessons from my experience. Read on to get a practical, friendly plan you can follow.

Planning your island: goals, layout, and measurements
Start with a clear goal. Decide if the island is for food prep, dining, storage, or all three. Measure your kitchen. Leave at least 36 inches of walk space on both sides. For busy kitchens allow 42 inches where possible.
Pick the cabinet sizes you want. Most stock cabinets come in standard widths. Common sizes are 12, 15, 18, 24, 30, and 36 inches. Use combinations to get the island length you need. Account for toe kick and countertop overhang.
Think about plumbing, gas, and electrical needs early. If you plan a sink or cooktop in the island, call your local building office. Most places require permits for plumbing and gas work. Plan for electrician access if you want outlets or under-cab lighting.
Lay out the island on paper. Draw the cabinets to scale. Check clearances for doors and drawers. A full layout avoids surprises during installation.
How to build a kitchen island with stock cabinets begins with good planning. Poor planning is the main reason projects stall. Spend time here and you save time later.
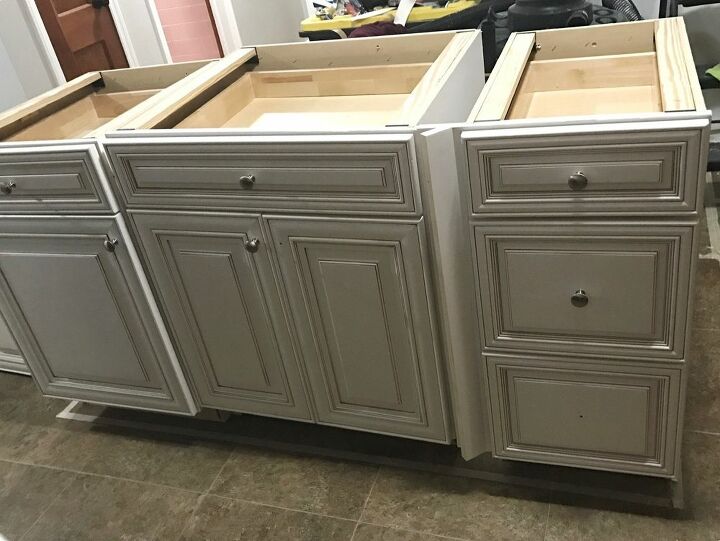
People also ask — quick answers
Can I put a sink in an island with stock cabinets?
Yes. Choose base cabinets designed for sinks. Plan plumbing runs and get permits if needed.
How big should a kitchen island be?
Aim for at least 4 feet long and 2 feet deep for useful prep space. Keep clearances of 36–42 inches around it.
Will stock cabinets hold a countertop overhang for seating?
Yes. With a proper support design and a stable countertop, stock cabinets can support seating overhangs up to 12 inches.
Tools and materials you will need
Gather tools before you start. Work is faster with the right gear. Here is a simple list.
- Tape measure — For accurate layout and spacing.
- Level — To ensure cabinets are straight and even.
- Drill and driver set — For screws and hardware.
- Clamps — To hold cabinets in place while you fasten them together.
- Shims — To level cabinets on uneven floors.
- Circular saw or jigsaw — If you need to trim panels or cut countertop supports.
- Countersink and wood screws — To join cabinets and install rails.
- Adhesive for countertops — Construction adhesive works well.
- Countertop material — Butcher block, quartz, laminate, or stone.
- Plumbing and electrical supplies — If adding sink or outlets.
Choose quality screws and connectors. Cheap hardware can strip or fail. If you need appliance cutouts, have a router or circular saw ready.
how to build a kitchen island with stock cabinets requires careful attention to material choices. Pick cabinets rated for kitchen use. Check the cabinet backs if you plan to route plumbing through them.
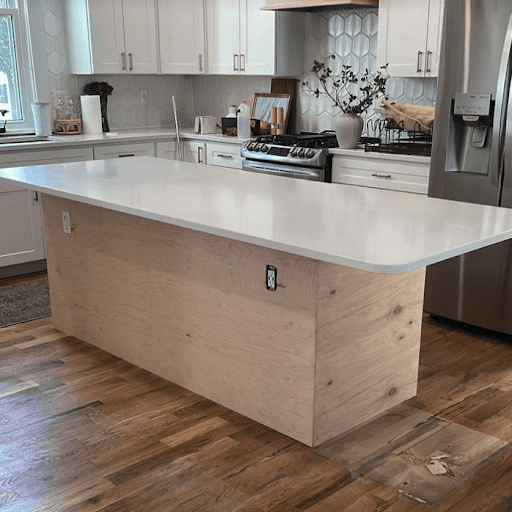
Step-by-step: build process for a sturdy island
Follow this clear build order. Take your time at each step.
-
Prepare the floor and layout
- Clean the floor area.
- Transfer your paper layout to the floor with chalk or tape.
- Mark centerlines and cabinet locations.
-
Assemble and inspect cabinets
- Open each box and check for damage.
- Assemble any cabinets that arrive knocked down.
- Remove and set aside drawer boxes and doors for easier handling.
-
Position the first cabinet
- Start at a corner or a marked end.
- Use shims to level it front to back and side to side.
- Check with a level on top and front face.
-
Join cabinets together
- Butt cabinets tightly. Clamp them.
- Use screws through the cabinet frames to join them. Pre-drill to avoid splitting.
- Check faces for flushness. Adjust with shims as needed.
-
Attach a ledger or cleat if needed
- For countertop support or overhang, attach a plywood cleat or steel bracket to the cabinet frames.
- Secure cleats to studs if the island sits against a wall.
-
Route plumbing and electrical
- Cut holes in cabinet backs for pipes and wires.
- Make sure piping slopes correctly and that wiring meets code.
- If unsure, bring in a pro for hookups.
-
Install the countertop
- Dry-fit the countertop first.
- Join seams with proper hardware and adhesive if using laminate and apply seam filler.
- Fasten the countertop to cabinets with screws into blocking or cleats.
- Seal any joints under sinks or where water may seep.
-
Finish faces, doors, and hardware
- Reinstall doors and drawers.
- Install new pulls or knobs.
- Add trim or quarter-round to hide gaps and toe kick.
how to build a kitchen island with stock cabinets is mostly about careful measuring and steady fastening. Take one step at a time. Check levels often.
Personal tip: When I built my first island, I joined two 24-inch base cabinets and a 12-inch sink cabinet. I used a ledger for the overhang. I ran into trouble when I forgot to trim the cabinet base for a slightly uneven floor. Shimming early saved me time on the second island.

Finishing touches: countertop, seating, paint, and trim
Finish choices make the island feel like a feature. Choose a countertop that fits your use. Butcher block is warm and easy to install. Quartz is low maintenance. Laminate is budget friendly.
Decide on an overhang for seating. Standard overhangs are 10 to 12 inches for bar seating. Provide knee space by adding support brackets or corbels. Make sure supports attach to blocking or cleats.
Paint or stain the cabinet faces and trim. If you paint stock cabinets, sand lightly and use a primer. Use durable paint meant for kitchens.
Add lighting and outlets. Under-counter lights make prep easy. Install outlets on the side of the island for small appliances. Follow electrical code for spacing and GFCI protection.
how to build a kitchen island with stock cabinets ends with a polished look. Small details like matching hardware and neat seams boost the final result.
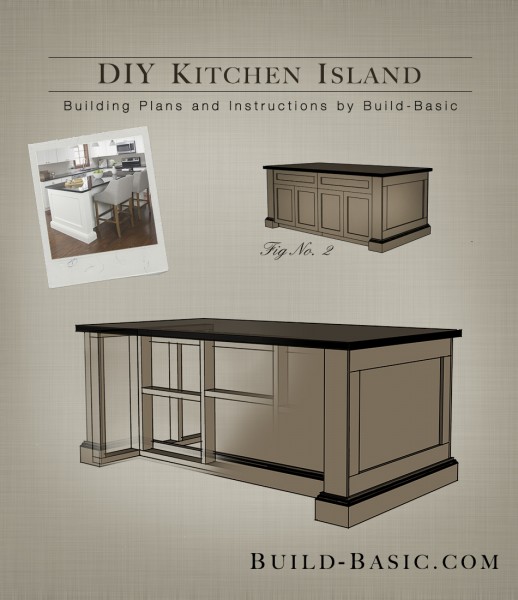
Cost and time estimates
Typical cost factors:
- Cabinets: Stock cabinets cost much less than custom. Expect wide ranges. Price depends on material and finish.
- Countertop: Budget to premium materials vary greatly.
- Labor: DIY saves money. Hiring a pro raises cost but saves time.
- Plumbing and electrical: Add permit and hookup costs.
Estimated timeline for a DIY build:
- Planning and shopping: 1–2 weeks.
- Cabinet delivery and prep: 1 week.
- Installation and countertop: 2–4 days for a simple island.
- Plumbing/electrical and finish: 1–3 days more.
how to build a kitchen island with stock cabinets can save thousands over a custom island. Plan for extra time for edits and unexpected fixes.
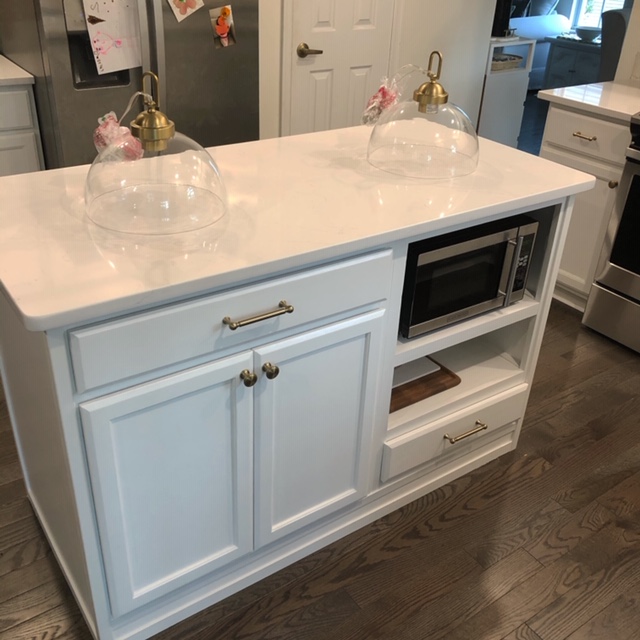
Troubleshooting and common mistakes
Common problems and fixes:
- Cabinets not level
- Fix with shims and recheck with a long level.
- Drawer alignment off
- Adjust the drawer slides and hinge plates.
- Countertop seams visible
- Use proper seam kits for laminate, or select a single slab for stone.
- Weak overhang support
- Add brackets or a support frame under the countertop.
Don’t rush. Take small steps and check your work. Ask for help when you need it. I once installed a heavy butcher block without enough screws and had to reattach it. That taught me to pilot-drill and use multiple fasteners.
how to build a kitchen island with stock cabinets is straightforward when you expect small setbacks. Plan a buffer for small repairs and adjustments.
Frequently Asked Questions of how to build a kitchen island with stock cabinets
What size stock cabinets work best for an island?
Stock widths of 24 and 30 inches are common. Combine them to reach your desired length while keeping aisles clear.
Do I need permits to add a sink in the island?
Most places require permits for new plumbing. Check local codes and hire a licensed plumber if you are unsure.
Can I move cabinets after installation?
You can, but it is extra work. Disconnect plumbing and electrical first, and remove fixtures and trim to avoid damage.
Are stock cabinets strong enough for a heavy stone countertop?
Yes, if you add proper support like plywood blocking or a dedicated support frame. For heavy slabs, consider a full plywood substrate or pro installation.
How do I attach seating to a cabinet island?
Use a ledger, corbels, or steel brackets attached to studs or blocking. Ensure the support carries the load safely.
Conclusion
This guide shows practical steps for how to build a kitchen island with stock cabinets. Plan well, pick the right cabinets, and follow a clear step-by-step process. Expect small issues and learn from them. Start simple, and add features as you go.
Take action this weekend: sketch a layout, order a sample cabinet, or measure your space. If you try it, share your results or questions below to help others and get feedback.