
Build sturdy, custom kitchen cabinets using basic tools, plywood, and careful planning.
I’ve built cabinets for my own kitchen and for clients. I know how to build kitchen cabinets from layout to install. This guide walks you through planning, materials, step-by-step building, and installation. Read on for practical tips, common mistakes, and real-world tricks that make building cabinets simpler and more satisfying.

Materials and Tools You Need
Good materials and the right tools make how to build kitchen cabinets possible and painless. Use plywood for carcasses and hardwood or MDF for doors. Choose quality hinges, slides, and fasteners to avoid early repairs.
-
Materials to buy:
-
3/4" plywood for carcasses and shelving
-
1/2" plywood for backs
-
Hardwood or MDF for doors and face frames
-
Drawer slides, hinges, screws, wood glue, pocket hole screws
-
Edge banding, veneer, paint, primer, or stain and clear coat
-
Essential tools:
-
Circular saw or table saw for straight cuts
-
Router or jigsaw for cutouts and grooves
-
Pocket hole jig and drill
-
Tape measure, speed square, and clamp set
-
Random-orbit sander and orbital sander
-
Drill, driver, and level
I learned to invest in a few precise tools early. They save time and yield better fit and finish. Good hardware reduces frustration during installation.

Planning and Design
Planning is where you save time when you learn how to build kitchen cabinets. Accurate plans cut waste and make the build predictable. Start with a clear layout and measurements.
- Steps to plan:
- Measure wall height, width, and existing plumbing and electrical
- Sketch cabinet sizes and layout on graph paper or software
- Decide face-frame or frameless design
- Choose cabinet depth and heights to fit appliances
Think about storage. Drawers store pots; pull-outs hide pantry items. I always mock up cabinet fronts with cardboard. It helps me see flow and access before cutting wood.
How long does it take to plan?
Planning can take a few hours for a simple kitchen. Larger kitchens may take several days. Take time now to avoid costly on-site changes.
Should I make a frameless or face-frame cabinet?
Frameless cabinets give more interior space and simpler European-style hardware. Face-frame cabinets are easier for beginners to align and repair. Choose based on finish and skill level.
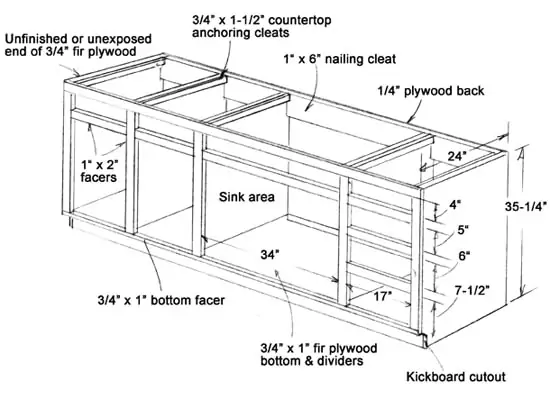
Step-by-Step: How to Build Kitchen Cabinets (Base Cabinets)
This section gives a clear workflow for how to build kitchen cabinets that sit on the floor. Each step is short and actionable.
- Cut panels
- Cut side panels, top, bottom, and shelves from 3/4" plywood.
- Cut the back panel from 1/2" plywood to the full height.
- Join carcass
- Use pocket holes or dados to join sides to the top and bottom.
- Apply glue first, clamp, then screw for a solid joint.
- Install shelf supports
- Drill shelf pin holes or fix fixed shelves with pocket screws.
- Check squareness with a carpenter’s square.
- Attach back
- Glue and screw the 1/2" back to keep the box square.
- Countersink screws and fill holes for a clean finish.
- Build and attach face frame (if used)
- Rip hardwood strips for stiles and rails.
- Assemble with pocket holes or dowels and attach to the carcass.
- Add toe kick and finishing trim
- Cut toe kick to size and attach to the base.
- Sand edges smooth for painting or staining.
I learned that consistent clamping pressure makes carvasses square and stable. Test-assemble one cabinet before building many. This practice avoided alignment problems later.
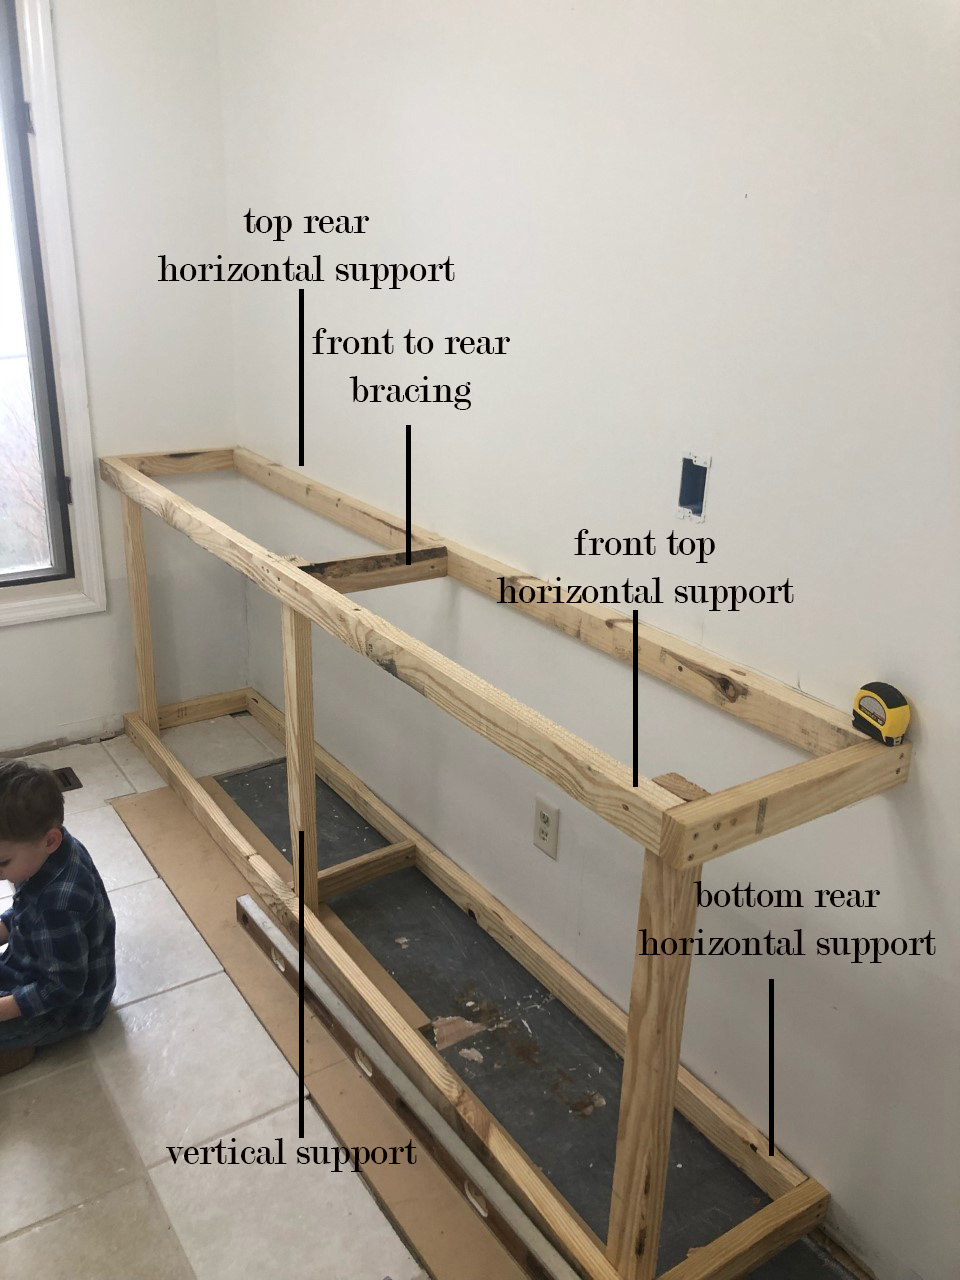
Step-by-Step: How to Build Kitchen Cabinets (Wall and Tall Cabinets)
Wall cabinets require light handling and precise hanging hardware. Tall cabinets need internal reinforcement for pantry weight.
- Build wall cabinet carcass similar to base cabinets but without the base and with a shallower depth.
- Reinforce mounting rails into back panels to distribute load.
- For tall cabinets, add full-height backing and extra screws where shelving will carry weight.
Wall cabinets demand careful leveling during installation. I always mount a ledger to support the first cabinet while I fasten it. This simple trick keeps hands free and speeds up work.
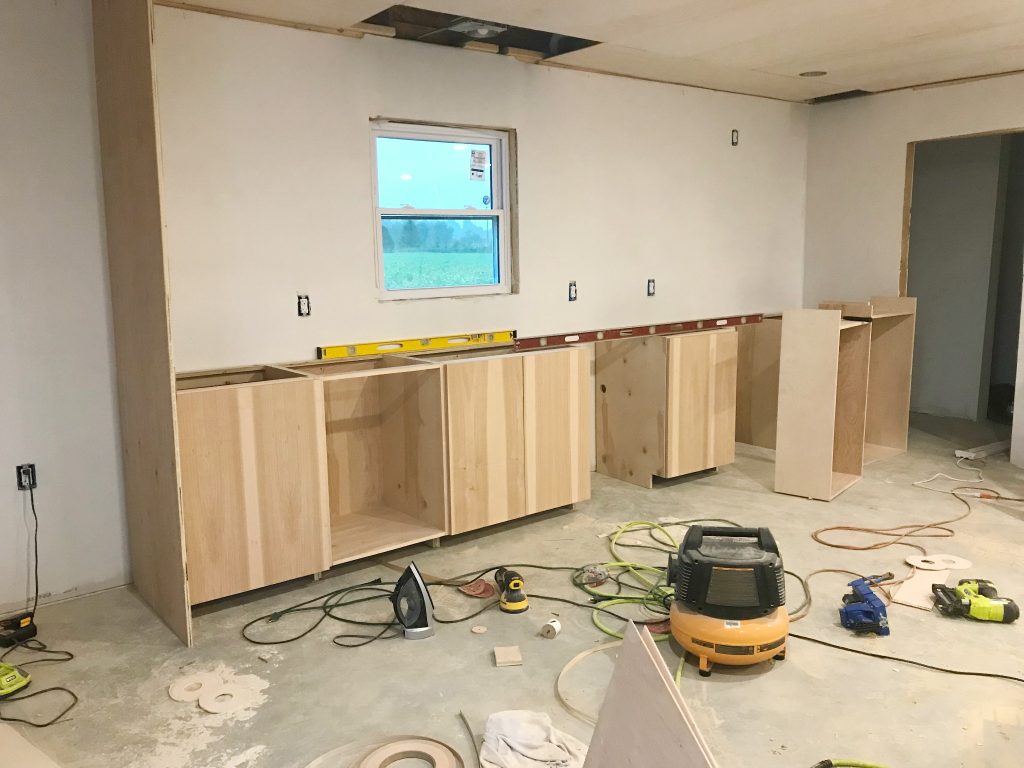
Doors, Drawers, and Hardware
Doors and drawers affect both function and style. Good joinery yields trouble-free use.
-
Building doors:
-
Frame-and-panel doors use rails and stiles plus a floating panel.
-
Slab doors are simple MDF or hardwood sheets.
-
Use a router to create clean profiles.
-
Drawer boxes:
-
Use 1/2" or 5/8" plywood for boxes or solid wood for the front.
-
Dado joints or butt glued and screwed joints both work.
-
Fit full-extension drawer slides for better access.
-
Hardware:
-
Soft-close hinges and slides extend the life of cabinets.
-
Choose hardware weight-rated for your drawer loads.
I once installed cheap slides to save money. They failed in a year. Spend a bit more on quality hardware. It pays off in longevity and user satisfaction.

Finishing, Paint, and Sealing
Finish protects your work and defines the style. Proper prep makes painting or staining easier.
- Sand progressively from 120 to 220 grit.
- Apply wood filler to seams and sand again.
- Prime with a good adhesion primer if painting.
- Use a roller or HVLP sprayer for a smooth finish.
- For stained wood, use a grain filler, then stain and seal with a clear coat.
Dry time matters. Wait recommended times between coats for a hard finish. I prefer spraying when possible for the smoothest result. It requires setup but yields pro-looking cabinets.
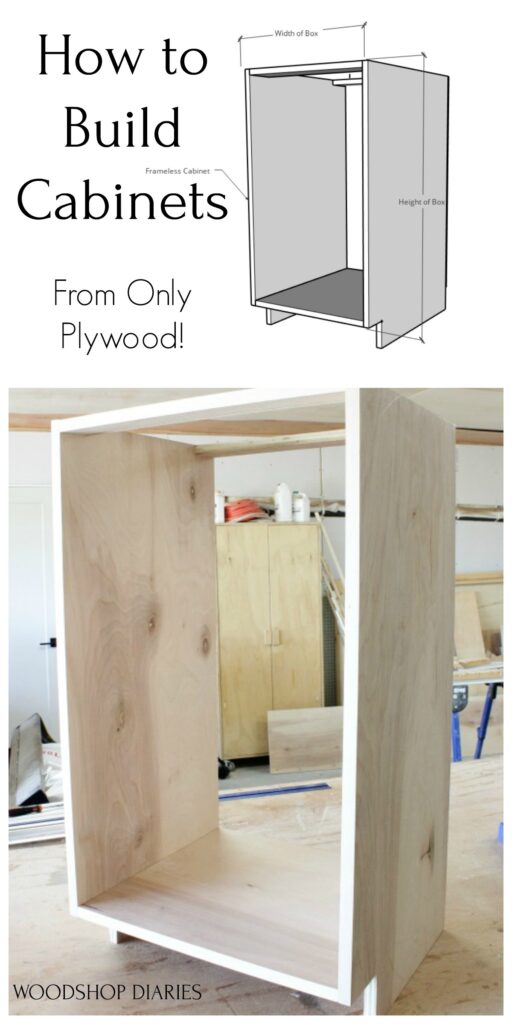
Installation and Final Adjustments
Install cabinets carefully. Small mistakes here show in the final look.
-
Prep walls
-
Find studs and mark mounting lines with a ledger.
-
Test-fit each cabinet before final screwing.
-
Mount sequence
-
Start at a corner or high point and work outward.
-
Shim behind cabinets to keep frames plumb and level.
-
Secure cabinets through the face frame or cabinet sides into studs.
-
Final touches
-
Install countertop after cabinets are fixed.
-
Adjust doors and drawer fronts for even gaps.
-
Caulk seams and add hardware.
When I install, I check gaps with a business card. That simple gauge keeps reveals even and professional.

Common Mistakes and Pro Tips
Avoid these errors when you learn how to build kitchen cabinets. They can save hours and cost.
-
Mistakes to avoid:
-
Rushing measurements leads to wasted plywood and fit problems.
-
Skipping test assemblies causes alignment issues.
-
Using thin back panels without reinforcing for tall cabinets.
-
Pro tips:
-
Build one prototype cabinet first.
-
Label all parts with a pencil for faster assembly.
-
Use clamps and jigs to keep repetitive cuts consistent.
My biggest lesson was to slow down and measure twice. It reduced wasted material and improved final fit.

Cost, Time, and When to Hire a Pro
Estimate costs and times before you start how to build kitchen cabinets. Accurate budgeting prevents surprises.
-
Typical costs:
-
Material-only for basic cabinets: moderate, often half of prebuilt prices.
-
Good hardware and solid-wood doors increase costs significantly.
-
Time estimates:
-
A single cabinet takes several hours for an experienced DIYer.
-
A full kitchen can take several weekends or weeks, depending on finish work.
-
When to hire a pro:
-
Hire a pro for complex layouts, structural changes, or when deadlines are tight.
-
Professionals can ensure code compliance for changes involving plumbing or electrical.
Be honest about your skill level. I recommend starting small and building confidence before tackling a full kitchen.
Quick PAA-style Questions
Do I need a table saw to build cabinets?
No. You can use a circular saw with a guide and a jigsaw for cutouts. A table saw makes repeatable cuts faster and more precise.
How thick should plywood be for cabinets?
Use 3/4" plywood for carcasses and shelves and 1/2" for backs. Thicker plywood resists sag and warping over time.
Can I build cabinets without a face frame?
Yes. Frameless cabinets are common and offer more interior space. They require precise plywood cuts and edge banding for a clean look.
Frequently Asked Questions of how to build kitchen cabinets
What is the easiest cabinet style to build?
Face-frame cabinets are the easiest for beginners. They allow small adjustments and are forgiving with minor errors.
How much plywood do I need for a small kitchen?
A small kitchen often needs 6 to 12 sheets of 3/4" plywood, depending on layout and drawer choices. Plan and cut a cutting diagram to reduce waste.
Are plywood cabinets better than MDF?
Plywood is stronger and resists moisture better than MDF for cabinet carcasses. MDF works well for painted doors and trim but can swell if exposed to water.
How do I ensure cabinets are level on an uneven floor?
Use a straight ledger and shims behind the cabinets to level them. Shim and screw each cabinet to adjacent units and studs for stability.
Can I install countertops myself?
Yes, many DIYers install countertops, especially laminate or butcher block. Stone countertops often require professionals due to weight and precise seams.
Conclusion
You can learn how to build kitchen cabinets with careful planning, the right materials, and step-by-step work. Start small, build a prototype, and choose quality hardware to make cabinets last. Take your time to measure, clamp, and test-fit. Your effort will pay off with custom storage and a personal touch in your kitchen. Ready to start? Sketch a cabinet, order plywood, and build one box this weekend—then share your results or questions below.